
Stage Guides
| Primrose |
|---|
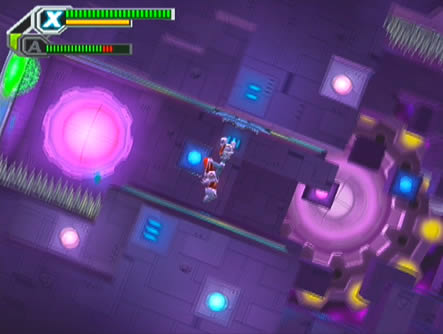 Within this colorful stage you'll encounter odd rotating rooms, so expect the unexpected. Proceed through the first purple room and take out the multitude of bats and missile-launchers throughout. At the far end you'll discover a small green teleporter on the wall. Touch it to teleport to the next area. In the next room you'll find yourself in a sealed area with two red buttons, one on the floor and the other on the ceiling. Alia will inform you of their purpose - stand on one to rotate the room 180 degrees. Within this colorful stage you'll encounter odd rotating rooms, so expect the unexpected. Proceed through the first purple room and take out the multitude of bats and missile-launchers throughout. At the far end you'll discover a small green teleporter on the wall. Touch it to teleport to the next area. In the next room you'll find yourself in a sealed area with two red buttons, one on the floor and the other on the ceiling. Alia will inform you of their purpose - stand on one to rotate the room 180 degrees.You'll notice that as the room rotates the blocks in the corner will move, revealing the next teleporter. Keep in mind that whenever you rotate the rooms, the blocks will move, so don't get caught beneath them or it's lights out. Jump into the teleporter to reach the next area. The next room yields several spike traps so you'll need to take it carefully. You should spot a Reploid skating about on the spikes, Layer will inform you that Axl can copy its DNA. Destroy the bat flying about and step on the first red switch to flip the room upside down. Pass the next red switch without touching it (or you'll dive straight into the spikes) and take out the second bat. Here you'll have a great chance to take out the two skater Reploids with Axl's Copy Shot, so be sure to grab the capsules they drop as their spike-walking ability will make things far easier later on. Jump up the narrow corridor beyond, and take out the bats before touching the switch in the ceiling. You'll now have a clear path to the teleporter so walk on in. Blast the two missile-launchers atop the large blocks in the following corridor and grab the Metals above before hitting the switch in the ceiling. Move on past the blocks and use the switch up ahead to reach a red Metal before uncovering the next teleporter. Once in the next corridor, quickly step on the switch to crush all the enemies ahead under the moving blocks. 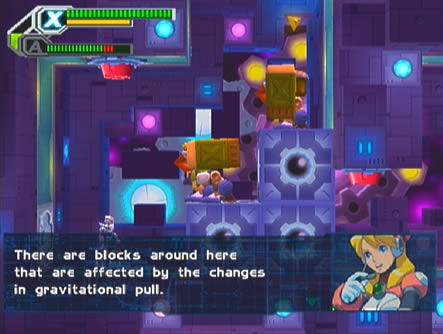 Flip the room back around again as you'll notice deadly spikes appearing atop the blocks. At the far end hit the second switch to unveil the teleporter. The following room will see you at the top of a downward sloping staircase filled with spider turrets. Take them out on your way down to the teleporter. In the following room, you'll discover two green switches. These ones will rotate the room 90 degrees clockwise, so keep this in mind to avoid falling blocks. Hit the switches three times to reveal the next teleporter, just stay clear of the blocks as they fall. Flip the room back around again as you'll notice deadly spikes appearing atop the blocks. At the far end hit the second switch to unveil the teleporter. The following room will see you at the top of a downward sloping staircase filled with spider turrets. Take them out on your way down to the teleporter. In the following room, you'll discover two green switches. These ones will rotate the room 90 degrees clockwise, so keep this in mind to avoid falling blocks. Hit the switches three times to reveal the next teleporter, just stay clear of the blocks as they fall.Take out the two enemies in the following room before hitting the green switch up in the corner (don't touch the red one or the blocks will come crashing down on you. Hit the red one after the room rotates to reveal the teleporter up on the ceiling. The following room will contain long corridors filled with spikes, so you'll need to flip switches often to get through safely. Hit the first red switch to fall down the shaft lined with spikes. As you reach the bottom you'll hit another switch and rotate the room 90 degrees. Grab the three red Metals over in the alcove on the right, then hit the switch again and walk along the left corridor. At the end of this short walk you'll spot two switches, one on the floor and the other on the wall. Touch the red switch in the floor and take care as you drop past the spikes. Try to avoid landing on one of the two switches below, but don't stress if you do. The next teleporter resides in this final corridor, just follow the trail of Metals to find it. 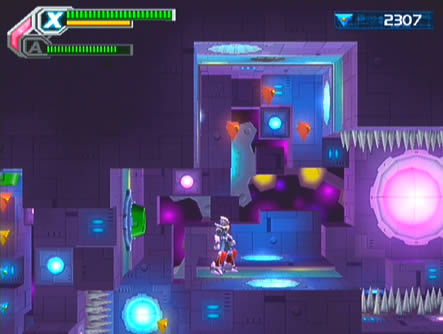 The following room will see you climb up a tall staircase, just watch out for bats, spider turrets and the crazy bouncing wheels. Note that Primrose RM#01 resides atop a block up the left wall, but you'll need Zero & X (with his Crystal Wall) to reveal it. Beyond the staircase you'll find a short hallway with a door at the far end. Inside you'll find a large room with a row of blocks across the ceiling. The following room will see you climb up a tall staircase, just watch out for bats, spider turrets and the crazy bouncing wheels. Note that Primrose RM#01 resides atop a block up the left wall, but you'll need Zero & X (with his Crystal Wall) to reveal it. Beyond the staircase you'll find a short hallway with a door at the far end. Inside you'll find a large room with a row of blocks across the ceiling.Get ready for some tricky manouvering, as the blocks will move up and down the screen brandishing a large spike each in the process. Wait for the far right block to move down the screen, then quickly jump atop it as it lands and go up the right wall. Wait for all the blocks to land on the floor, once completed they'll extend spikes so be sure not to touch them. Wait for the center block to rise, then air-dash over to its side and carefully drop down to land underneath it. With all the blocks up in the ceiling again, wait for the second one from the left to lower, then quickly jump on top of it and over to the left wall. Now things will really heat up (unless you're playing on Easy Mode, in which the blocks will explode now). The blocks will begin moving up and down the screen rapidly, so try to follow these directions to safely avoid the spikes (but bear in mind that there's a few ways to avoid them). Wait for the center block to rise, then air-dash over to its left side. Stay there and wait for it to lower (it should lower before the one to its left rises). Quickly jump atop it as it lowers down and get ready to drop off the right side as the adjacent block on the right rises, but be quick before the spike emerges. Once on the ground, just walk back and forth beneath the two blocks along the right wall as they'll alternate positions, giving you a chance to stand below one. It may take you a few tries to clear this room, but once you've developed a routine it won't be too difficult, as the blocks always follow the same sequence. Be warned though, as the sequence does change in Hard Mode making it excrutiatingly difficult to make it through. If you're having trouble, keep trying until Vile shows up to bypass the blocks. Enter the teleporter in the following room to move on. You'll land in a tall room with three floating turrets moving about, Pallette will also mention an extra teleporter lies hidden somewhere here (it leads to the Head Parts I capsule). To find the next teleporter, trash the three foes flying about (breaking through their barriers if needed), then climb up the left wall and hit the green switch. With the room rotated, hit the next switch over on the right wall. You can now access the teleporter up in the left corner of the room, while further pushing of the switches is needed to send the blocks down the spike-filled corridor to reach the capsule (unless Axl grabbed an A-Trans capsule from one of the spike-skating Reploids). Blast the three flying turrets in the next corridor (watch out when they retract their barrier to fire) and hit the red switch over by the two blocks. 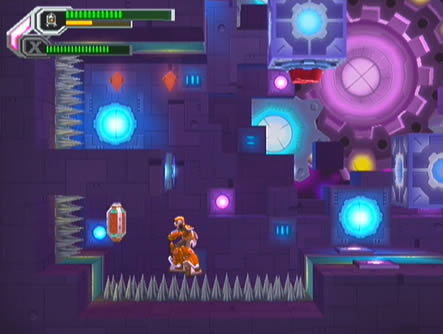 Drop down the hole on the right to find a large block floating left through the air. Follow it and touch the next red switch on the floor. Fry the turret up ahead, and take care as the moving block can push you off the edge of the platform. Below you'll find a range of Metals hovering around a deadly bed of spikes, so use Axl's A-Trans to assume the shape of the spike-immune Reploids. If you can't go below, jump over to the floating block ahead, then jump to the next one with a red switch on top. Upon touching the switch and rotating the room you'll fall down a shaft filled with Metals at the bottom, so grab them all before touching the next switch there. Allow yourself to drop all the way down as the room rotates to easily locate the next teleporter. Drop down the hole on the right to find a large block floating left through the air. Follow it and touch the next red switch on the floor. Fry the turret up ahead, and take care as the moving block can push you off the edge of the platform. Below you'll find a range of Metals hovering around a deadly bed of spikes, so use Axl's A-Trans to assume the shape of the spike-immune Reploids. If you can't go below, jump over to the floating block ahead, then jump to the next one with a red switch on top. Upon touching the switch and rotating the room you'll fall down a shaft filled with Metals at the bottom, so grab them all before touching the next switch there. Allow yourself to drop all the way down as the room rotates to easily locate the next teleporter.The following room contains more floating blocks, also keep in mind that Primrose RM#02 lies below, Axl as a spike-skating Reploid ensures a safe grab. Notice the red switch on the floating block ahead? Time your jump so that upon pressing the switch the block above you is close enough for you to land on once the room rotates. Do the same for the following pair of blocks, but watch out for bouncing wheels looking for trouble. From here you should spot the next teleporter over on a platform, feel free to grab some of the Metals floating about before heading in. Descend the following long staircase while taking out the fixed and floating turrets along the way. Clear this room and head through the large door at the base to finally locate the teleporter taking you to Gravity Antonion's room. |
| Mission select | ||
|---|---|---|
| 1. Noah's Park 2. Booster Forest 3. Troia Base 4. Pitch Black |
5. Primrose 6. Metal Valley 7. Dynasty 8. Central White |
9. Inferno 10. Jakob 11. Gateway 12. Sigma Palace |