
Stage Guides
| Pitch Black |
|---|
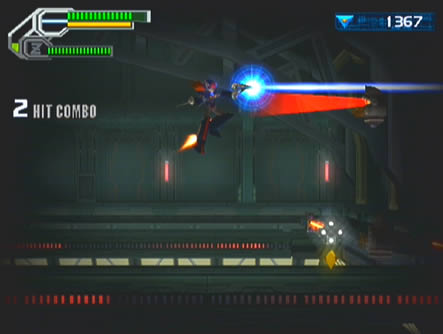 Here you'll find yourself infiltrating an enemy facility in almost total darkness, so stealth is the key here. Only a small radius of light will emanate from your character, so you'll need to keep an eye out for enemies hiding out in the dark. Travel right and take care around the laser tripwires, but keep in mind that these only injure you without tripping alarms. Here you'll find yourself infiltrating an enemy facility in almost total darkness, so stealth is the key here. Only a small radius of light will emanate from your character, so you'll need to keep an eye out for enemies hiding out in the dark. Travel right and take care around the laser tripwires, but keep in mind that these only injure you without tripping alarms.Take out the Metools along the way and keep an eye out for Bulbrites patrolling around with yellow sensor fields beaming out of their eyes. If they spot you and squeal (or if you shoot them) they'll summon two more Bulbrites as backup (although if you destroy it quickly enough the other two retreat without delay). At the far end of this first corridor you'll find an opening up along the wall. Go inside and quickly take out the floating bats before they swoop. Take care near the cooling fans up ahead, you'll only have a short opportunity of time to dash through them to avoid touching the blades. Beyond the fans you'll find a tall shaft leading down with a laser firing a continuous beam across the room. Platforms will be slowly ferrying crates down the shaft, you'll need to use these to block the lasers. Descend the shaft taking care near the laser below, slide down the right wall and pass the laser as a lift blocks it off. Head through the door down on the left and take out the bats in the following room before passing through the door you'll find (watch out for the moving blade on the floor, they can be temporarily disabled by striking them). Inside you'll find a darkened room with a large door in the background. Promptly the door will open and a swarm of dark green Bulbrites will swarm out. Hold out against the swarm and you shouldn't have any trouble. Grab all the items that appear and head left. 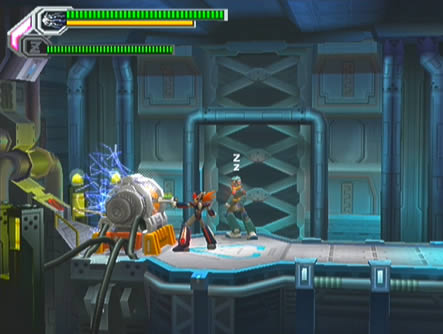 In the next large open area, Pallette will give you a hint about a hidden power generator capable of lighting up the entire area. Keep in mind though that you'll need Axl to find it, and you'll also need his Plasma Gun weapon (gained from Gigabolt Man-O-War) to charge up the generator, so for this first run through you'll have to brave the dark. Proceed through the large corridor and you'll quickly find another door in the background next to a moving searchlight. In the next large open area, Pallette will give you a hint about a hidden power generator capable of lighting up the entire area. Keep in mind though that you'll need Axl to find it, and you'll also need his Plasma Gun weapon (gained from Gigabolt Man-O-War) to charge up the generator, so for this first run through you'll have to brave the dark. Proceed through the large corridor and you'll quickly find another door in the background next to a moving searchlight.This entire area is swarming with these searchlights, so you'll need to take care to avoid them. If a searchlight spots you, the lights will come on and the nearest door in the background will open to inundate you with Reploids pouring out to attack. You'll face an endless wave of sword-weilding Reploids until you destroy their commander (holding a shield). So try to avoid them, but note that if you manage to power up the hidden generator to switch on all the lights, the spotlights disappear making your journey far easier. Traverse through the corridors while avoiding the spotlights, and keep an eye out for floating turrets. Eventually you'll come across two searchlights side-by-side. Right after passing them you'll encounter an electrical field-generating Reploid along with a sword-weilding Reploid. Take down the floating foe, then use Axl's Copy Shot on the sword-Reploid before snagging the A-Trans capsule it drops. Pass around the next corner and take out the floating turret. A large drop lies right after the searchlight where the floating turret was, so take care and make sure you don't fall down (only Zero's double-jump can get you back up). Take out the Bulbrite over the hole and jump across. You're now very close to the power generator. Climb up the wall to find a hidden opening leading to a room with an odd sight.  You'll see a Reploid guarding a door, but oddly enough he'll be sleeping. Break out the A-Trans and assume the form of the Reploid before walking up to it and pressing Special Weapon. Axl will salute the guard, who promptly wakes up and returns the gesture before opening up the door. Follow him inside to find the power generator along with Pitch Black RM#01 (X's Crystal Wall is needed). You'll need the Plasma Gun (or X's or Zero's counterparts) to charge up the generator (as per Pallette's hints). Hold down fire while standing next to the generator and give it enough power to stabilize. With the lights back on you'll also be able to track down a few Rare Metals. You'll see a Reploid guarding a door, but oddly enough he'll be sleeping. Break out the A-Trans and assume the form of the Reploid before walking up to it and pressing Special Weapon. Axl will salute the guard, who promptly wakes up and returns the gesture before opening up the door. Follow him inside to find the power generator along with Pitch Black RM#01 (X's Crystal Wall is needed). You'll need the Plasma Gun (or X's or Zero's counterparts) to charge up the generator (as per Pallette's hints). Hold down fire while standing next to the generator and give it enough power to stabilize. With the lights back on you'll also be able to track down a few Rare Metals.Whether you've powered up the lights or not, drop down the hole you passed earlier and head right. Through this next series of corridors you'll encounter more enemies and searchlights (if the lights are off) much like the first upper corridors, so take care. Proceed through the door at the far end to find a room with two Reploids hanging out. They'll spot you and summon reinforcements from behind the door in the background (Axl's salute doesn't work too well here). Clear all the foes out and grab the items that appear before leaving; Axl's Blast Launcher works well. Beyond this room you'll locate another tall shaft with lifts carrying crates and lasers planted along the walls. Use the crates for cover against the lasers (just make sure you slide down the correct side) while descending the shaft. A good trick with Axl is to slide down the opposing side of a crate to the lasers and hold down fire, Axl will stick to the side of the crate while it lowers down. Ignore the Bulbrites floating around, eventually you'll spot an opening in the wall on the right. Head through to find a corridor with more cooling fans. Take care while passing them and head right. 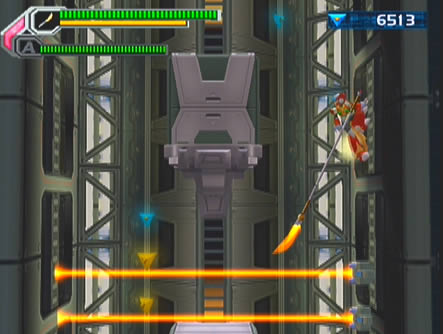 The adjacent corridor will be very tricky to clear if the lights are still out. The entire room is pitch black save for a source of light coming from a lone Bulbrite slowly floating back and forth throughout the corridor. Spike traps hide out along sporadic sections of the floor, so they're your biggest threat. Naturally you won't have any trouble if the lights are on. Try to avoid destroying the Bulbrite on your way through. Watch out for flying bats and the moving blades on the floor as you go through, and try your best to stick with the Bulbrite. The adjacent corridor will be very tricky to clear if the lights are still out. The entire room is pitch black save for a source of light coming from a lone Bulbrite slowly floating back and forth throughout the corridor. Spike traps hide out along sporadic sections of the floor, so they're your biggest threat. Naturally you won't have any trouble if the lights are on. Try to avoid destroying the Bulbrite on your way through. Watch out for flying bats and the moving blades on the floor as you go through, and try your best to stick with the Bulbrite.Eventually you'll see a purple Metal up on the ceiling, grab it with Zero's double-jump or X's enhanced jump before moving on. Grab the items on the floor in the following small corridor and move on to find the final tall shaft filled with descending crates. Up above on the right you'll find the Body Parts H capsule. Descend the shaft while avoiding the lasers, once at the bottom head right and watch out for moving blades on the floor and ceiling. Surprise the two Reploids up ahead before heading through the door they guard to face Dark Mantis. |
| Mission select | ||
|---|---|---|
| 1. Noah's Park 2. Booster Forest 3. Troia Base 4. Pitch Black |
5. Primrose 6. Metal Valley 7. Dynasty 8. Central White |
9. Inferno 10. Jakob 11. Gateway 12. Sigma Palace |