
Axl's Bosses
There are three listings of the bosses here, one each for X, Zero and Axl. Each list has the bosses organized in an order which allows you to be able to use the correct special weapon or technique to defeat them with. Also indicated are the two recommended characters you should have teamed up while battling each boss, but keep in mind that they are recommendations only, and not mandatory.
| X's Bosses | Axl's Bosses | Zero's Bosses |
|---|---|---|
 |
 |
 |
| Click on a link to view the guide | 1. Scorpion Mechaniloid 2. Soldier Stonekong 3. Tornado Tonion 4. Splash Warfly 5. Flame Hyenard |
6. Ride Boarski 7. Snipe Anteator 8. Wind Crowrang 9. Vanishing Gungaroo 10. Bulldozer Mechaniloid |
11. Red 12. Sigma Part 1 13. Sigma's Final Form |
|---|
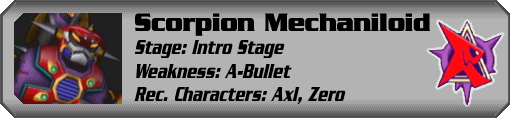
| Scorpion Mechaniloid | |||
|---|---|---|---|
| Stage: Intro Stage | Weakness: A-Bullet | Recommended Characters: Axl, Zero | Difficulty: Very Easy |
| X and Axl's Weapons: N/A | Zero's Technique: N/A | ||
 |
|||
| This enemy has three standard attacks. He will fire plasma shots from his tail. Evade this by dashing away from it. He will also dash over the ground and you can evade this by either crouching or dashing beneath him. When he has dashed past you, use your A-Bullet weapon to fire at his tail. Once his tail is destroyed, his claws will be your next target. Use the same tactic to destroy them too. | |||
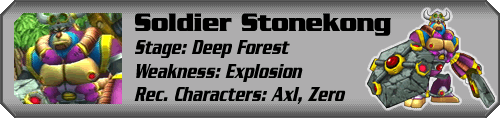
| Soldier Stonekong | |||
|---|---|---|---|
| Stage: Deep Forest | Weakness: Explosion | Recommended Characters: Axl, Zero | Difficulty: Easy |
| X and Axl's Weapons: Gaea Shield | Zero's Technique: Gokumonken | ||
 |
|||
| Soldier Stonekong has three main attacks when you face him. His first attack is when he releases his tiny shield and lets it fly around the arena once. Jump over it do dodge it. When he is standing still, use rapid fire to lower his life quickly. After that, he will rush towards you. Jump over him to avoid a hit. Then fire at him again. His third attack is when he jumps up and grabs onto the cylinder-like obstacle in the middle. He will create a huge rock which will split into two parts and each part will fly in the opposite direction to the other around the arena. When they touch each other, they'll explode. He has one fourth and final attack but he won't use it very often. If you are standing too near him, he will raise his sword and slash at you. This will take almost half your life, so watch out. |
|||
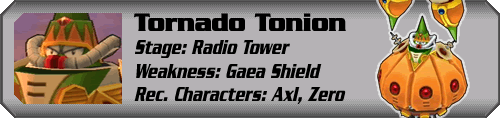
| Tornado Tonion | |||
|---|---|---|---|
| Stage: Radio Tower | Weakness: Gaea Shield |
Recommended Characters: Axl, Zero | Difficulty: Easy |
| X and Axl's Weapons: Volt Tornado (+Ray Gun) | Zero's Technique: Raijinshou | ||
 |
|||
| Tornado Tonion will be fought in a circular battlefield. He will spin around a lot and use his electric attacks. His main attack is when he begins to spin around, creating an electric tornado around him. Fire at him to damage him and run around to avoid being hit. If he hits you, you will fly to the top of the tornado and then fall to the ground and take heavy damage. The second of his attacks will be when he fires a tiny barrier against you. He will create this from pieces of his onion body, making him more vulnerable at the points where he misses pieces. His third attack will make him take all of his body parts, creating a long blade which he slashes at you. Jump or dash away from it. Fire whenever you get the chance. Activate the Gaea Shield if you need further protection. |
|||
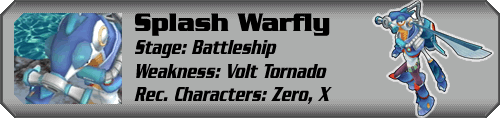
| Splash Warfly | |||
|---|---|---|---|
| Stage: Battleship | Weakness: Volt Tornado |
Recommended Characters: Zero, X | Difficulty: Normal |
| X and Axl's Weapons: Splash Laser | Zero's Technique: Suiretsusen (+D-Glaive) | ||
 |
|||
| This guy will be fought on three platforms. You will see the big robot you just defeated in the ocean in the background. This guy will run around on the platforms and swing his blade. He has five attacks which he uses. His first attack is when he is running around and spinning his blade around like a propeller. Evade him by running away from him. As he pulls down his blade, fire at him. He will also use two water attacks. The first one is when he fires a beam of water against you. He will fire three at a time and then switch attacks, or use the same again. Evade the beams by running away. His second water attack will make him smash his blade into the ground, creating a huge wave of water, but it has short attack range so it's easily evaded. He can also use two thrusting attacks. The first one is when he halts and then thrusts the blade at you. Jump when you see that he halts. His second is when he dashes forward and slashes twice in the air. Jump to evade it. When he says "Later!", he will jump into the water around you. He will then jump up somewhere else laughing. This is your chance to hit him heavily. Equip the Volt Tornado and when he jumps up from the water, go over to him and release the tornado. He will then jump down in the water again and then jump up. Use the same tactic and he should be destroyed in a few hits. |
|||
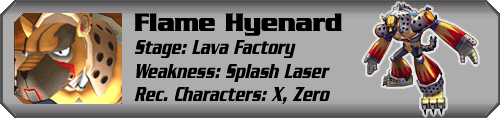
| Flame Hyenard | |||
|---|---|---|---|
| Stage: Lava Factory | Weakness: Splash Laser |
Recommended Characters: X, Zero | Difficulty: Normal |
| X and Axl's Weapons: Circle Blaze (+Double Bullet) |
Zero's Technique: Bakuenjin | ||
 |
|||
| This is the most crazy boss you'll meet in the game. You will be on a gigantic platform in the middle of a great sea of lava. Flame Hyenard will create two copies of himself and these will come down to you on the platform. Your first thought is to fight them, but don't. Instead, look at the giant hyena which is walking around the platform. Fire at its legs to stop it. Climb up the legs and the real Flame Hyenard will be standing on the head of the giant hyena. Fire at him once and he will come to you. He will call up his copies and they will run around you. If you try to escape, they will all attack you. While you're fighting, the giant hyena will begin walking again making it harder for you to stay on it. You will have to walk forward to stay on its back or else the three Flame Hyenards will attack you, seeing it as an escape. While they're running around you, they will be firing very weak fireballs at you. Don't worry about those because they take about 1% of your life. Keep your eyes on the real Flame Hyenard, equip the Splash Laser and when the real one is in front of you, fire the Splash Laser and he will fall over. He will now create two new copies because his last ones were destroyed when you hit him. They will run around you again and you can simply fire at him again. They will be faster and faster with each hit, making it harder for you. After a few hits, the giant hyena will fire missiles from its back, making it even harder for you. Run around to evade the missiles and fire the Splash Laser at the real Hyenard to win the battle. |
|||
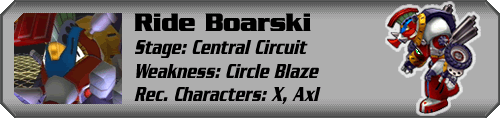
| Ride Boarski | |||
|---|---|---|---|
| Stage: Central Circuit | Weakness: Circle Blaze |
Recommended Characters: X, Axl | Difficulty: Normal |
| X and Axl's Weapons: Moving Wheel | Zero's Technique: Zankourin | ||
 |
|||
| Ride Boarski will be fought in a circular arena. He will often drive around in it, making it hard for you to hit him. While he is driving around you, he may create small wheels which will roll after him. Once he stops, fire the Circle Fire at him and he will be heavily damaged. After that, he will try to ram you. He will drive into you, making you fly into the air. He will now pick you up in his tusks and drive you into the wall. You will take heavy damage for this. Evade this attack by dashing around. Another attack is when he fires out an orange ball into the middle of the arena. This ball will fire out three arms which will spin around and try to hit you. Jump to evade them. | |||
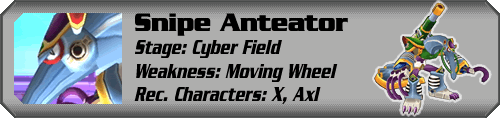
| Snipe Anteator | |||
|---|---|---|---|
| Stage: Cyber Field | Weakness: Moving Wheel |
Recommended Characters: X, Axl | Difficulty: Hard |
| X and Axl's Weapons: Sniper Missile | Zero's Technique: Hieijin | ||
 |
|||
| This is the hardest of all Mavericks. He will be fought on a cylinder-like arena. He will be able to walk around it, while you can just walk on its top half. While he is at the back, use rapid fire and the Moving Wheel to damage him. While is standing on the edges, fire at him again to make his life drop. After a few hits, he will begin laying out bombs shaped as ants. Evade these because when you're near them, they'll detonate. Once half his life is gone, he will begin firing homing missiles at you. Use the Gaea Shield to stop them. After a few more hits, he will create some small balls around him. These are very hard to dodge as they will move around after each other all the time. And they will fire at you too. Try to have your eyes on Snipe Anteator and fire as much as you can. He may take a few tries to defeat. |
|||
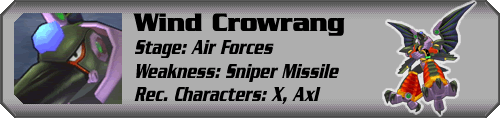
| Wind Crowrang | |||
|---|---|---|---|
| Stage: Air Forces | Weakness: Sniper Missile |
Recommended Characters: X, Axl | Difficulty: Normal |
| X and Axl's Weapons: Wind Cutter | Zero's Technique: Souenbu (+V-Hanger) | ||
 |
|||
| This boss will be fought on a horizontal platform. He will begin flying in the background and he will fire some small boomerangs at you. While he is, equip the Sniper Missile and use Auto Lock-On to launch the homing missiles on him. He will take pretty heavy damage when hit. Once he is hit, he will fly up into the air and try to dive at you. He will dive straight down and not diagonally so just walk away from where you're standing. Once he is on the ground, fire the Sniper Missile to stun him totally. He will then fly into the background again. Fire the Sniper Missile again and he will be destroyed after a few hits. |
|||
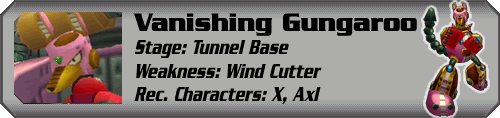
| Vanishing Gungaroo | |||
|---|---|---|---|
| Stage: Tunnel Base | Weakness: Wind Cutter |
Recommended Characters: X, Axl | Difficulty: Normal |
| X and Axl's Weapons: Explosion (+G-Launcher) | Zero's Technique: Hadangeki | ||
 |
|||
| When you start this battle, you must use the Ride Armor because he is using one. Punch his armor until it's defeated and try to give him some punches while you still have the armor. When your armor is destroyed, equip the Wind Cutter and fire at him when your Auto Lock-On appears. He is pretty fast so time your fire. He uses about two attacks, the first one is where he tries to kick you. The other one is when he fires at you. Evade these by running away from him. Once half his life is gone, he will become faster which will make it harder for you to hit him. Attack him when you've got the chance. Once he is defeated, he will scream and explode. |
|||
| The following bosses will be fought in the final stages. |
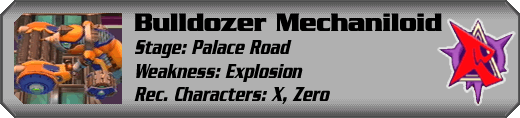
| Bulldozer Mechaniloid | |||
|---|---|---|---|
| Stage: Palace Road | Weakness: A-Bullet | Recommended Characters: X, Zero | Difficulty: Normal |
| X and Axl's Weapons: N/A | Zero's Technique: N/A | ||
 |
|||
| This boss will chase you through the whole stage before you fight him. He will be standing in the right corner. From there, he will use two attacks. The first one is when he drives away from his position. Place yourself in the middle of the stage. He will come driving at the top or bottom of the screen. Once he is done driving, he will charge up a very powerful plasma beam. Stand just beneath him and use rapid fire at him to lower his life quickly. When the beam comes near you, jump to evade it. Sometimes, he will also throw away his big spiky obstacle at you. Try to evade it by jumping. After a few hits, he will be destroyed. | |||
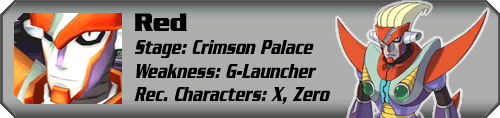
| Red | |||
|---|---|---|---|
| Stage: Crimson Palace |
Weakness: G-Launcher |
Recommended Characters: X, Zero | Difficulty: Hard |
| X and Axl's Weapons: N/A | Zero's Technique: N/A | ||
 |
|||
| Right when the battle starts, equip the G-Launcher weapon. Run towards him and release a normal shot. These shots are very powerful and will lower his life greatly. He will always be standing in the middle when the battle starts. When you've hit him enough, he will vanish and appear on another platform. He will then create two copies or illusions of himself which will always appear near you. They will first flash around you, before they appear clearly and slash quickly at you. When you see them flash, quickly jump to another platform to evade them. When Red appears again, fire at him and he may use another attack. He will throw his scythe at you. When you see that he is about to throw, jump away to evade it. Another attack is that he will fire an energy wave at you, both horizontal or vertical depending on what you're doing. When you've hit him for a few times, he will create pink tornados on some platforms. When you see a tornado begin, quickly jump to another platform to evade being heavily hit. Using the G-Launcher is very effective against Red. |
|||
| When advancing through the final stage, you will have to fight all of the eight Mavericks again. Utilise the same tactics and weapons as before to defeat them, and remember to pick up the life and weapon energy refills between each battle. |
| Sigma Part 1 | |||
|---|---|---|---|
| Stage: Crimson Palace |
Weakness: A-Bullet | Recommended Characters: X, Zero | Difficulty: Normal |
| X and Axl's Weapons: N/A | Zero's Technique: N/A | ||
 |
|||
| Sigma returns for the seventh time. In this battle, Sigma can fly in the background as well as stand on the ground firing at you. When he is flying in the background, release the Sniper Missile or a bunch of rapid fire shots to hit him. When he is standing on the ground, he will sometimes teleport from one place to another so you must move yourself all the time. He will sometimes pick up a big bazooka-like weapon and release a quick and powerful plasma beam. Crouch behind the blocks to evade it. Once he is defeated, you will fight the final form. | |||
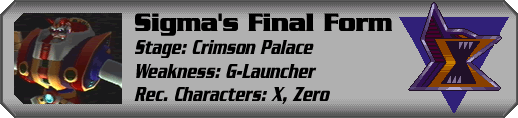
| Sigma's Final Form | |||
|---|---|---|---|
| Stage: Crimson Palace |
Weakness: G-Launcher |
Recommended Characters: X, Zero | Difficulty: Hard |
| X and Axl's Weapons: N/A | Zero's Technique: N/A | ||
 |
|||
| Sigma's Final Form will be fought in a spiral-like battlefield. He is pretty big, so you main target is the head which is the most vulnerable point. He also has one and a half life energy bar, meaning he has 150% life while all the other bosses only had 100% life. Equip the G-Launcher when the battle starts and walk up to the top of the battlefield. He will have five attacks to use. The first one is when he throws out his hands and creates green fireballs from it. These will fly up and then fall down on you if you're badly placed. Walk down the platforms to evade the bombs. Then walk up again and wait. His second attack is when his head appears right in front of you. This is your big chance, fire at his head while he uses his breathing attack. This attack won't take much damage on you as you destroy the balls he fires while you fire at him. Watch out if Sigma begins spinning around as he'll launch four homing fireballs, dash and jump around quickly to avoid them. His fourth attack is his waist-laser beam, when he begins sweeping you with the beam just jump over it to avoid damage. His fifth attack is his strongest one. He will appear a long way away from you and will then launch a powerful punch against you. Once he punches, jump away to evade the attack. Then use Auto-Lock On to fire at his head. Once 75% of his life is gone, or half his life is gone, he will lose his mask and become faster. Use the same tactic as before and he should be defeated soon enough. |
|||