
Stage Guides
| Sigma Palace |
|---|
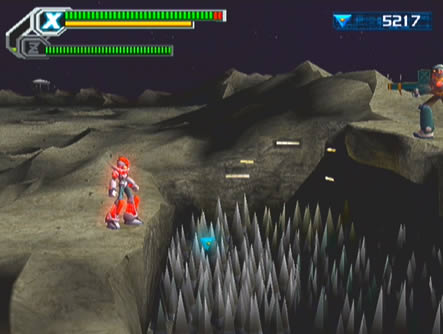 Be advised that the two characters you choose for this stage will be the ones you'll use in the final boss battles, so choose carefully. It's also a good idea to have both Life Tanks filled up and the Prickle Barrier and Spare Energy items in your inventory. So this is it, the final showdown with the Mavericks responsible for this latest crisis. You'll begin on the Moon's surface before proceeding inside Sigma's giant palace. Be advised that the two characters you choose for this stage will be the ones you'll use in the final boss battles, so choose carefully. It's also a good idea to have both Life Tanks filled up and the Prickle Barrier and Spare Energy items in your inventory. So this is it, the final showdown with the Mavericks responsible for this latest crisis. You'll begin on the Moon's surface before proceeding inside Sigma's giant palace.From the outset your Navigator's signal is being jammed, so you'll be going solo. Traverse over the rocky surface and watch out for potholes in the ground. Carefully take out the Reploids wielding freezer rifles and missile launchers, especially around the holes. Not far in you'll encounter a large pit full of spikes (on the moon of all places?) and a missile-launcher wielding Reploid on the far side atop a ledge. Shoot it from the left side and watch out for incoming missiles. With the path clear air-dash or hover over to the ledge to avoid the spikes and move on. Watch out for jetpack Reploids and the flamethrower turrets beyond. Take out the shielded Reploids and sword-wielding varieties across the plateau, and watch out for pits. Eventually you'll reach a tall cliff, climb up and quickly prepare to face a multitude of Reploids guarding the entrance of the palace. With all enemies cleared out, head inside the giant structure. Right inside the entrance hall you'll be greeted by Sigma's doorman (Vile) and face him for the last time in battle, check the bosses guide for tips to send him back to his grave. 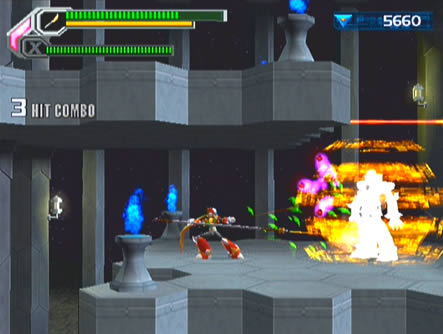 With Vile suffering his third defeat on record to the Hunters, the doors will unlock and you'll be clear to explore the vast innards of the palace. You're now in for a surprise if playing Hard mode. Before leaving the room your reserve character teleports in to chat with your controlled Hunter. But once your main character leaves, the door slams shut on the other, trapping them inside. With Vile suffering his third defeat on record to the Hunters, the doors will unlock and you'll be clear to explore the vast innards of the palace. You're now in for a surprise if playing Hard mode. Before leaving the room your reserve character teleports in to chat with your controlled Hunter. But once your main character leaves, the door slams shut on the other, trapping them inside.A battered Vile reappears on the left, cackling before slamming himself into the trapped Hunter. You get the idea of what befalls them, as you'll be stuck for the rest of the stage with one Hunter. It's still quite possible to make it through alone, and don't worry about your reserve character. Vile's last bid at triumph failed, as they'll make a fated return when you face Sigma. Proceed through the adjacent room and down the corridor. You'll encounter a standard Reploid, but it'll promptly change it's body to mimick the Sigma body you faced in the Gateway mission. You'll be facing an army of these Sigma-Copies throughout the palace but they're aren't the real deal so shouldn't give you too much trouble. Wander too close to the Sigma-Copy and its eye will glint before it unleashes a quick sword slice, so keep your distance. Hammer it with fire from afar and eventually it'll revert back to a normal Reploid before exploding. Watch out for a second Sigma-Copy above, shoot it while up on the right wall. Move on and carefully avoid the spider-turret's fire up on the far left wall. Take it out and climb up, but watch out as you'll encounter another Sigma-Copy. This one will charge up purple energy in its hands before unleashing three small energy balls. After floating on the spot for a split second they'll come straight at you so be ready to move quickly, or alternatively keep in mind that Zero can deflect the balls with a swing of his weapon. Destroy the Sigma-Copy and move on, taking out the spider-turret on your way up the room. At the top you'll face two Sigma-Copies standing side-by-side, one uses the slash attack while the other fires the energy balls, so be careful. With all the enemies cleared out head right at the top of the room. 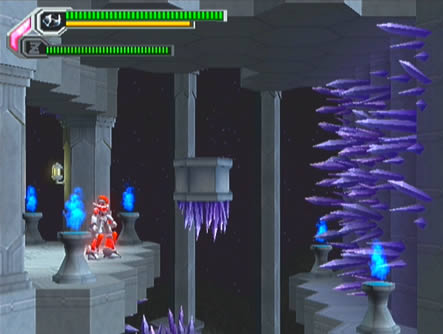 Be very careful in the following room as the entire floorspan is covered in spikes. Carefully jump up the left wall and air-dash over to the exit on the right to move on. Shoot the Sigma-Copy across the way in the next room and carefully jump down to the opening below beyond the spike-lined floor. In the next shaft, take out the spider-turret and keep in mind that there's a life capsule hiding behind the Sigma-Copy above in the corner. Be very careful in the following room as the entire floorspan is covered in spikes. Carefully jump up the left wall and air-dash over to the exit on the right to move on. Shoot the Sigma-Copy across the way in the next room and carefully jump down to the opening below beyond the spike-lined floor. In the next shaft, take out the spider-turret and keep in mind that there's a life capsule hiding behind the Sigma-Copy above in the corner.Descend the shaft by sliding down the right wall as there's a spike trap in the floor below. Head left to find a spider-turret on the ceiling and a Sigma-Copy generating a protective energy barrier. Take out the barrier as you would any barrier-protected foe and destroy the copy before moving on. Slide down the left wall ahead to find two more Sigma-Copies below. Shoot at them from the wall while watching out for the spike trap below. With both targets neutralized, head right to find a life capsule next to a hole in the floor. Grab the capsule if you need it before falling through the hole. Slide down the right edge and drop down to the entrance below on the right wall, as you don't want to fall into the gaping hole. 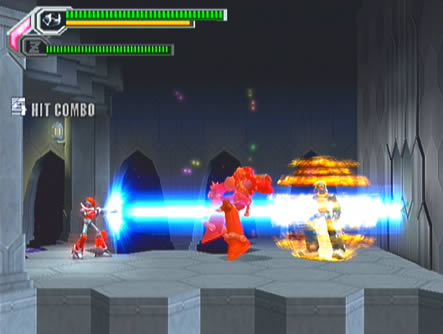 The next room contains spikes lining the walls and only a few platforms bridging the hole below, so take it easy. Destroy the lone Sigma-Copy and use a combination of tiny jumps and air-dashes (to avoid touching the spikes at the base of the walls) to get through safely. Up above on the left wall you'll spot a ledge with a full life Refill capsule, but it's a hassle to reach, so don't worry too much about it. The next room contains spikes lining the walls and only a few platforms bridging the hole below, so take it easy. Destroy the lone Sigma-Copy and use a combination of tiny jumps and air-dashes (to avoid touching the spikes at the base of the walls) to get through safely. Up above on the left wall you'll spot a ledge with a full life Refill capsule, but it's a hassle to reach, so don't worry too much about it.Head right to find another shaft riddled with spikes. Carefully ascend the shaft, Zero's double-jump and X's enhanced jump with the Icarus Armor and Ultimate Armor really help out here. Use the safe wall sections to reach the top of the shaft, but be warned that it might take you a few tries to get through in one piece (the Prickle Barrier is an absolute must here). Once above you'll spot two more Sigma-Copies above the ceiling, so head left for now. This next area is very tricky, as you'll need to use the side of the long floating platform to project yourself higher up the shaft. Your ultimate goal is the door above on the right, but there's two ways to get there. If you have Axl, jump over to the side of the floating platform, then carefully jump up and over to the safe platform on the left side of the shaft. From there you can easily jump up and hover over to the door. If you don't have Axl, it'll be very tricky to reach the door, you'll need to jump up high using Zero's double-jump or X's enhanced jump and air-dash at the peak of the jump to just clear the spikes. I can't stress enough how important it is to have the Prickle Barrier in case you do touch the spikes (you won't need it again beyond here). Beyond you'll face the final two of Sigma's clone cronies, break through the first one's barrier and watch out for the second's energy balls. Crush them both and head through the door beyond. Cross the long narrow corridor to find another door, through this one you'll locate a huge elaborate throne room. Walk down the pink carpet, up the staircase and along the open-air hall to find an ugly sight, the real Sigma sitting atop a high throne (Narcissus would be proud). There's no turning back now, so if you need help check the bosses guide for tips on defeating the final trio of bosses. |
| Mission select | ||
|---|---|---|
| 1. Noah's Park 2. Booster Forest 3. Troia Base 4. Pitch Black |
5. Primrose 6. Metal Valley 7. Dynasty 8. Central White |
9. Inferno 10. Jakob 11. Gateway 12. Sigma Palace |