
Stage Guides
| Central White |
|---|
 The second 3D stage sees you hurtling through an icy river and canyon aboard a Ride Chaser. Here it's all about reacting to what's coming up ahead, so you'll need good reflexes to clear this area. Like Dynasty, the Ride Chaser can fire, brake, and perform a quick boost. You'll have a different weapon depending on your selected Hunter. X fires manual shots with a charged shot available, while Zero fires wide green projectiles, and Axl unleashes an automatic barrage. Most enemies will come at you from ahead, so you'll have plenty of time to react. The second 3D stage sees you hurtling through an icy river and canyon aboard a Ride Chaser. Here it's all about reacting to what's coming up ahead, so you'll need good reflexes to clear this area. Like Dynasty, the Ride Chaser can fire, brake, and perform a quick boost. You'll have a different weapon depending on your selected Hunter. X fires manual shots with a charged shot available, while Zero fires wide green projectiles, and Axl unleashes an automatic barrage. Most enemies will come at you from ahead, so you'll have plenty of time to react.Along the first long straight you'll be assaulted by waves of Reploids atop Ride Chasers of their own, so cover the screen with fire and sweep around to clear out their unpredictable patterns. Beyond them you'll face a range of Bulbrites hanging about on the ice before a Reploid sneaks up behind you. Either boost ahead to lose him or swing left or right then brake to send the Reploid on its way. Thrash the Bulbrites to avoid collisions and keep plowing through more Reploids aboard Ride Chasers. Eventually you'll reach a cliff with a Bulbrite on the edge. Blast it and drop down into the canyon. As you brave the canyon you'll spot precarious pits scattered about, each with a boost pad in front. Use the boost pads to clear the pits, but don't bother boosting into them as it won't give you extra distance. Beyond the canyon you'll emerge out onto a river covered in broken icebergs, but don't stress about pits as you can't slip into the water. Here you'll encounter more Reploid Ride Chasers, along with Bulbrites carrying bombs. Blast them from afar or steer out of their way as you pass by to avoid a collision. Watch out for a Reploid sneaking up from behind as well. Eventually you'll reach the next ice canyon filled with more Bulbrites. Shoot them down as you pass through, and be sure to hit the boost pads to pass over the pits (hold left as you jump over the second pit to avoid falling in). 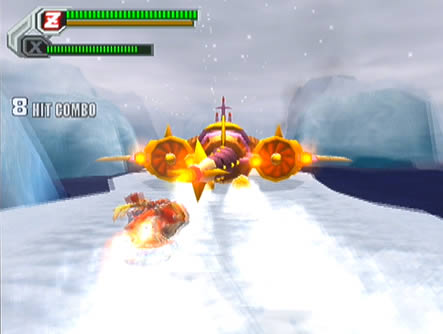 Around the corner you'll emerge out onto a hilly field, watch out for a nasty pit on the left side while clearing out incoming enemies. Beyond here you'll find yourself back out on the frozen lake, where not far in you'll be assaulted by a giant ship from above. It'll shoot off ahead of you and begin deploying Reploids, but they shouldn't pose a significant threat. Around the corner you'll emerge out onto a hilly field, watch out for a nasty pit on the left side while clearing out incoming enemies. Beyond here you'll find yourself back out on the frozen lake, where not far in you'll be assaulted by a giant ship from above. It'll shoot off ahead of you and begin deploying Reploids, but they shouldn't pose a significant threat.Afterwards it'll come in closer and fly down level with the ground, now you'll have a chance to attack. Rip into the engine turbines on its rear to inflict damage, but watch out as it'll begin pelting small purple balls at you. Each one will slow you down when struck, so switch to your reserve character and boost up to avoid falling back. Before long you'll spot smoke sneaking out of the top of the ship, when you see three smoke plumes it's alomst done. If you don't take out the ship quickly enough it'll fly ahead and pour out more Reploids before coming in close again. Once you deal enough damage it'll streak ahead amid a flurry of explosions. More enemies along with Metals will pour out, so hold off and grab as many Metals as you can. Beyond here you'll face more waves of Reploids before bomb-toting Bulbrites appear. These ones will hover up, down, left and right, so steer clear if you're too close and can't get a hit in. Beyond here you'll find yet another ice canyon. A habitat of more Bulbrites, but not only the bomb-carrying variety, pairs of blue Bulbrites generating an electric field between each other live here. Try to avoid striking the fields and take out one of the Bulbrites to destroy both. 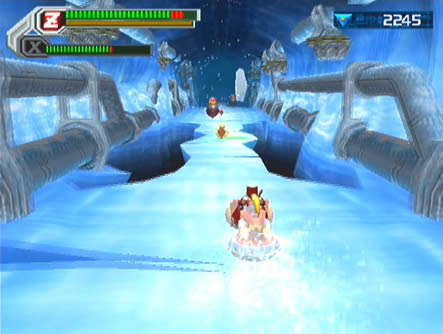 Around the next few corners you'll find a long straight area filled with metal ramps. Atop the ramps you'll find Metals and eventually a diverting path, with another canyon leading on ahead and a ramp on the right diverting into a large opening on the canyon wall. Inside the cave you'll find a winding path filled with Bulbrites and Metals (red and purple varieties), while the open-air canyon path is riddled with pits and Bulbrites. You should have an easier time travelling through the cave, so try to get inside. Eventually both paths rejoin at the head of a tall cliff. Around the next few corners you'll find a long straight area filled with metal ramps. Atop the ramps you'll find Metals and eventually a diverting path, with another canyon leading on ahead and a ramp on the right diverting into a large opening on the canyon wall. Inside the cave you'll find a winding path filled with Bulbrites and Metals (red and purple varieties), while the open-air canyon path is riddled with pits and Bulbrites. You should have an easier time travelling through the cave, so try to get inside. Eventually both paths rejoin at the head of a tall cliff.Beyond you'll spot the giant ship you faced earlier before it begins deploying bouncing bomb-Bulbrites. Stay clear of the foes and you'll eventually drop down to an iceberg river for a final showdown against the ship. It'll take more hits to bring down a second time. Watch out when it banks off and flies ahead to face you, expect to be the recipient of deployed bouncing bomb-Bulbrites. Upon finishing the wave, the ship will lower down to one side of the river and rush forward at you, so judge which side it'll attack from and stay on the other to avoid a major headache. Upon reappearing it'll fly low and attack with purple balls and Reploids. Use your boost to catch up and don't stop ripping into the engines while moving back and forth to avoid the balls. This time it should take you at least two flight rounds to finish it off. Upon dealing the final blow the ship will streak ahead amid explosions before the screen fades to white. You'll jump off the Ride Chaser as it plows into a solid ice blockage barring a gate. With the gate cleared, you'll have open access to reach the bosses' room up ahead. Keep in mind that you'll find both the Head Parts H capsule and Central White RM#01 hidden outside above the factory, but you'll need X & Zero for the capsule and Axl & Zero for the Rare Metal so you'll need to come back at least once more to snag both items. Step inside the factory to find Avalanche Yeti's snowy freezer. Intermission Back on the Ride Chaser, you'll be travelling down a long straight stretch of ice while blowing away large ice obstacles strewn about. There's quite a large range of Metals scattered along the way, so you should find this Intermission the most lucrative in saving up Metals quickly. Try to avoid stacking into walls and keep in mind that the obstacle and Metal layout doesn't change, so after a few runs you should memorize the order. Each wall takes a few rounds to take out, so brake if need be to pump in a few extra shots. Eventually at the very end you'll encounter a towering ice block barring your entire path, take it out and try to grab as many Metals as you can just beyond to finish the mission. |
| Mission select | ||
|---|---|---|
| 1. Noah's Park 2. Booster Forest 3. Troia Base 4. Pitch Black |
5. Primrose 6. Metal Valley 7. Dynasty 8. Central White |
9. Inferno 10. Jakob 11. Gateway 12. Sigma Palace |