
Items Guide
Unlike previous installments of the X series, you won't find ready-to-use items scattered throughout stages. Instead, X8 features a chip development system where you'll develop individual parts for each Hunter to enhance their abilities by collecting Metals. Hidden in stages are valuable Rare Metals, giving you the best abilities to develop.
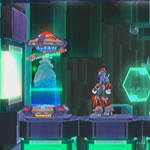
Eight of Dr. Light's capsules also await recovery, and upon finding the first capsule Dr. Light will give X the Neutral Armor which you can customize with the eight parts that make up the Icarus and Hermes Armor. Special armor suits are also available for the Hunters, as well as three additional unlockable characters. Read on for all the details.
Unlockable characters
Alia, along with the other two Navigators only become available in the Chip Development screen after restarting the game with New Game + and using each one as a stage Navigator a few times.
Once you've developed their primary weapon (see the chips page for more info), hit Special Weapon while on the character select screen to view your available navigators. To develop chip upgrades for them, press Special Weapon while on the Chip Development screen in the R&D Lab.
| Alia Buster | |
|---|---|
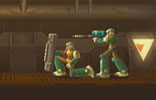
| Alia handles much like X, with standard buster shots and a stronger charged shot. Be warned though as Alia, unlike X, won't have any extra special armor suits to use, so she won't be able to gain abilities such as Shield Armor and Shock Absorber. Alia can use X's special weapons, but can't charge them up for a secondary shot. | 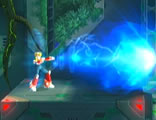 |
| Layer Rapier | |
|---|---|
| Layer boasts a range of special moves much like Zero's, but instead she weilds a Rapier (thin saber) which is just a strong as the Z-Saber. Layer can also unlock the same weapons as Zero, as well as perform the special techniques he gains from defeated bosses. | 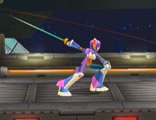 |
| Pallette Bullets | |
|---|---|
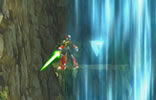
| Pallette utilizes the same abilities as Axl (minus his A-Trans copy-change ability). She can use all of Axl's special weapons, and can also hover in mid-air. As with Axl, Pallette has unlimited ammo for her weapons, and has no Special Weapon energy gauge. | 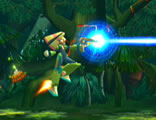 |
Rare Metal locations (click the chip name for further details)
| Noah's Park RM#01 | |
|---|---|
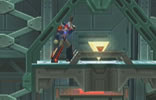
| Chip: Weapon Bottle Full Navigator: Alia Right after crossing the large pit outside the jungle Alia will tell you of a rock ledge hidden behind the waterfall ahead. Use Zero's double-jump to reach the Rare Metal hidden above. Note that she'll only give you this intel after re-entering Noah's Park upon clearing it initially. |
 |
| Noah's Park RM#02 | |
| Chip: Shock Absorber - Axl Navigator: Pallette You'll need the Head Parts I upgrade to locate this Metal. Right outside the cave filled with waves of bats, Pallette will hint at using your head to find a Rare Metal nearby. In fact you should just be able to spot a few Metals up at the top of the screen in a sealed-off alcove. Over on the right the alcove is sealed by a cluster of boulders which can only be destroyed by using the Icarus Armor's Head Part ability. Jump up into the boulders and the energy field X generates around himself will literally shred the boulders to clear your path. |
 |
| Booster Forest RM#01 | |
| Chip: Weapon Converter - X Navigator: None Upon reaching the area where you'll have multiple paths to choose from, leave the Chimera Armor above (if you've got it) and drop down to the very bottom path. Earlier in the stage you'll have faced a floating legless Reploid using its fists to attack you with. Destroy this foe with Axl's Copy Shot and it'll leave behind an A-Trans unit. You'l need it to reach this Rare Metal. Back in the dividing path, in the very bottom left corner of the area you'll spot a narrow opening in the wall too small to walk through. Use the A-Trans to assume the shape of the hovering Reploid and roll through to find a small room filled with Metals and this Rare Metal. |
 |
| Booster Forest RM#02 | |
| Chip: Double Barrier - Axl Navigator: None Once again you'll need the Chimera Armor, along with X and the Crystal Wall's charged shot to find this Rare Metal. Upon reaching the dividing path, use the Chimera Armor to break through the opening blocked by two blue crates and proceed onward. Jump onto the spiked conveyer belt and walk up to the floating platform blocking the armor's way. Jump out to allow the armor to pass under the platform and quickly destroy the floating Reploid above before it grabs you in its electrical field. Land back in the armor and quickly jump over the small pit to the platform on the other side. Leave the armor here and jump across to the following conveyer belt. Shoot down the floating turret then blast the blue switch on the wall to lower a large platform. Go back and bring the Chimera Armor to the platform before jumping out and shooting the blue switch again to raise the lift up. Make your way up to the armor, then destroy the two blue crates blocking the alcove above. Finally, walk into the alcove and fire the Crystal Wall's charged shot to reveal this Rare Metal. |
 |
| Booster Forest RM#03 | |
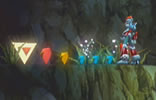
| Chip: Shield Armor - Zero Navigator: None This Rare Metal will be tricky to reach, and requires Axl, the Prickle Barrier and the Chimera Armor to reach safely. Beyond the second room full of Ride Armor foes, you'll find a large open room with a floating platform, a range of Metals and a lone Bulbrite. Destroy the Bulbrite then jump onto the first platform. You'll slowly lower down, as soon as you're level with the horizontal row of Metals jump right to find a second platform. Before this one lowers too much jump cross to the ledge ahead. Here you'll find a spiked conveyer belt running under a platform. At this point make sure you've grabbbed an A-Trans capsule from one of the hovering legless Reploids (if not, there's one at the end of the platform above the conveyer). Have Axl ready and the A-Trans already selected while you're in the armor. Park it on top of the conveyer and jump out. As it rolls along to the right, quickly assume the form of the hovering Reploid and make sure you're in the ball shape. Drop down onto the spikes, but don't worry as the Prickle Barrier will protect you. While you're still flashing quickly follow the Chimera Armor to the platform on the far right. Once you're there, immediately press the Switch Character button to return to Axl's normal form. Jump in the armor and you'll be taken by the platform through the background. You'll pick up a range of Metals along the way, while finallly grabbing this Rare Metal at the end. |
 |
| Troia Base RM#01 | |
| Chip: Weapon Converter - Zero Navigator: None Late in this stage you'll exit one of the training rooms to find a huge chasm before you. Use Axl to hover over the huge pit to find this Rare Metal atop a platform on the far side, or alternatively use Zero to climb up the room then slide down the left side of the large platform above and air-dash right to fall down to it. |
 |
| Troia Base RM#02 | |
| Chip: Metal Generator Navigator: None Gain a top score for all eight training rooms to receive this Rare Metal at the end. |
 |
| Troia Base RM#03 | |
| Chip: Life Tank Navigator: None Gain a top score for between 5 and 7 of the training rooms to receive this. |
 |
| Pitch Black RM#01 | |
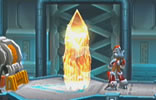
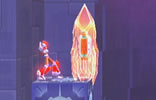
| Chip: Life Tank Navigator: Pallette Use X's charged Crystal Wall right in front of the power generator used to switch on the lights in this stage to reveal this Rare Metal. For specific directions to find the room, check the Pitch Black stage guide. |
 |
| Pitch Black RM#02 | |
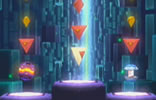
| Chip: Shield Armor - Axl Navigator: Pallette To find this Rare Metal, you'll need to use Axl to power up the generator to enhance the lighting in the entire stage. Check the Pitch Black stage guide for more info on finding the generator. Once you've powered up the lights, exit the generator room and head back to the main open area. Now with the lights on, jump over the small hole and backtrack along the path you took earlier. Turn the corner ahead and you should spot a large platform hanging from the ceiling that wasn't visible in the dark. Jump up and grab all the Metals strewn about; this Rare Metal rests atop the fourth hanging platform on the right. |
 |
| Pitch Black RM#03 | |
| Chip: D Glaive - Zero Navigator: Pallette To track down this Rare Metal you'll once again need Axl to power up the lights in the stage (see the stage guide for more info). With the lights on, leave the generator room and drop down the pit just outside. Follow the path from there until you reach a door leading to the next area. Right above the door you'll spot a small platform high up that wasn't visible in the dark. Use Zero's double-jump or X's enhanced jump to reach it, then jump up to the next platform off the screen to find this Rare Metal there. |
 |
| Primrose RM#01 | |
| Chip: K Knuckle - Zero Navigator: None You'll need X's charged Crystal Wall shot here. Eventually you'll teleport to a large room with a large staircase sloping skyward. Using Zero, jump up the left wall to find a lone large block up above. Use his double-jump to reach the top of the crate, then simply release a charged shot with X's Crystal Wall to reveal this Rare Metal. |
 |
| Primrose RM#02 | |
| Chip: B Fan - Zero Navigator: None For this Rare Metal, having Axl on your team makes short work of it. Use his Copy Shot to pick up an A-Trans capsule from one of the spike-skating foes near the start. With that in hand, near the end of the stage you'll find a room full of moving blocks. In the second room of the two, activate the A-Trans and drop down off the ledge. You'll fall down past two red Metals and land on a spike bed below without harm. Right in the corner ahead lies this Rare Metal. You can also flip the room upside down once and climb up to the Rare Metal safely via the moving blocks. |
 |
| Metal Valley RM#01 | |
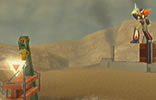
| Chip: Life Bottle Full Navigator: None You'll only have one chance to reach this Rare Metal while pursed by the giant Mechaniloid. Using Axl, once you reach the old dinosaur bones quickly climb over them as the Mechaniloid effortlessly destroys them as it passes through. Once you see Metals floating about in the air, quickly jump and hover through them, past the lone red Metal you'll find this Rare Metal floating in the air. |
 |
| Metal Valley RM#02 | |
| Chip: Double Barrier - Zero Navigator: Pallette While you're being chased down by the giant Mechaniloid you'll eventually begin an uphill climb to the cliff where you'll face off against it. Near the end of the climb you'll come across a group of cranes in the background, one which has a switch you can shoot to activate. Once the crane swivels about you'll have access to reach this Rare Metal hidden atop the furthest crane on the left. On the way back Pallette will inform you of new open routes, so climb across the cranes to reach it (Axl's hover assists greatly). |
 |
| Metal Valley RM#03 | |
| Chip: Metal Discount Navigator: None You'll need X with the Crystal Wall in your inventory to find this. Upon chasing the giant Mechaniloid back to the entrance of the stage, you'll come across a small alcove in the ground covered by a few metal plates out in the middle of the open plateau. As it walks over the hole, the Mechaniloid will blow the plates away and open it up for you. Drop into the hole and disharge a charged shot of X's Crystal Wall to reveal this Rare Metal inside it. |
 |
| Central White RM#01 | |
| Chip: Shock Absorber - Zero Navigator: None Axl & Zero will both be needed to reach this Metal. At the very end of the stage where your Ride Chaser plows through the ice blocking Avalanche Yeti's hideout, use Zero's double-jump to reach the large platform above where the Head Parts H capsule rests. Once up above, switch to Axl and hover back over to the top of the gate on the left to find this Rare Metal waiting there. |
 |
| Inferno RM#01 | |
| Chip: Double Barrier - X Navigator: Pallette You'll need Zero's T Breaker weapon to find this Rare Metal. During your descent of the large pipe-filled shaft riddled with spikes, you'll eventually find a platform where Pallette points out a weakness in the floor. She'll say a good kick will break through, but in fact the T Breaker and the Dairettsui technique (press Special Weapon while standing still) will do the job. Descend the small shaft to find this Rare Metal hidden inside a crate. |
 |
| Inferno RM#02 | |
| Chip: T Breaker - Zero Navigator: Layer Axl's Copy Shot will be needed for this item. At the very base of the tall shaft riddled with spikes, you'll find a flying Reploid which Layer points out can be copied with Axl's Copy Shot. Destroy it with said weapon and grab the A-Trans capsule it drops. Now you'll need to backtrack and ascend the tall shaft, if you're feeling lazy you can always sacrifice yourself to respawn at the top. Either way, near the very top where two bats hang out you'll see a small hole up on the left wall surrounded by spikes. By assuming the form of the jetpack-Reploid you'll be able to fly about (jump up as high as you can and hit jump again to glide). Stand on the third step down starting from the right and jump as high as you can. Hit Jump a second time to hover, then simply zip through the hole to find a room with this Rare Metal hidden inside. Don't worry if you run out of Weapon energy before leaving, as the game will let you escape before returning Axl to his normal form. |
 |
| Inferno RM#03 | |
| Chip: Weapon Tank Navigator: Pallette Upon exiting the second room where you face waves of fiery Bulbrites, Pallette will inform you of a hidden area above the corridor. Head left to find the second giant auto-descending shaft with a range of platforms hanging about. Quickly climb up the platforms leading skyward using Axl (each one falls when you step on it), then once at the top hover through the range of Metals floating in the air to find a door on the right wall (X & Zero should barely be able to make it with a mid-air dash). Go inside and take out the Reploids guarding this Rare Metal in the corner to reach it. |
 |
Robot Ride armor
| Ride Chaser | |
|---|---|
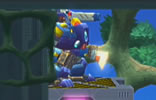
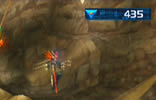
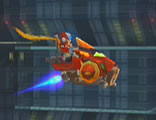
| The Hunters will use the Ride Chaser in the Central White & Dynasty missions. In the Central White region the Chaser will continuosly travel forward into the screen as you dodge and weave your way through incoming obstacles. The following controls are accessible in this mode: Fire, Brake (press Jump) & Boost (press Dash). X can also charge up a stronger shot, while Zero fires wide energy bolts and Axl uses rapid fire. In the Dynasty mission you'll be chasing Gigabolt Man-O-War throught a bustling and crowded cityscape. This time the Chaser will fly through the air, with the following controls: Fire, Brake (press Jump), Boost (press Special Weapon - uses weapon energy) & Quick Strafe (press Dash + Left or Right). You can also direct the Chaser around in any direction while it automatically tracks Gigabolt. |
 |
| Chimera Armor | |
|---|---|
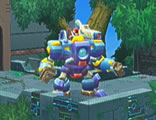
| This giant Ride Armor is only avilable in the Booster Forest stage. Whilst in the armor you can perform a standard punch by pressing Fire, and repeated punches with timed hits. Charge it up and release for a quick rapid-punch attack. You can also discharge a large energy ball by pressing Special Weapon, any enemies caught in range become stunned for a few seconds. You can also dash along the ground and in mid-air, as well as hover much like Axl can. Due to the size and weight of this beast, you can easily crush small enemies by landing directly on top of them. |
 |
| Raiden Armor III | |
|---|---|
| This smaller and lighter version of the Chimera Armor only offers a standard punch attack. You can still dash and jump around in this armor, but you'll probably only have the opportunity to use one if you manage to defeat an enemy riding in one without destroying the armor. |  |
Body upgrades
| Neutral armor |
|---|
| Upon locating your first Dr. Light capsule, X will receive the Neutral Armor. As indicative of the name, you'll be able to customize this armor with the eight parts found in separate capsules. When four specific parts are combined you'll activate one of two special armor suits, the Icarus Armor (I) or the Hermes Armor (H). Each main component (Head, Body, Boots & X-Buster) offers two parts, one for each special suit and with unqiue abilities. Select parts to use on the character select screen, and keep in mind that with no parts selected the Neutral Armor won't give X any enhancements. |
| Icarus Armor (I) Parts | |
|---|---|
| Please note: Only X can activate the capsules. | |
 With the Icarus Armor activated, X will receive the Giga Crash, an extra weapon capable of destroying all enemies on-screen at once. Activate the weapon by either having no weapon equipped or by selecting it from your inventory and pressing Special Weapon. With the Icarus Armor activated, X will receive the Giga Crash, an extra weapon capable of destroying all enemies on-screen at once. Activate the weapon by either having no weapon equipped or by selecting it from your inventory and pressing Special Weapon.Use this when completely surrounded by enemies, especially in the small rooms scattered throughout stages where you'll face off against waves of foes (also effective in taking a chunk off a bosses' health). One use will drain its weapon energy, but take note that it'll slowly recharge automatically. You don't need to wait for it to fully recharge, even the tiniest amount of weapon energy is enough for another shot. The strength of the blast won't reach maximum until the bar fully recharges. |
|
 |
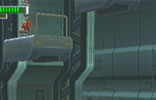
Foot Parts I Location: Booster Forest Doubles jumping height You'll need the Chimera Robot Ride Armor to reach this capsule. Just after leaving the first room with waves of Robot Ride Armor foes, Pallette will inform you that something interesting hides out above. Destroy the two bomb-toting Bulbrites and use the lift ahead to raise the Chimera Armor up the tall platform. If you've got Axl on your team, use his hover ability to find a platform over on the far left with its right edge covered in spikes. You'll need to go back to the right and use the Chimera Armor to air dash over to the platform as far as you can before bailing out to clear the spikes. Zero's double-jump should do the trick, so have him and X on your team. It might take a few rounds to reach the capsule, so be sure to have a Prickle Barrier in your inventory. |
 |
Buster Parts I Location: Noah's Park New X-Buster charge attack (Beam attack) You'll have passed by this capsule's location during your first trip through Noah's Park, but until you've cleared one of the Maverick stages you won't be able to reach it. Once you've got access to Noah's Park again, simply proceed through the stage as before and eventually you'll reach the building where you used Zero's double-jump to get inside. This time there'll be a crate in front of the building and the once-sealed door will be open. Go inside to find the capsule waiting there. |
 |
Head Parts I Location: Primrose Damage enemies by jumping near them Make sure you've got Axl on your team for this capsule. Early on you'll find a few enemies skating around on spikes which Layer hints can be copied by Axl. Destroy one with the Copy Shot and grab the A-Trans capsule it drops. Later in the stage you'll find a room with three flying barrier-protected Reploids. In here Pallette will hint at an additional teleporter leading to an unkown location. Destroy the flying foes and touch the green switch on the left wall to rotate the room. Touch the green switch on the right wall to rotate the room again, and you'll now be level with a corridor filled with spikes leading right. Destroy the Reploid floating about in the corridor, then activate the A-Trans and walk over the spikes to drop down to a teleporter down a hole ahead. If you don't have Axl you can still make it through safely. Jump up the right wall and touch the switch to rotate the room again. Quickly dash right as you'll have blocks falling down from above. By rotating the room enough times you'll have sent one of the blocks from the large group down the spike-filled shaft. Rotate the room a few times again to send down a second block before following it down. You'll fall below through the spike-filled shaft and land on top of the blocks at the base. Just above on the left lies the hidden teleporter (and a red Metal below). Jump up and air-dash over to the teleporter to reach it safely. Inside you'll locate the capsule in a majorly cramped room. |
 |
Body Parts I Location: Metal Valley Reduces damage by half, stops knockbacks when hit (receive 1 Metal for each hit) During the initial run of this stage where the giant Mechaniloid chases you down, eventually you should spot a giant boulder blocking access to a hidden alcove as you climb the uphill terrain (it's behind a large bulldozer Reploid, and near a purple Metal). Once you turn the hunter into hunted, the giant Mechaniloid will break the boulder during its retreat. Use the Melt Creeper to easily destroy the fuel canisters blocking your way to open up clear access to this capsule inside. |
| Hermes Armor (H) Parts | |
|---|---|
| Please note: Only X can activate the capsules. | |
 The Hermes Armor gives X the X-Drive ability. When activated, this device will greatly increase X's mobility, jumping height, charge speed and number of charged shot projectiles. The Hermes Armor gives X the X-Drive ability. When activated, this device will greatly increase X's mobility, jumping height, charge speed and number of charged shot projectiles.X will become extremely frantic during the activation period, so don't use it unless you're in dire need of quick movement, such as when the giant Mechaniloid in Metal Valley chases you through the canyons. The effect wears off upon a full drain of weapon energy. |
|
 |
Buster Parts H Location: Troia Base New X-Buster charge attack (Triple shot) You'll need X's Squeeze Bomb weapon to find this. After clearing four of the training rooms, you'll find a large empty room where Pallette will inform you of something interesting above which is blocked by a wall only penetrable by a black hole. Jump up to the wall blocking the capsule, then use the Squeeze Bomb to easily blow your way through. |
 |
Body Parts H Location: Pitch Black Become invincible to weak enemy attacks Late in this stage you'll find different shafts filled with lasers and lifts moving crates down below. Eventually you'll reach one where Pallette mentions that it's taller than the others (it's also the final shaft before the boss room). Instead of dropping down below, ascend the shaft (watch out for the lasers) and you'll find an opening in the right wall at the top. Inside you'll find this capsule. |
 |
Head Parts H Location: Central White Decreases X-Buster charge time Zero's double-jump will be needed to reach this capsule. Right at the end of the stage just after your Ride Chaser blows open the entrance to Avalanche Yeti's hideout, proceed past the tall gate and you'll spot a large platform above outside the building. Use Zero to reach the top of the platform where you'll find a tall wall of solid ice blocking the path. Alia will hint that you need extreme heat to break through, use the Tenshouha or X's Shining Ray to melt the ice easily. Beyond you'll find the capsule. |
 |
Foot Parts H Location: Inferno Increases movement speed While descending the tall shaft filled with spikes and pipes, you'll see this capsule in plain view but out of reach. Keep going down, then once you encounter a Reploid generating an electrical field around itself, destroy it and head left. You'll find an opening leading skyward up the left wall, so carefully climb up while avoiding the spikes on the walls to reach the capsule's alcove. |
Special armor suits
| X's Ultimate Armor | |
|---|---|
 |
X's Ultimate Armor bears the familiar characteristics present since its debut in X4. With this armor you'll have the ability to perform the Nova Strike and Shouryuuken attacks (see X's Weapons for more details). The armor will also grant X a higher jump, the Plasma Shot (charged shot leaving trails of energy over struck enemies), invulnerability to energy weapons while dashing and unlimited ammo for his special weapons. You can unlock this baby via one of two methods. Clear the game on either Normal or Hard mode and start up a New Game +. Then develop all of X's chips to bring him up to 100% (if you hadn't already in the previous game), the armor will become selectable on the character select screen when you choose the Neutral Armor. You can also unlock the armor via a special code, check the hints and tips page for more details. |
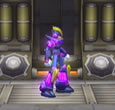
| Zero's Black Armor | |
|---|---|
 |
This armor gives Zero his black appearance, while it also slightly increases his ground dash distance. Unlock the armor by completing the game on Normal or Hard mode and selecting New Game +. Power up Zero to 100% to make the armor selectable on the character select screen (select the "???"). Alternatively, use the special code in the hints and tips page to unlock the armor instantly. |
| Axl's White Armor | |
|---|---|
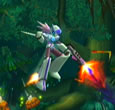 |
Not to be left out, Axl can receive a special white armor suit. With this equipped he'll be able to hover indefinitely on the spot while firing any weapon, and will also have unlimited special weapon energy while using his A-Trans unit to assume different forms. Unlock it by first using Axl to deal the final blow to Lumine's Final Form on Normal or Hard mode, then power up Axl to 100% in a New Game + session. Take it for a spin by selecting the "???" on the character select screen when choosing Axl. Or use the special code in the hints and tips page to unlock the armor. |