
Bosses Guide
Each boss character has been analysed and their attacks patterns recorded below. Specific tactics for each of the Hunters is noted, giving hints and offering ideas to take advantage of their unique abilities.
The list is organized in such a way as to allow you to exploit a bosses' weakness and use the correct special weapon or technique to defeat them with. Bear in mind that the order is also only one suggestive method for successful victories, as you're free to take them on in any order.
| Note on Double Attacks |
|---|
| Double Attacks give you a great chance to take off a sizeable chunk from a bosses' health. Keep in mind that you'll need to fill up the Attack Gauge to recover a lost character if they lose all their health. If you use the Double Attack when a boss is low on health you'll score a Double Attack victory, signified by the "EXF" icon beside the stage's name on the post-mission report screen. |


| Crab Mechaniloid | ||
|---|---|---|
| Stage: Noah's Park | Weakness: X-Buster / Z-Saber | |
| X's Weapon: N/A | Axl's Weapon: N/A | Zero's Technique: N/A |
  |
||
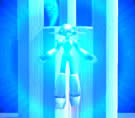
| Boss attacks and general strategies: The final battle against the crab will see you face off in a classic 2D platform environment. Despite the mechaniloid's size you'll have plenty of room to move around, the situation only becomes tricky if it corners you against a wall. The crab will initally begin on the far right of the room after blowing out a makeshift door in the background. It'll begin slowly walking forward with a single claw open to defend itself. Try shooting the claw and it'll deflect your shots easily. Upon trapping you against the left wall your character will be on the receiving end of a quick series of stabs from the crab's claws, so ascending the wall as it closes in will ensure evasion. After delivering a few stabs, the crab will jump backwards before raising its defense claw and walking forward again. If you manage to leap over the crab while it attacks up against the wall, it'll simply spin around and continue walking forward to repeat its defense-attack cycle. By using barrier-breaking attacks to stun the crab and make it vulnerable, you'll have a great chance to use the Double Attack (shoot the crab's body and it'll drop attack gauge refills) to finish it off. You'll know you've dealt the final blow if the swarming matrix in the background appears orange rather than green. X's strategies: Before you can actually inflict damage on the crab, you'll need to deliver a fully charged shot from the X-Buster to the crab's face to break its claw defense. With a successful hit it'll reel back and lurch forward, temporarily stunned. Take this opportunity to let rip more damage, blasting the face with single or charged shots to drain its energy. Eventually it'll recover and march forward again, deliver another charged shot to stun it again. Keep this routine up and use the Double Attack to finish it off. Zero's strategies: Zero needs to deliver three strikes against the crab to disable its defense barrier, so you'll need to time your hits so as to avoid being stomped on by the crab as it marches forward. Stand back as far as you can while striking the claws, and quickly switch to X and dash away if you're hit to recover some energy. Once disabled, keep slashing the crab to inflict small pockets of damage before it regains its footing. Don't hesitate to switch to X if you're having trouble keeping out of its way while disabling the barrier, as X's long range shots make for an easier fight. |
||
| Bamboo Pandamonium | ||
|---|---|---|
| Stage: Booster Forest | Weakness: Melt Creeper / Flame Burner / Enkoujin | |
| X's Weapon: Green Spinner | Axl's Weapon: Blast Launcher |
Zero's Technique: Youdantotsu |
  |
||
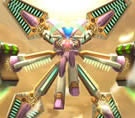
| Boss attacks and general strategies: You'll battle Pandamonium in a large outdoor environment, so there'll be plenty of room to move around. Keep in mind that it's possible to bring along a Ride Armor to fight this boss with, refer to the Booster Forest Stage Guide for tips. Due to Pandamonium's size he'll pack a heap of large-scale attacks, so be ready to move around quickly. Frequently he'll discharge large green missiles which grow as they slowly fly forward and up out of the screen, but their slow speed allows you to easily jump over as they pass by (you can actually just stand still and they'll pass over your head). Watch out if he begins pounding the ground. You'll see small puffs of dust appear all over the floor before a drill appears in the ground at each point. Stay clear of them as they'll soar up the screen revealing huge green invulnerable poles. Pandamonium will then begin walking across the screen, quickly jump up one of the poles and as soon as he's about to crush the one you're on, air-dash over him to safely avoid damage. He'll then proceed to launch more missiles, keep moving as you jump over them as they can fly straight down out of the sky without warning. His other attacks include an extremely rapid succession of punches, stay right back as his blades can really tear a chunk of your health away. If he leans over he'll lob a few large grenades out of his back, predict where they'll land and stand clear. The Melt Creeper / Flame Burner / Enkoujin is Pandamonium's weakness, keep in mind that these attacks can also breach the tall green poles (generally a boss will dance about in a comical way when hit by their critical weakness). Regular attacks also work well against this boss, just keep your distance at all times. Overdrive: Upon reaching critical health, Pandamonium will summon an extra charge of energy before unleashing a massive lunge attack with his claws. One hit is all it takes to lose your character, so you'll need to avoid contact at all costs. Pandamonium will charge all the way across the screen if you're standing way back, so you'll need to stand closer to him and jump away at the last second to stop him from charging all the way (precise timing is required though). Next he'll continue firing missiles rapidly, with others raining down from above. Also watch out for his double-grenade launcher. Don't stop attacking him and keep moving, you don't want to be cornered at all. X's strategies: X can use the Melt Creeper to breach Pandamonium's green poles, also bear in mind that the fire will keep going as it destroys the poles, eventually reaching the boss. As the first Maverick listed in this bosses guide, you won't have that weapon yet, so stick to charged X-Buster shots and use the poles plus air-dashes to avoid touching Pandamonium as he walks across the arena. Zero's strategies: Zero's double-jump allows him to cleanly pass over Pandamonium as he marches across the arena, so use it wisely to avoid becoming cornered. Zero's Enkoujin delivers severe damage to this boss, but unfortunately you'll need to be right up against him to land a blow with the downward strike, so time your attacks carefully and lunge backwards if he begins punching. Without the Enkoujin stick to standard swipe attacks, again retreating when he uses melee attacks. Axl's Strategies: Axl's Flame Burner weapon works well against Pandamonium, but bear in mind that you'll need to be reasonably close to hit him and that it won't inflict as much damage as X's Melt Creeper. Without the Flame Burner you'll need to stick with supressed fire, just watch out for the missiles and grenades when hovering and use the hover to fly over Pandamonium as he stomps across the arena through the green poles. |
||
| Optic Sunflower | ||
|---|---|---|
| Stage: Troia Base | Weakness: Green Spinner / Blast Launcher / Youdantotsu | |
| X's Weapon: Shining Ray | Axl's Weapon: Ray Gun | Zero's Technique: Tenshouha |
  |
||
| Boss attacks and general strategies: Optic Sunflower has the ability to rearrange blocks around the room, so you'll have a chance to use them to your advantage. At first this androgynous boss will laugh and the screen will turn bright white. Upon reappearing you'll spot two green blocks planted randomly in the room. Sunflower will then be pulled into the ground by some vines before reappearing somehwere else in the room. He'll then discharge an enourmous green beam that scans across the room and is deadly to touch. Use the green blocks to avoid the beam, as it passes by a block the beam will cut off, giving you an alcove either above or below the block to hide in. Once the beam disappears Sunflower will dig into the ground and reappear somewhere else again before emitting the beam again. Use the Green Spinner / Blast Launcher / Youdantotsu while Sunflower's vulnerable, with each blast he'll retreat into the ground and reappear elsewhere. After enough hits he'll try to trick you by creating an illusion of himself as he digs out of the ground, so watch for the real one. Eventually he'll rearrange the blocks in the room, before jumping up and sweeping a beam around in a clockwise direction. Once again use the blocks to avoid the beam. He might also create an odd rainbow-colored ball to bounce around the room, if you touch it you'll become caught inside so call in your reserve character to break free. If Sunflower changes the blocks to a single block in the center he'll begin to emit two tracking lasers, so be on your toes and attack often. Overdrive: On critical health Sunflower will rearrange the blocks one final time before creating a purple tracking laser. The beam will track your movements while it focuses in and upon becoming a thin line a massive energy beam will pelt down from above. Wait until the last moment as the tracking beam focuses before dashing out of the way of the incoming beam. He'll also produce two illusions as he digs out of the ground, as well as throwing more capture balls around the room. Use the blocks for cover against his dual green lasers, keep in mind they'll be moving around much faster than before. X's strategies: X's Green Spinner works a treat on Sunflower, just remember to fire it at him while he's vulnerable and not digging into the ground. Always use the blocks for cover against his lasers, but if you're quick enough in firing missiles as he appears out of the ground you can stop him from emitting them. Watch out during his Overdrive attacks and try to concentrate on filling his face with missiles. Zero's strategies: Zero's Youdantotsu delivers enough damage to Sunflower, just be wary of your distance from him as you initiate the attack. If you're too close you might touch the boss and take damage yourself, so be aware of this technique's motions. You'll only be able to use it while Sunflower's on the ground, so use simple slashes while he's up on the blocks, or switch to your reserve character to keep your attack sequence up. Axl's Strategies: The Blast Launcher works great against Sunflower, especially with the latent explosions each grenade produces. Go to town with this weapon, firing it madly as Sunflower appears out of the ground. Use your hover to carefully avoid the balls as they bounce around, instantly call in your reserve character if you're caught. |
||
| Dark Mantis | ||
|---|---|---|
| Stage: Pitch Black | Weakness: Shining Ray / Ray Gun / Tenshouha | |
| X's Weapon: Shadow Runner | Axl's Weapon: Black Arrow | Zero's Technique: Rasetsusen |
  |
||
| Boss attacks and general strategies: The very nature of Mantis' morphology will see him jumping off the walls around you for most of the battle. Watch out when he laughs and launches a single arrow projectile, it has a limited homing capability so remain a moving target. Stay back from his discrete movements, as he'll move about unpredictibly and use a variety of jump attacks. Stay away while he's on the ground or you'll find yourself on the receiving end of his claws as he performs a dash attack. His weakness is the Shining Ray / Ray Gun / Tenshouha, so break them out and use them. Once Mantis generates flames around himself, he'll launch around the room at high speeds, so it'll be difficult to avoid a collision. Stay on the ground to avoid his launching back and forth, and be especially careful to avoid his lunge attack. If you're caught quickly call in your reserve character as Mantis will not only immobolise you, he'll slowly refill his own life energy with yours! Take care if Mantis drops to the ground and launches several arrows up into the air, they'll come crashing down and stick in the ground, be sure not to touch them. Overdrive: Dark Mantis will jump up into the center of the room and charge up energy before engaging his Overdrive attacks. He'll begin with a massive claw swipe attack, so watch for the direction he'll swipe in and immediately dash underneath him to the opposite side to avoid the wave. Watch out for a second swing, just dash to the other side to avoid it. He'll then commence his jumping movements, all the while make sure he doesn't grab you or you'll be immobolised while he refills energy (call in your reserve Hunter). He'll also launch more arrow projectiles at a faster rate, keep moving to avoid them. X's strategies: Due to the nature of the Shining Ray's fire mode it'll be difficult to land a hit on Mantis. An easy option is to stand next to him and land a hit with a diagonal beam, but you'll leave yourself open to a claw swipe so try to keep your distance instead. As Mantis will be jumping back and forth across the room, keep firing the weapon and you'll surely catch him in mid-air. Once he begins jumping back and forth across the walls, stay in the middle of the room and keep firing, just dash out of the way if he comes crashing down after taking a hit. Zero's strategies: Zero's Tenshouha delivers stronger blows to Mantis, the downfall is you'll only have a few rounds to unleash. The best time to perform the attack is while Mantis jumps back and forth across the walls, he'll easily intercept the beam in mid-air. Once your weapon energy runs dry, just stick with the Z-Saber but don't stand still too long or Mantis will either slash or grab you. Axl's Strategies: Axl can easily land hits on Mantis with the Ray Gun, the only caveat is that each hit won't cause much damage. You'll need supressive fire to inflict any serious damage, so keep your distance at all times and spray the air with fire, Mantis shouldn't be able to dodge your shots easily. Watch out during his Overdrive attacks, use Axl's hover as Mantis runs around on the ground to stay clear. |
||
| Gravity Antonion | ||
|---|---|---|
| Stage: Primrose | Weakness: Shadow Runner / Black Arrow / Rasetsusen | |
| X's Weapon: Squeeze Bomb | Axl's Weapon: Spiral Magnum |
Zero's Technique: Juuhazan |
  |
||
| Boss attacks and general strategies: This little fella can rotate the room at will and summon huge blocks to attack you with, so you'll need to judge where to move to as the room rotates. Take care if Antonion climbs up a wall and burrows into it, he'll reappear underneath the block and throw it at you. If he rotates the room (usually by 180 degrees), make certain you won't end up below the block as it falls down. If the block happens to fall on him he'll just pick it up again and throw it. Antonion's weakness is the Shadow Runner / Black Arrow / Rasetsusen, with each hit he'll drop off the walls or ceiling so make sure he doesn't fall on you. Upon charging up flames around himself, Antonion will produce a huge purple vortex in the center of the screen. This hole can't actually injure you, but it can block your weapon fire, limiting your attack range. Take care if he runs up a wall and ejects a green bubble, upon touching you it'll immobolize you so call in your reserve character to break free. If you dodge it successfully it'll bounce off a wall once before breaking up into two smaller bubbles; stay clear as they too can immobolize you. Also watch out for Antonion's swipe attack where he pulls out a long pole to swing at you with. Keep in mind Zero's Rasetsusen can destroy Antonion's blocks, useful for taking them out as they crash down on top of you. Overdrive: Antonion's Overdrive attacks consist of increased frequencies of giant blocks and fast movements. He'll begin by summoning a barrage of blocks above to rain down on you. Time your movements carefully to avoid each block as they alternate between one another. You might notice that Antonion himself disappears during the attack, he'll eventually reappear in the center of the room once the blocks cease to appear. He'll then create the giant vortex and summon a single block. Take care to avoid Antonion as he streaks around the room, and watch out for the block falling down as the room rotates. Keep berating him with fire to try and stop him from launching two green bubbles, if not they'll be difficult to avoid. Concentrate your fire and you should eliminate him without much trouble. X's strategies: X's Shadow Runner delivers a strong-enough hit to knock Antonion off the walls, the only trade-off is that you'll need to be fairly close for the projectile to home in on its target. Wait for Antonion to recover after each blast before firing again, and bear in mind that the Shadow Runner passes through the vortex unhindered. Concentrated fire from the X-Buster and charged shots also work well, especially during his Overdrive attacks. Zero's strategies: Naturally you'll need to attack Antonion up close and personal, but with Zero's Rasetsusen your job is made significantly easier. Deliver the attack whenever you can, you'll find it easiest when Antonion clings to a wall. Take every chance to score a hit and always keep in mind that only Zero can destroy Antonion's blocks with the Rasetsusen technique. Axl's Strategies: Axl's Black Arrow can strike Antonion from far distances and can even pass through the vortex unhindered, the only drawback is that it won't cause as much damage as X's Shadow Runner. Nevertheless, sustained fire can do the trick, especially if you time your hits to disallow Antonion from performing an attack. |
||
| Earthrock Trilobyte | ||
|---|---|---|
| Stage: Metal Valley | Weakness: Squeeze Bomb / Spiral Magnum / Juuhazan | |
| X's Weapon: Crystal Wall | Axl's Weapon: Bound Blaster | Zero's Technique: Rekkyoudan |
  |
||
| Boss attacks and general strategies: The first thing you'll find with Earth Trilobyte is that his hard shell blocks standard fire easily. You'll need to use the usual trick to break his barrier (charged shots from X, three slashes from Zero or sustained fire from Axl) or exploit his weakness to break it instantly. You'll notice that if you use a standard attack to break his barrier, his armor drops off and lays motionless in a corner. Eventually after looking around frantically, Trilobyte will walk over and pick it up again. But if you use his weakness against him, the armor will break apart and he can't recover it. Watch out for his small blue projectiles, they'll bounce off the walls so you'll need to watch your back. Whenever he screams "Crystal Wall!", keep jumping as one or two orange walls will appear somewhere in the room (the particles of energy reveal where they'll appear), you don't want to stand near them as they crash over. Eventually he'll begin rapidly alternating between firing two blue projectiles and a pair of orange walls, so you'll need to keep moving throughout the battle. His weakness is the Squeeze Bomb / Spiral Magnum / Juuhazan, bear in mind that these attacks (apart from Axl's Spiral Magnum) can also nullify his projectiles and destroy the orange walls. As mentioned earlier, a single hit on Trilobyte will also permantently destroy his protective armor. Break through his defenses and sustain your fire all the while keeping an eye out for any projectiles breaking through your attacks. Overdrive: Upon charging up his remaining energy, Trilobyte will instantly begin sending a series of purple walls towards you. They'll cover the room from floor to ceiling, so you'll need to jump through the gaps between each round to avoid becoming crushed up against the left wall. Your special weapons can't break through these walls, so you'll need to outlast the barrage. Upon clearing the purple wall onslaught, Trilobyte will expel three blue projectiles before summoning more orange walls. They'll appear frequently, so your best bet is to keep firing your special weapon to take out the flying projectiles, but steer clear of the walls as you can't destroy them anymore. Use this time to land more hits on Trilobyte, only a few more will finish him off. X's strategies: X's Squeeze Bomb can easily break through Trilobyte's early attacks and destroy his armor permanently. Take care when standing near the orange walls though as you can only fire one vortex at a time. With X's enhanced jumping height you'll find it easier to jump over the purple walls Trilobyte sends out during his Overdrive attacks, just take your time and only fire the Squeeze Bomb when he's open to attack. Zero's strategies: Zero's Juuhazan can easily make short work of Trilobyte's armor and simple attacks, just take care as there's a delay before Zero actually swings his weapon. The D Glaive allows you to stand further back when attacking with its larger swing radius, so try sticking with it the entire battle. Use Zero's double-jumps during Trilobyte's Overdrive and only perform the Juuhazan when you've got a split-second to wind up the attack beforehand. Axl's Strategies: The Spiral Magnum can easily take out Trilobyte's armor and inflict heavier damage, just bear in mind that his shots can't destroy Trilobyte's walls and projectiles, instead they'll pass straight through them. You'll need sustained fire as each shot only takes a small amount of his health, and keep moving around as the walls appear. Try to avoid his projectiles and stay up the opposite wall if too many orange walls litter the floor. If there's too many walls and they don't fall over, use a different weapon or character to knock them down from a safe distance or while up on the wall. |
||
| Gigabolt Man-O-War | ||
|---|---|---|
| Stage: Dynasty | Weakness: Crystal Wall / Bound Blaster / Rekkyoudan | |
| X's Weapon: Thunder Dancer | Axl's Weapon: Plasma Gun | Zero's Technique: Raikousen |
  |
||
| Boss attacks and general strategies: Upon chasing Gigabolt down you'll face off against him atop a floating platform. Steer clear of both edges as if you fall off it's lights out. Gigabolt's odd body allows him to float around the screen, so always be on the lookout for his diving attacks. If he hovers just above the ground before lunging, stay in the center of the platform and don't move, he should bob clean over you. If he floats high up the screen instead, stay in the center and jump clean as he dives down. Watch out if he charges up electrical energy in his hands as he'll promptly discharge a field of electricity. Stand on the very edge of the opposite side to avoid damage. Upon delivering enough damage, Gigabolt will charge up flames around himself before rapidly spinning. He'll generate six small jellyfish creatures, each of which hover about and slowly fly around the screen. X & Axl can push them back with single shots, while Zero can completely destroy them with the Rekkyoudan. Watch out if Gigabolt flies up to the top of the screen, as he'll promptly extend his arms down to each corner, trapping you inside an electric barrier. Don't touch the electricity connecting his arms to his body, instead attack an arm to disengage the electric fields. Gigabolt's weakness are the Crystal Wall / Bound Blaster / Rekkyoudan weapons. For X & Axl, their weapons can also destroy the small jellyfish. Due to the nature of Zero's Rekkyoudan, all you'll need to do is hit Gigabolt with a standard swing to inflict significant damage. Try to attack him as frequently as possible to stop him from attacking back and stay well clear of the pits on either side of the platform. Overdrive: As soon as Gigabolt's Overdrive kicks in, he'll move to the top of the screen. Watch the ground carefully and you'll spot small blue shimmering particles swirling about in several places. You'll only have a split second to stand where the particles aren't, as Gigabolt will release a massive bombardment of electrical energy. If you're standing where no particles appeared you'll safely avoid the attack. He'll release another two rounds, so keep moving to safety. Upon clearing the final round, Gigabolt will unleash a horde of jellyfish everywhere, just keep destroying them with your special weapon to avoid becoming overrun. Take extreme care if some of the jellyfish merge together to create a larger form, as it'll immobolise you if you're caught, prompting a quick character switch to break free. The larger jellyfish will also become barrier-protected, upon breaking it they'll revert back to individual jellyfish. Gigabolt will also use his arm-launching trick again, simply attack his arms to break out. Attack Gigabolt as often as you can, with the right weapons he won't be a match for you. X's strategies: X's Crystal Wall works wonders on Gigabolt, the only drawback is that you'll need to stand still on the ground to discharge the weapon, and Gigabolt will need to be lower down for it to reach him. A great trick is to release it right in front of him as he hovers on one side of the platform and push it over to strike him. Keep in mind that the Crystal Wall can also destroy his jellyfish, plant the wall in the middle of the platform and wait for the jellyfish to fly into it to clear them out easily. You'll have a hard time hitting him as he attacks from up at the top of the screen, so stick with charged X-Buster shots to keep the damage rolling. Zero's strategies: Zero's Rekkyoudan isn't strictly an attack (it allows him to deflect energy shots back at enemies), so all you'll need to do is attack Gigabolt normally. Any weapon will do, bear in mind the D Glaive can easily rip through Gigabolt and shred his hordes of jellyfish in a single swing. Axl's Strategies: With Axl's Bound Blaster, you can strike Gigabolt from anywhere on the platform. With each hit Gigabolt will become invulnerable for a few seconds, so a constant stream of fire won't work as well as manual bursts. Axl can easily take out the jellyfish, try to concentrate on timing your shots to hit Gigabolt continuously when he's open to attack. The Bound Blaster won't inflict as much damage as X's Crystal Wall, but with persistence you'll easily take Gigabolt down. |
||
| Avalanche Yeti | ||
|---|---|---|
| Stage: Central White | Weakness: Thunder Dancer / Plasma Gun / Raikousen | |
| X's Weapon: Drift Diamond | Axl's Weapon: Ice Gattling | Zero's Technique: Hyouryuushou |
  |
||
| Boss attacks and general strategies: You'll battle Yeti inside a huge room partially filled with snow which he'll use to his advantage. Much of Yeti's attacks will involve him charging straight at you, so you'll need to use the walls to jump clear. Once the battle begins quickly jump up the left wall as Yeti will charge at you. Jump over him once he reaches the wall, as he'll jump up and begin shooting large icicles around. Back and forth across the room he'll continue to charge at you to either ram you against the wall or fire his icicles, so keep using the walls to jump clear (but stay off them if he slams up against a wall). Keep in mind that with any weapon you can easily destroy his ice projectiles. Upon delivering enough damage, he'll generate flames around himself (not very locigal for an ice boss) and dig down into the snow. You'll easily be able to track him via the snow particles moving around, try your best to stay away. Quickly climb up a wall and just before he reaches you air-dash away, as Yeti will promptly jump up out of the snow with an uppercut style attack. You'll need to time your air-dash precisely to avoid Yeti's uppercut as he streaks up the screen very quickly. He'll mostly concentrate on using the uppercut from now on, so you'll need to attack him before he disappears under the snow. Also watch out if he produces small blue particles around himself, as he'll jump up and fly straight down at you. Sticking near a wall can give you an easy escape. Yeti's weakness are the Thunder Dancer / Plasma Gun / Raikousen weapons. With each hit he'll drop to the floor, stunned for a few seconds, but you can't hit him again until he ceases glowing. Constant movement and timing are the key here. Overdrive: Upon engaging his Overdrive, Yeti will expel a blast of cold air from his back up into the sky. Once finished he'll commence dashing around using his normal attacks. But watch out as huge deadly snowflakes will begin to float down from above. Take them down before they touch you with either Yeti's weakness or any other weapon. They'll continue to flutter down, so you'll need to keep moving. Yeti will move around much faster than before and alternate between his ice projectiles, dashing and uppercut attacks. You'll have a hard time avoiding him, so instead concentrate on finishing off his remaining life energy as quickly as possible. X's strategies: X's Thunder Dancer gives Yeti enough of a jolt to stop him in his tracks. With each hit Yeti will fall to the ground and emit a faint white glow, indicating that you can't inflict further damage until it fades away. The Thunder Dancer doesn't have much in terms of range, so you'll need to move fairly close to strike him. A great technique to use once Yeti begins uppercutting is to wait up on a wall until he's just about to reach you, then jump away and nail Yeti in the back as he rises up. X's enhanced jumping and dashing will also greatly assist in avoiding Yeti's attacks. Zero's strategies: Zero's Raikousen move can be tricky to perform, but with proper timing you can pull off some very stylish hits on Yeti. Bear in mind that Zero's invulnerable when he disappears just before unleashing the attack. Don't use the Raikousen all the time or you'll open yourself up to attack, instead stick with regular strikes and use it when you know you'll score a hit. When Yeti begins his uppercut attacks, with some excellent timing you can climb up the wall, air-dash away and perform the attack just at the right time so Yeti lunges up into the Raikousen's electrical beam - it's very rewarding to see. Stick to regular strikes as Yeti reaches his Overdrive mode, you don't want to lose droves of health while trying to pull off the Raikousen. Axl's Strategies: The Plasma Gun is much like X's Thunder Dancer in that it only has a short range. You'll need to move in close to hit Yeti, but with Axl's ability to fire in any direction you should find the Plasma Gun useful regardless of its weaker damage ratio. Once Yeti moves into Overdrive mode, taking down the floating snowflakes is extremely easy, simply jump up, hold fire and point in the direction the snowflakes are to wipe them out. Keep in mind that you'll still be able to hit Yeti while he digs through the ground, stopping his uppercut move altogether. |
||
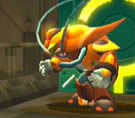
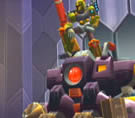
| Burn Rooster | ||
|---|---|---|
| Stage: Inferno | Weakness: Drift Diamond / Ice Gattling / Hyouryuushou | |
| X's Weapon: Melt Creeper | Axl's Weapon: Flame Burner | Zero's Technique: Enkoujin |
  |
||
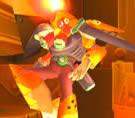
| Boss attacks and general strategies: You'll locate Burn Rooster at the very base of a giant magma shaft. He'll be hanging around in the background kicking the snot out of a pylon for reasons only he knows. Upon spotting you and emitting a sharp "kaw!" he'll jump over and face you. Watch out as he hovers around above, after hovering into the center of the room and performing a quick somersault he'll engage a fast flame kick in which he'll fly back and forth bouncing off the walls. Watch his movements and use the walls to avoid damage. Upon landing stay behind Rooster as he'll kick the ground which sends flames charging along the floor. He'll spend most of his time hovering around, so be on your guard for any telltale signs of his kicking attacks. Keep moving every time Rooster takes off above the screen as he'll often try to come crashing down right on top of you. Eventually with enough damage inflicted against him Rooster will jump back into the background to stand atop the pylon. He'll begin glowing and hover above the ground while the screen begins shaking. The five sections of the floor will begin to rise up and down, eventually Rooster will jump back into the room once the floor ceases to move. Watch out for his ground kick attack, but you'll notice that if the flames fall into a recess in the floor they won't be able to continue onwards. Take care when the floor sections begin moving again, after a short time they'll re-align themselves. Stay well clear from Rooster for now as he may kick the floor again, but instead of sending out flames he'll belch fire at you. Also keep an eye out for a spinning flame attack as Rooster flies about the screen, keep yourself moving to avoid the flaming projectile. Burn Rooster's weakness is the Drift Diamond / Ice Gattling / Hyouryuushou. Due to his hovering patterns it should make him an easy target. Overdrive: Upon reaching his Overdrive mode Rooster will leap up out of the screen before plummeting back down in the center. He'll be glowing at this point so you can't strike him yet. Make sure you stay behind him as he'll spew a torrent of flames which cover the half of the room he's facing. Don't climb up the wall Rooster's facing as upon finishing his barrage the flames will coalecse into a huge pillar of fire up against the wall. Rooster will then turn around and repeat the same pattern for the other side of the room, so quickly jump over him and stay between him and the first fire pillar. While the second fire pillar rises the floor will begin to rise itself, leaving you with a very small amount of room to move around in. Keep attacking Rooster all the while, and watch out for his aerial kicks and flame breath. The center sections of the floor will eventually recede down into the ground, giving you more room to move in. From now on the central floor sections will randomly move, while the two flame pillars won't disappear so you're restricted to the center of the room. Keep attacking Rooster without delay and use the moving floor sections to your advantage. X's strategies: X's Drift Diamond works well against Rooster, knocking him to the floor with each hit. Due to the nature of the weapon's firing trajectories, you can't hit Rooster while standing in front of him. Instead, while he's hovering around try to get 45 degrees (diagonally) under him so the higher of the two ice projectiles strikes him. Same goes for when he's grounded, just jump up and fire so the lower shot scores a hit. Once his Overdrive mode begins and the central floor sections begin moving you might have difficulty hitting him as he moves around the bottom of the screen, just wait until he's hovering again to score another hit. Zero's strategies: The Hyouryuushou technique can easily bring Rooster down to the ground, just keep in mind that you'll need to aim Zero so that his Saber strikes Rooster slightly to the side so Zero himself doesn't make contact. Naturally the D Glaive's range will give you a much wider strike radius so you won't need to attack so close. While Rooster stands on the ground performing either his flame breath or flame kick attacks you'll have plenty of time to stand behind him and perform the attack, easily avoiding physical contact. With the floor sections moving up and down randomly in his Overdrive mode, you might find it difficult to use the technique so stick to standard swipes to finish his health off. Axl's Strategies: With the rapid fire of Axl's Ice Gattling you'll be able to strike Rooster from anywhere in the room. Once again the major drawback is that it won't deliver as much damage as X's Drift Diamond, but if you're quick in avoiding Rooster's attacks it's a worthy trade-off. Try to completely avoid Rooster's early attacks in the leadup to his Overdrive mode, you should also find Axl's ability to remain attached to a wall while firing an extremely handy technique. While successfully avoiding Rooster's attacks, it's possible to get Axl through this battle without losing a shread of health. |
||
| Vile | ||
|---|---|---|
| Stage: Various stages (all 8 Maverick stages) |
Weakness: Drift Diamond / Ice Gattling / Hyouryuushou | |
| X's Weapon: N/A | Axl's Weapon: N/A | Zero's Technique: N/A |
  |
||
| Boss attacks and general strategies: Riddled throughout every stage are rooms where you'll face waves of different types of enemies. Sometimes instead of tackling enemies you'll face Vile and need to defeat him before moving on (Layer will warn you of his presence prior to entering the room). He won't have a health bar so you'll need to just keep attacking him until he gives up and retreats. He'll spend most of the time hovering around the room, diving at you often and firing electrical balls everywhere. Each time you fight him he'll use different projectile attack patterns. Sometimes he'll emit three balls that fly out over a wide arc, simply stay back and sneak through the gaps to avoid them. If he pumps out a torrent of single balls at a time they'll fly straight at you so you'll need to use the opposite wall to continually evade his shots. Try to lure the shots up into the top corner and drop down to avoid them and vice versa. Get behind Vile as he floats around the center of the room for a clear shot. Don't stop attacking Vile, and if you have the Drift Diamond / Ice Gattling / Hyouryuushou by all means use them. With each hit Vile will glow invulnerable for a short time, take care though and stay still as he oddly seems to try and intercept you if you move around too much. Hold out against Vile for long enough and he'll crash to the ground before skirting off. X's strategies: Vile's extremely easy to hit with X's Drift Diamond as he'll be floating around the room most of the time. Stay clear of Vile as he crashes to the ground with each hit, and try to time your strikes to hit him just after his invulnerable glowing period ends. Charged X-Buster shots also work well, especially if you can get behind him as he emits electrical balls. Zero's strategies: Vile floats around the room most of the time, giving you a great chance to bring him down with the Hyouryuushou technique. Use it as often as possible, and try out the D Glaive with its wide attack radius. Otherwise, standard Z-Saber swings work best, especially when Vile's grounded. Axl's Strategies: Axl's Ice Gattling can strike Vile from anywhere in the room, so make sure you're clear when he crashes to the floor. Time your shots to keep him grounded and to slow down his electrical ball attacks. Any other of Axl's weapons also work effectively with Vile, especially the Ray Gun. Get behind Vile and he'll be in for a world of hurt. |
||
| You'll tackle these following bosses in the final three stages. |
| Vile | ||
|---|---|---|
| Stage: Jakob | Weakness: Drift Diamond / Ice Gattling / Hyouryuushou | |
| X's Weapon: N/A | Axl's Weapon: N/A | Zero's Technique: N/A |
  |
||
| Boss attacks and general strategies: Atop the orbital elevator you'll face Vile, this time with a personal health bar. He'll spend most of his time ducking and weaving around the screen, so try to stay clear from his unpredictable movements. Watch out for his primary cannon attacks, all of which comprise of his signature electric balls. He'll fire a barrage of single shots straight at you, so try to stay on the ground and lure them towards you before jumping clear, or try to sneak through the gaps between each shot. Vile's triple-shot shouldn't prove much of a bother, just stand well clear and watch their trajectories from a distance. With enough damage dealt Vile will engulf himself in flames before diving at you again. Every time he finishes a round of electric balls he'll tend to swoop down to the opposite side of the screen, make sure you're not in his path. He'll begin firing homing balls which track you around the room, so try to lure them up high to sneak by below, or vice versa. Take extreme care if Vile lobs a small fireball down to the ground, it'll become a short pillar of fire and travel across the ground before becoming a plume against a wall. Wait for the fire to hit the ground then simply jump clear as it passes. Vile's weakness never changes across separate battles, so once again use the Drift Diamond / Ice Gattling / Hyouryuushou to bring him crashing down. Wait for the glow he emanates following a hit to subside, then simply whack him again to inflict heavy damage. Stand well clear of Vile as much as you can, and be ready to jump clear from his diving attacks at all times. Overdrive: With only a fraction of health remaining, Vile will hover to the center of the screen and summon a charge of electricity. He'll produce six long bolts of electricity before rotating them around himself. You'll need to stay in the safe gaps between each bolt, and watch out for any bolts sizzling out slightly to sneak through unharmed. The bolts will rotate clockwise before slowing to a stop and rotating counter-clockwise. Once he's done, Vile will eject huge plasma balls into the air which explode to produce a number of smaller electric balls. They'll all fly straight down at you, so be ready to move quickly. Watch out for more flame pillars, and take care if Vile lobs two large grenades into the room. They'll explode in the air while ejecting two of the electric field-generating reploids, make sure you're not caught in their fields (call in your reserve character to break free). Vile will continue his relentless attacks, so keep your attack routine up to put another dent in his ego. X's strategies: With the Drift Diamond, X can take Vile out of the sky extremely easily, just stand well back so the higher projectile scores a hit. Use the Neutral Armor with at least Body Parts I equipped during this stage, as you'll find his defense against knockbacks when hit invaluable. Standard X-Buster charged shots also work well, especially when he summons the electric field-generating reploids, as you'll want to take them out as quickly as possible. Zero's strategies: Take care with Zero's Hyouryuushou, as you don't want to perform the attack while Vile launches eletric balls around or you'll take a facefull of them. Wait for him to stop and quickly score a hit before he swoops to the other side of the screen. Use double-jumps to clear the homing balls, and break out the D Glaive and Rasetsusen once the reploids appear to take them out quickly. Axl's Strategies: Shoot Vile from afar with the Ice Gattling, you don't want to stand below him as he comes crashing down. Axl's hover works great to lure homing electric balls up high, lure as many as you can and simply drop to the floor to avoid damage. Only attack when he's vulnerable, concentrate on avoiding his attacks when you can't attack. Use the Blast Launcher on the reploids Vile summons, and if possible have the Shock Absorber developed to stop Axl from falling back when taking a hit. |
||
| Sigma Copy | ||
|---|---|---|
| Stage: Gateway | Weakness: Shadow Runner / Black Arrow / Rasetsusen | |
| X's Weapon: N/A | Axl's Weapon: N/A | Zero's Technique: N/A |
  |
||
| Boss attacks and general strategies: Back in the main hangar of the orbiting Gateway satellite, Sigma will finally reveal himself. After his speil about taking control of the moon to create his 'new world', (at which you're probably sick of Mavericks talking about) you'll finally have a chance to take him out. At first he'll charge up a dashing slash attack, so be ready to jump up the left wall to avoid it. Get clear from Sigma as he floats up and generates a large red charge of energy, you'll now need to very quickly break his barrier (you'll see the rainbow deflector if you shoot him). If not he'll unleash a massive wave of energy across the screen which bluntly can't be avoided. Break through his barrier with the any of the Hunter's standard weapons to drag him back down to the floor. Sneak in a few more hits while he's grounded but get clear and the up the opposite wall without delay as Sigma will sneak in another dashing slice. He'll return to the left of the screen to perform another energy wave, so quickly break his barrier again to stop the attack. With enough damage dealt he'll engulf himself in flames to break out his next round of attacks. Watch out for four small missiles Sigma launches, they'll slowly fly about the room, reflecting off the walls and floor. Blast or slash them to deflect them in the opposite direction, just watch out for more of Sigma's dashing slice while he tries to distract you with the missiles. Take him out quickly as he charges up more energy waves, just be ready to put as much distance between yourself and Sigma as he comes crashing down. Sigma's weakness is the Shadow Runner / Black Arrow / Rasetsusen, all of which work extremely well in close range. Concentrate on breaking through his barrier first before letting rip with your special weapons, and be on your toes, watching for Sigma's quick movements. Overdrive: Sigma's Overdrive will see him emit a sharp red laser from his face before he sweeps it across the floor. The entire floor section will light up in flames, so as soon as you see Sigma charging up his Overdrive make a break for the opposite wall. The ground's off limits from now on, so you'll need to hold out from the walls. Watch out for his missiles, Zero's D Glaive works well at sending them back at Sigma while defending your position on the wall. A few seconds after he launches the missiles, Sigma will perform another quick slash attack all the way up to your position, so try to stay as low as you can just above the flames before quickly jumping up the wall when Sigma lunges to avoid a nasty blow. Keep your attacks up all the while, you'll find long-range attacks work best while Zero defends the wall from Sigma's missiles best. Finish him off to find out what Sigma has in common with the other Mavericks of this stage. X's strategies: Make sure you've got one of the Body Parts equipped on X's Neutral Armor to avoid knockback's when hit during this battle. The Hermes Armor's Buster Part also makes your job easier to break through Sigma's barrier. Only use the Shadow Runner while he's vulnerable, you don't want to waste weapon energy. The projectile can reach all the way across the room, so be sure to use it during Sigma's Overdrive while you're stuck up on the wall. Zero's strategies: Zero will have a hard time taking out Sigma's barrier, try using the D Glaive to reach him while grounded. As soon as Sigma drops to the ground, jump as high as you can and perform the Rasetsusen to take a few more chunks out of Sigma before dashing off. The D Glaive can also ensure your defense against his small missiles, a single swing will send them off in the other direction. Zero will have an extremely hard time scoring hits against Sigma during his Overdrive, so try to use him mostly for defense against the missiles. Axl's Strategies: Axl will be slightly tougher to use against Sigma, as you'll need to switch between the Axl Bullet and Black Arrow to break through Sigma's barrier before dealing heavier damage with his weakness. On the flipside, Axl works extremely well during Sigma's Overdrive, as he can latch onto the wall while firing, so you'll have ample chance to keep ripping into Sigma. Just watch out for his missiles, and use Axl's hover to fly clear of Sigma's dashing attacks. |
||
| Vile (+Goliath) | ||
|---|---|---|
| Stage: Sigma Palace | Weakness: Drift Diamond / Ice Gattling / Hyouryuushou | |
| X's Weapon: N/A | Axl's Weapon: N/A | Zero's Technique: N/A |
  |
||
| Boss attacks and general strategies: Just inside Sigma's grand palace you'll have a final showdown with Vile. He's saved the best weapon of choice for last - the Goliath Ride Armor. Much like previous iterations, Vile will use the armor throughout the battle. The armor itself isn't more than a standard Chimera Ride Armor minus the stun cannon. Vile will begin atop his armor in which he'll dash and jump around the room in. Stay clear or he'll unleash a barrage of punches, which is ultimately the worst you'll get from his armor. Stay in the center of the room if Vile jumps and dashes back and forth, keeping clear and predicting his movements is a must. Jump up every time Vile crashes into the floor, as the weight of his armor will momentarily stun your character if grounded. To knock Vile off his portable throne you'll need to break through the armor's barrier with any standard barrier-breaking attack. With a single shot Vile will jump out of the armor while it moves into the background, disabled for now. Now on his own, Vile will float around the room discharging his blue electric balls. Three rounds will see them fly at you with different trajectories, one will arc down into the ground, while another spreads out across the room and finally homing balls will zero in on you. Keep your distance and use this time to attack Vile. His weakness is once again the Drift Diamond / Ice Gattling / Hyouryuushou, so once Vile's out of his Ride Armor don't delay in blasting away. Eventually Vile will glow and return to the Goliath, prompting you to break through his barrier again. After a few cycles Vile will change his electric ball attack patterns, with wider spreads and tougher homing attacks. Keep your attack routine up with disabling Goliath before taking care of Vile and you'll have him down in no time. If you're playing Hard mode, Vile's last hurrah will be a thorough caning of your reserve character, so you'll face the rest of the stage alone prior to facing Sigma. X's strategies: X's charged X-Buster shot works best in taking out Goliath's barrier, and once again the Drift Diamond works best against Vile himself. Stay clear as Vile drops to the floor, and keep in mind that the Icarus Armor's enhanced jump or the Hermes Armor's increased movement speed work well in avoiding Vile aboard Goliath. Zero's strategies: Use Zero's Juuhazan or Youdantotsu to easily break through Goliath's barrier (equip the D Glaive or Σ Blade for increased attack range) then simply break out the Hyouryuushou to ground Vile. Sneak in the attack just before he spews a round of electric balls or at the climax, as you don't want a faceful on the way up. Axl's Strategies: Axl's Blast Launcher works best in breaking Goliath's barrier, as all you'll need is a single shot. The Ice Gattling is fairly weak, so expect Vile to take a serious beating from it before giving up. Use Axl's hover to lure the homing balls up at the top of the screen before dropping down, just make sure Vile doesn't swoop by as you fall. |
||
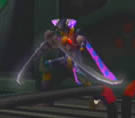
| Sigma | ||
|---|---|---|
| Stage: Sigma Palace | Weakness: Shining Ray / Ray Gun / Tenshouha | |
| X's Weapon: N/A | Axl's Weapon: N/A | Zero's Technique: N/A |
  |
||
| Boss attacks and general strategies: Don't expect this climactic battle to be anything like the Sigma Copy you faced in Gateway, as the real Sigma packs far a deadlier punch. You should notice straight away his very own Σ Blade (which you really don't want to be on the business end of) and a health bar far longer than any previous boss encountered. You should certainly come well equipped for this battle, with both Life Tanks and the Weapon Tank in reserve, all filled up ready for use (check the items guide for details on where to find them). After his usual gloating, Sigma will begin the battle by disappearing briefly before emitting large blue rings. They'll travel straight across the screen in different positions, simply jump up to the top of the wall to avoid them. With the round finished Sigma will disappear. As he does, stay on the left side of the room and begin walking right. As soon as he appears directly above you he'll slam down with his sword extended, an attack you don't want to fall for. Once you spot him above you quickly dash out of his way to safety. He'll disappear and repeat the attack a second time before returning to the right side of the room. Watch out for another round of the blue rings, this time they'll travel faster but you'll be safe up on the wall. Get ready for another sword-attack from above when Sigma disappears, and keep in mind that on occasion he'll use his blue ring atacks from the left side of the room as well. He'll keep these attacks up over and over until you've dealt enough damage. Sigma's weakness is the Shining Ray / Ray Gun / Tenshouha, with the Ray Gun being the easiest weapon to hit him with. You can't attack Sigma as easily while he emits the blue rings, but don't stop attacking and try to hit him from behind just after avoiding his vertical sword attack. Do your best to avoid taking any damage, as energy preservation is a must. With enough damage dealt Sigma will summon a charge of energy and disappear. You'll hear him shout "It's all over!" while your character loses control and hovers to the center of the room. Sigma will reappear gripping your character to sap precious life energy. Normally you'd call in your reserve character to break Sigma's grip, but on Hard mode you'll have lost them to Vile's last trick. Instead, an extra cutscene will play with Sigma gloating as he grips your Hunter's face. Your reserve character will make a timely return, breaking Sigma's grip to keep you in the fight. Once loose, Sigma will jump back against the wall and sweep a red laser across the opposite wall. The screen will flash red before flames appear on the wall, trapping you between Sigma and the fire. He'll dish out more blue rings which you'll find extremely difficult to avoid, so try to immediately jump over Sigma and up the wall he stands against (jump as high as you can and air-dash into the wall just above Sigma, you should make it). If you're quick and jump on the wall before Sigma emits any rings, get back down straight away as Sigma will try to counter you by performing a quick twirling uppercut to knock you off the wall. Once the flames disappear get ready to dash clear as Sigma performs his vertical downward sword attack again. He'll repeat the flame-rings attack again, use the same trick to avoid damage and don't stop attacking Sigma at every open chance. With half his health down the drain Sigma will charge up a purple aura around himself before repeating the same attacks, this time from the left side of the screen and with faster moving rings. He'll alternate positions much more rapdily now and perform the downward sword lunge attack repeatedly, so you'll need to be on our toes and react properly to all his attacks. Eventually he'll unleash an unavoidable wave of purple energy similar to the way his copy did in Gateway. So as soon as you see Sigma charging up purple energy, whack him with a barrier-breaking attack to nullify it. Sigma will continue to use these faster and heavier attacks until you put him out of his misery, so keep holding out against him and don't be afraid to use a Life Tank if need be (but try to save it for the final battles). Crush Sigma for the eighth (!) time to meet the newest and latest megalomaniac twisted by the Maverick Virus. X's strategies: X's Shining Ray can deal out a healthy dose of damage to Sigma, but it'll be extremely difficult to hit him with it due to it's attack pattern and Sigma's unpredictable vulnerability windows. Stick with standard X-Buster charged shots, and by all means use the special abilities of the Icarus, Hermes, and even Ultimate Armor. When Sigma's got you trapped on the wall above him as he creates flames on the opposite wall, try using the Shadow Runner or any other weapon you can fire straight down while in mid-air to try and chip off more damage (Thunder Dancer, etc.). The X-Drive will greatly help you deal out more damage while moving quickly to avoid Sigma's fast attacks, but ultimately you'll find that this battle was meant to be fought with skillful use of two Hunters. Zero's strategies: If you've unlocked Zero's own Σ Blade by all means use it. Zero's Tenshouha won't be of much use, as Sigma won't spend any vulnerable time above you, leaving you to try and hit him up close but leaving yourself open to attack. Instead use the D Glaive or Σ Blade to land blows from afar, but don't get caught up in attacking him just before he unleashes the blue rings. Use the Rasetsusen if you're stuck up on the wall above Sigma, just don't accidentally fall on him. Use the Σ Blade or a quick three-strike attack once Sigma charges purple energy to avoid his wave attack, bear in mind the Juuhazan and Youdantotsu also work well, but keep your distance. Axl's Strategies: Axl's Ray Gun works wonders against Sigma, as with its continuous rate of fire you'll surely break through Sigma's defenses long enough to deal some decent damage. Don't stop shooting him, but make dodging his attacks your top priority. When Sigma emits the blue rings, jump up the opposite wall and shoot him from there, with Axl's ability to hold onto the wall you'll have a great chance to deal out some healthy damage. Once Sigma's got you trapped up on the wall above him, just jump off and hover while firing directly below at him to rip off more damage while you wait for his blue rings to stop. The Blast Launcher makes short work of Sigma's purple wave attack, shoot him once as soon as you see purple energy charging up in him to stop it easily. |
||
| Lumine | ||
|---|---|---|
| Stage: Sigma Palace | Weakness: Varies | |
| X's Weapon: N/A | Axl's Weapon: N/A | Zero's Technique: N/A |
  |
||
| Boss attacks and general strategies: Upon revealing himself as the leader of the new 'turn-Maverick-at-will' generation of Reploids, Lumine will try his hand at defeating the Hunters. Time to give him the new-psycho-kid-on-the-block treatment. He'll waste no time in using his DNA-copying abilities to mimick the attack patterns of the eight Mavericks. Floating around the room for the entire battle, the eight colored balls spinning and rotating around him represent each of the Mavericks. Don't bother attacking Lumine as he glows, your shots won't penetrate. Instead, wait for him to stop glowing before attacking but be quick as he'll sporadically glow on and off. Among his random taunts he'll eventually summon an energy surge and if you watch closely you'll see a small colored sphere appear above Lumine before it descends back down into his chest. Whichever color it was represents the Maverick Overdrive attack style he's about to use (black - Dark Mantis, red - Burn Rooster, etc.). Usually Lumine will start with Earthrock Trilobyte's Overdrive by jumping down into the right corner and creating the purple crystal walls. They'll travel across the screen attempting to crush you against the wall, so quickly jump up them and over to avoid damage. Naturally with the Maverick's special attacks comes their weaknesses, so you'll need to use the proper weapon depending on Lumine's current attack form (check the boss chart at the top of this page for reference). Only attack him while he's not glowing (which is a rare occurance in itself) and do your best to avoid taking damage yourself. After sending out enough waves of crystal walls, Lumine will summon the power of Gravity Antonion. He'll proceed to call in the huge blocks raining down from above, so you'll need to keep moving to hold out against the wave. Once they stop, rip into Lumine quickly before he summons the next Maverick's power. If Lumine summons the power of Bamboo Pandamonium, stay on the floor as he hovers over to the corner, then immediately jump up the wall to avoid a quick slice attack. With Avalanche Yeti's power Lumine will blast cold air up into the screen, summoning the large floating icicles. They'll keep coming down for the rest of the battle, so you'll need to multitask and take them out as much as you can. Dark Mantis' power will give Lumine a massive swipe attack, he'll float up to the top of the screen before initiating the attack. Stay on one side of him then instantly dash to the other as the purple wave appears to narrowly avoid it, then quickly dash back to the other side as he repeats the attack. Watch out for Optic Sunflower's tracking beam, once the tracking laser appears on you quickly move to the opposite side of the room and dash away just before the beam fires. Burn Rooster's power will give Lumine the flamethrower/fire pillar attack, simply stay behind Lumine as he attacks one side of the room and jump over him as he attacks the other. Keep in mind that the flame pillars he produces won't disappate, so you'll lose the walls and have less room to move around in. Finally, if Lumine summons Gigabolt Man-O-War's power he'll unleash the massive eletrical attack from above, just watch for where the blue sparks appear on the floor and stay in the gaps to avoid major damage. Lumine will continue to rotate between Maverick attacks, so you'll need to keep your attack routine up constantly. Try to save your Life Tanks for the final battle, just remember to keep switching back and forth between your Hunters as they take damage, any red health bars you can recover are certainly worth the effort. Finish Lumine to hear one final foreboding taunt before he reveals his last trick. X's strategies: Using the correct weapon depending on Lumine's current Maverick status works great for X, especially with the Ultimate Armor equipped. Between forms be sure to use the X-Buster's charged shots, as you don't want to lose ammo thoughtlessly. Come well equipped to this battle and don't be afraid to use reserve energy (but try to keep it saved for the final battle). The Icarus Armor's Head Part works well against the floating icicles, while the Hermes Armor's fast X-Buster charge helps to deal out damage faster, so you can't go wrong with either suit equipped. Zero's strategies: Zero's Σ Blade & D Glaive work well in chipping hits out of Lumine from afar, as you don't want to be near his unpredictable movements. Don't worry too much about using the correct weakness depending on his status, just keep your attacks up and try to use faster attacks like the Rasetsusen or Youdantotsu to regain control quickly. While Lumine unleashes his Bamboo Pandamonium slice attack, try using the Raikousen to time your attack so that Zero disappears as Lumine passes through. Axl's Strategies: Try to use the proper weapon with Axl as all his weapons can whack Lumine no matter where he is in the room. The Blast Launcher in particular works well with its latent explosions, delving out more damage if Lumine drops his guard. Don't stop shooting Lumine, and use the Ray Gun if you can't be bothered switching between weapons to exploit the proper weakness. |
||
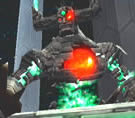
| Lumine's Final Form | ||
|---|---|---|
| Stage: Sigma Palace | Weakness: Drift Diamond / Ice Gattling / Hyouryuushou | |
| X's Weapon: N/A | Axl's Weapon: N/A | Zero's Technique: N/A |
  |
||
| Boss attacks and general strategies: Lumine's first and last encore will see him assume the form of a large winged Reploid, and while this appearance might be familiar to fans of the Mega Man Zero series, Lumine's laser attacks will keep you on your guard at all times. You'll face him out on a large platform before a golden cloudy backdrop, the stage for your final battle of the game. Lumine will begin on the right of the screen before diving down at you, quickly jump clear over him as he passes to avoid careless damage. Once he floats back on-screen his wing tips will glow before emitting rapid thick laser beams at you criss-crossing over the ground. You'll need to stay off the ground to avoid the beams, so keep jumping around and don't worry about taking slight damage as you touch the ground; just keep moving. During the attack Lumine will create a semi-transparent blue sphere around himself for protection, so you'll need sustained fire to break through. With the laser round over he'll swoop by again, so quickly jump over him. Back down in the arena Lumine will charge up energy in his hands before emitting weird circular laser fields around himself. The yellow bolts will slowly expand out as they rotate, try your best to sneak through the gaps as you see them to avoid damage. Once the bolts reach the edge of the screen Lumine will send out another ring of lasers as the first slowly draws back towards himself. Try your best to sneak through the gaps, just don't take too much of a beating from them and feel free to use up your Life Tanks at any point. Using X's armor suits or having the Shock Absorbers developed for Axl & Zero will certainly prove useful, as you don't want to become stunned during the firestorm of lasers. During this attack you'll have a great chance of striking Lumine without his protective barrier, so by all means fire away. Lumine's weakness is the Drift Diamond / Ice Gattling / Hyouryuushou, all work wonders on him as he floats motionless in the air. He'll keep repeating the same attacks until you've belted him enough. Once he charges up flames around his body he'll spread his wings again as the tips glow white. Each one will expel a small laser beam up into the air before they come streaking down straight at you, so keep dashing back and forth to avoid the barrage as they hit the floor. Watch out when Lumine fires pulses of yellow lasers up out of the screen, after a second a horizontal row of lasers will come straight down from above, followed by several more rounds. Once they've all settled into the ground, each one will travel back up the screen, at which point you'll find it tricky to avoid them as they pass up out of the floor. Axl's hover works well in staying airborne while waiting for the lasers to appear, just keep yourself moving and don't take too much damage. All the while Lumine performs this attack he'll be totally defenseless, so try to keep ripping into him as much as you can. Eventually with enough of his health gone Lumine will emit a laser straight ahead off the screen. You'll now be in for a tricky dance, as individual rows of lasers will move back and forth across the screen. Stay in the gaps as best you can, and keep attacking Lumine. Axl's hover works fairly well in staying airborne above the lowest row, but don't be too perturbed if they score hits on you. Lumine will continue these waves of attacks until you drain his health enough for his final Overdrive attack. Overdrive: With only a small amount of health left, Lumine will take center stage on the screen and summon one final surge of energy. The arena will darken considerably while Lumine folds up his wings and disappears. From here on you'll only have a few seconds left to finish him off, as you'll notice darkness slowly creeping into the screen from both sides. If you let the entire screen blacken out you'll lose instantly, so speed is a must. Lumine will periodically reappear nearby, but won't attack anymore. Rather, you'll need to break his wings open again with quick barrier-breaking attacks, so use Zero's Σ Blade or Axl's Blast Launcher to score instant hits. Once his wings are open, keep ripping into him to score damage and don't delay in breaking open his wings again if they slam shut. If your Attack gauge is full, now more than ever is the best time to use it, as there's nothing more stylish than finishing off Lumine with a Double Attack. Deliver the final blow to this weirdo and enjoy the finale! Remember that a small part of the final cutscene is determined on whichever character you use to finish him off, so feel free to use the New Game + feature (on Normal or Hard for best results) to come back for more. X's strategies: Use X's Drift Diamond primarily, and feel free to top up your ammo with any reserve Weapon Tank energy you might have stored. X's enhanced jumping via the Icarus Armor works well against Lumine's initial criss-crossing laser attack, while the Hermes Armor's faster charged shots aids in breaking through Lumine's wings during his Overdrive. Don't rely too much on X for breaking through Lumine's wings, as his slow rate of shots won't give you much time to deal out the final blows. Zero's strategies: If you've got the Σ Blade in your inventory you won't find a better weapon to use. If not, stick with the D Glaive. Break out the Hyouryuushou in front of the motionless Lumine as often as you can, just stay clear from his various laser attacks. When the expanding and contracting circular lasers appear, try using the Raikousen when trapped to sneak through without taking damage. Once Lumine's Overdrive kicks in, use the Σ Blade or Juuhazan to quickly rip through his wing barriers and don't stop once they're open. Axl's Strategies: Keep a steady stream of fire up with Axl's Ice Gattling to easily break through Lumine's defenses. Axl's hover can give you extra response time when Lumine emits his horizontal and vertical-travelling yellow lasers. Also use the hover when Lumine emits his early criss-crossing lasers (the White Armor ensures perfect avoidance with its infinite hover time). Break out the Blast Launcher during Lumine's Overdrive to instantly break through his wings, although you'll need a few rounds to fully reveal Lumine's body. |
||