
Stage Guides
| Troia Base |
|---|
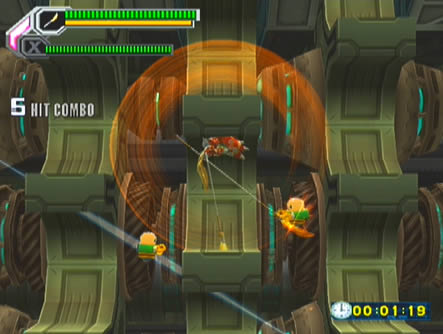 This stage will see you proceed through an old but certainly pretty training facility once used for Reploid combat skills development. As such, the shiny hexagonal-filled region you'll find yourself in serves as a pathway of mostly empty corridors intermitten with training rooms. Proceed right at the entrance and through the first door to find a large teleporter in a small room. This stage will see you proceed through an old but certainly pretty training facility once used for Reploid combat skills development. As such, the shiny hexagonal-filled region you'll find yourself in serves as a pathway of mostly empty corridors intermitten with training rooms. Proceed right at the entrance and through the first door to find a large teleporter in a small room.Take a look at the background and you'll spot a wall panel adorned with a multitude of dots. Each vertical line of three dots represents a single room (while the lone dots on either side represent the entrance & exit). The three dots for each room represent how well you perform in each scenario, so for now they'll all be blank. Step into the teleporter to access the first training room. Once inside you'll oddly find yourself outside in the middle of an ocean atop a large platform. Generally in each training room there'll be a timer in the corner of the screen either counting up or down. Here it'll be counting down, so your objective is to destroy as many Bulbrites as possible. They'll appear in waves from either or both sides of the screen, you should find Zero will be most effective in taking them out quickly. If you don't have any of Zero's weapons or techniques yet just stick with the Z-Saber, but once you've unlocked the D Glaive or Σ Blade and the Rasetsusen technique, break those out and you'll find they work wonders in all of the training rooms. Once your time's up you'll reappear back in the main area and a red dot will promptly appear in the background. If the dot appears in the lowest circle, you won't have performed too well, while the middle dot represents an average performance and the top an expert level. The higher you keep your performance the better items you'll receive at the end of the training run. Generally you'll need extremely fast times in each room to perform the best. Bear in mind also that if you fail during a simulation room or in the outer corridors, your rank for the previous room will drop to the lowest rank. The enemies in each room will also change their characteristics depending on how well you conquered the previous room, so watch out for stronger attacks each time you score a top rank. 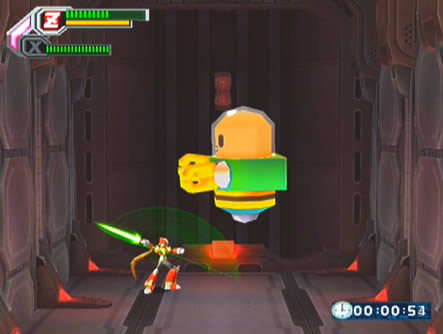 Leave the first training room and travel up the sloping corridor while picking up Metals along the way to locate the second training simulation. As you enter the room you'll notice that if you scored the lowest or highest rank of the previous simulation, the telerporter will move either up or down. Jump in to find yourself falling through an open sky. A Bulbrite flying about atop a large pod carrying a small crate will eventually appear, use Zero once again to slash away at the foe and watch out for it dropping crates from above. The D Glaive or Σ Blade works fantastically, if you don't have them stick to Z-Saber swinging or shoot the snot out of it. The faster you destroy the Bulbrite the better rank you'll receive. Leave the first training room and travel up the sloping corridor while picking up Metals along the way to locate the second training simulation. As you enter the room you'll notice that if you scored the lowest or highest rank of the previous simulation, the telerporter will move either up or down. Jump in to find yourself falling through an open sky. A Bulbrite flying about atop a large pod carrying a small crate will eventually appear, use Zero once again to slash away at the foe and watch out for it dropping crates from above. The D Glaive or Σ Blade works fantastically, if you don't have them stick to Z-Saber swinging or shoot the snot out of it. The faster you destroy the Bulbrite the better rank you'll receive.Upon leaving this simulation, climb up the adjacent shaft while picking up Metals and head right. The next room contains two rails of horizontal-moving platforms and a single Bulbrite. This little trooper can take a beating, so you'll need to take care not to fall into the hole below (stay on the top row) while hammering away at it. Destroying it quickly ensures a good rank. Upon leaving the room cross the next long corridor to reach the next training room. You'll now be in a room with three giant spinning cogs, standing on the center one. You'll need to keep moving back and forth from each one to jump up onto higher ledges as the cogs will be rotating downward into the hole. Two Bulbrites will pop in from above or below the screen, you'll need to destroy both to finish the simulation. The Rasetsusen together with the D Glaive or Σ Blade once again will make short work of this room, but without them you're best bet is to keep moving and attack the Bulbrites whenever they show up (try to avoid using X, as it'll be very hard to hit them). Beyond this room you'll find a large open area where the Buster Parts H capsule is hidden above (you'll need X's Squeeze Bomb to reach it). 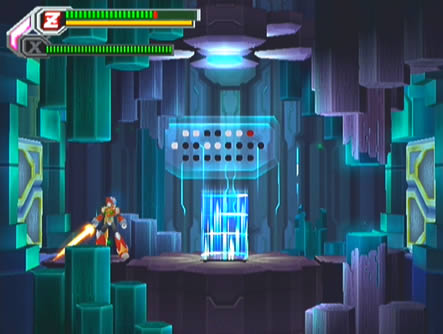 Beyond in the next training room you'll face off against a gigantic Bulbrite. Blast or hack away at the monstrous thing and it'll squeal and shrink with each hit. As it shrinks it'll expel small energy blasts which become balls moving around the floor and walls, so try to avoid them but don't worry too much about it. Keep laying into the Bulbrite and it'll shrink down to a tiny size before exploding. Beyond in the next training room you'll face off against a gigantic Bulbrite. Blast or hack away at the monstrous thing and it'll squeal and shrink with each hit. As it shrinks it'll expel small energy blasts which become balls moving around the floor and walls, so try to avoid them but don't worry too much about it. Keep laying into the Bulbrite and it'll shrink down to a tiny size before exploding.Beyond this room you'll find a long corridor with a gaping hole in the floor. Below you'll find a single red Metal, but you'll want to use the contour of the ceiling where the yellow Metals float to get by. Slide down each wall section and air-dash into the next, eventually you'll reach the next simulation room. This room contains a conveyer belt with a pit on the right and a spiked wall slowly moving along with the conveyer, so you'll have to be very quick here. The target is a Bulbrite flying over the hole in a machine with two long claw arms. Immediately attack it and don't touch the spiked wall (you can also attack the wall as you would an ordinary shielded enemy to knock it back). It's not that strong, so you should easily take it out (don't worry if you fall down the hole as the Bulbrite blows, as it won't count as a death). In the following room you'll find a huge chasm ahead and a wall leading straight up. Ahead over the pit you can find Troia Base RM#01, with it in hand climb up the wall and grab the Metals along the way (Zero's double-jump makes it easy). Head into the next simulation room to face off against two large Reploids, one brandishing a large hammer, the other a long rifle. They'll jump around the room attempting to hit you, you'll need to take them both out quickly to perform well. Watch out in the following corridor as you'll find spike traps littered about. Carefully traverse the corridor, Axl's hover and air-dashing should help out here. 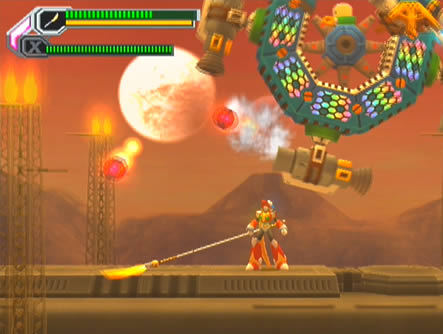 Beyond in the final simulation room you'll find yourself atop a high-speed train outside (complete with twin (?) moons in the background). A Bulbrite will be floating about surrounded by a large green robotic serpent spitting energy balls everywhere. Rip into the body of the serpent to destroy each segment and the turrets, then tear apart the head once the body's out. With the serpent gone, rip into the Bulbrite's body, but be warned it'll take a beating. With the Bulbrite destroyed you'll have finally cleared out all the training rooms. Beyond in the final simulation room you'll find yourself atop a high-speed train outside (complete with twin (?) moons in the background). A Bulbrite will be floating about surrounded by a large green robotic serpent spitting energy balls everywhere. Rip into the body of the serpent to destroy each segment and the turrets, then tear apart the head once the body's out. With the serpent gone, rip into the Bulbrite's body, but be warned it'll take a beating. With the Bulbrite destroyed you'll have finally cleared out all the training rooms.Head right and cross the following uphill corridor to find a room where you'll be rewarded for your efforts in the training rooms with a range of Metals and Life & Weapon refill capsules (plus a Rare Metal if you've performed well enough). Snag all the items and head right through the green door. Rather than facing Optic Sunflower straight out, you'll enter a long corridor with an unusual secret. For PS2 players, if you have a save game file from Mega Man X: Command Mission on your memory card, a teleporter will appear in the center of the corridor. You can also input a special code on the title screen (check hints and tips) to make the teleporter appear. Once inside you'll have stepped back in time and re-entered the 8-bit era! Inside is a complete remake of Cut Man's boss room from the classic Mega Man complete with the 8-bit Robot Master himself. Clear this nostalgic battle and head right to face the real boss of this stage, Optic Sunflower. Intermission Here you'll find yourself in the giant room from Gateway filled with the eight teleporters leading to Maverick boss battles. Ten minutes is all you'll have to defeat the bosses in, so you'll need to move quickly and take them on in any order. Having all eight Maverick abilities in your possession will certainly speed things up, so be sure to come well equipped. If you fail the mission or the timer runs out you'll lose and have to start over. Remember to check the bosses guide for tactics and boss weaknesses. |
| Mission select | ||
|---|---|---|
| 1. Noah's Park 2. Booster Forest 3. Troia Base 4. Pitch Black |
5. Primrose 6. Metal Valley 7. Dynasty 8. Central White |
9. Inferno 10. Jakob 11. Gateway 12. Sigma Palace |