
Stage Guides
| Inferno |
|---|
 For the majority of the this stage you'll be descending massive magma exhaust shafts to seek out the stage's boss in the bowels of the mountain. You'll begin by falling through a huge hole into the first giant shaft. Here the screen will automatically pan down while you scramble to remain atop one of the many floating platforms you'll encounter. Take care while descending and make certain you don't fall into the hole below or it's all over. For the majority of the this stage you'll be descending massive magma exhaust shafts to seek out the stage's boss in the bowels of the mountain. You'll begin by falling through a huge hole into the first giant shaft. Here the screen will automatically pan down while you scramble to remain atop one of the many floating platforms you'll encounter. Take care while descending and make certain you don't fall into the hole below or it's all over.Keep atop the platforms and watch out for floating turrets. Bear in mind too that you'll take damage if you go up beyond the top of the screen, so you'll need to time your jumps down to lower platforms as they appear. Axl's hover ability will often help out here, as you can hover in the air while waiting for a safe place to land. Not far down you'll find crates sitting atop the platforms, just watch out for the explosive variant. Take care around any laser turrets firing continuous streams of energy, use the platforms and crates for cover while passing by. Eventually you'll reach the bottom to discover a line of platforms with Metals floating about below them. Stepping on these platforms causes them to slowly drop into the hole, so you can risk grabbing some of the Metals before quickly jumping back up to the motionless remaining platforms. Beyond this shaft on the right you'll find a corridor safely leading you out of the bottomless shaft. Watch out for the attacking Reploid ahead, he'll be armed with a heavy shield which you can't break without stronger attacks like Zero's Juuhazan. You can always jump over and attack it from behind. Once you're ready head through the door at the end of the corridor. Inside you'll find yourself beholding a large furnace in the background. Crazy flaming Bulbrites will promptly burst from the open furnace so concentrate your fire on the opening. The Shadow Runner and Black Arrow tend to work well against them, just try to avoid being swamped by a pack of Bulbrites. Clear the room and grab all the items before moving on. 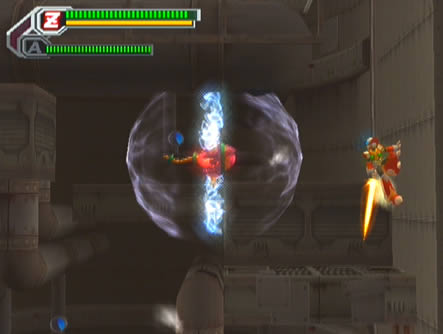 The following shaft is filled with pipes and spike traps, so the Prickle Barrier in your inventory is a must. Begin your descent but take it slow to avoid landing on spikes unexpectedly. To the left of the first two bats you'll discover a small hole up on the wall among the spikes, beyond there you'll find Inferno RM#02 but you'll need to use Axl's Copy Shot on a flying Reploid down at the base of the shaft and backtrack here to access the hole. The following shaft is filled with pipes and spike traps, so the Prickle Barrier in your inventory is a must. Begin your descent but take it slow to avoid landing on spikes unexpectedly. To the left of the first two bats you'll discover a small hole up on the wall among the spikes, beyond there you'll find Inferno RM#02 but you'll need to use Axl's Copy Shot on a flying Reploid down at the base of the shaft and backtrack here to access the hole.Be very careful descending the shaft beyond the bats as you'll soon discover spikes lining alternating sections of the walls. Axl's hover works great for lining up with safe sections of the walls. Move through the next shaft and slip down the narrow shaft up along the right wall. Watch out at the bottom as a Reploid wielding a freezer gun waits in ambush. Take it down and move on below, clearing the second Reploid on the platform below. Watch out for spinning blades further down, simply shoot them to silence them for a few seconds. Further below you'll encounter a floating Reploid generating a large energy field sphere, so be sure to avoid touching the field to avoid capture. If Pallette's your navigator she'll chime in and inform you that Zero can break through the platform you're standing on, in reality you'll need the T Breaker to bust through the floor to reach Inferno RM#01 below. Moving on you'll discover a shaft leading skyward, up the narrow spike-lined confines you'll locate the Foot Parts H capsule. Proceed on downward and watch out for the freezer gun-wielding Reploid. Upon descending the narrow shaft patrolled by spinning blades you'll reach the bottom to be welcomed by a flying Reploid. Blast it with Axl's Copy Shot and backtrack up the shaft to grab Inferno RM#02 mentioned earlier.  Through the door at the base of the shaft you'll enter the second furnace room. Clear out the flaming Bulbrites and head left after picking up all the items. Outside you'll find the second huge shaft much like the first one you entered the stage via, only this time you're in for a longer descent. Pallette will chime in and mention a hidden corridor directly above your position, so use the elevated platforms out in the shaft and Axl's hover (or X & Zero's air-dash) to reach the corridor above where you'll locate Inferno RM#03. Through the door at the base of the shaft you'll enter the second furnace room. Clear out the flaming Bulbrites and head left after picking up all the items. Outside you'll find the second huge shaft much like the first one you entered the stage via, only this time you're in for a longer descent. Pallette will chime in and mention a hidden corridor directly above your position, so use the elevated platforms out in the shaft and Axl's hover (or X & Zero's air-dash) to reach the corridor above where you'll locate Inferno RM#03.Once you're ready jump onto the platform back in the shaft with a column of Metals above it to begin the descent. Among the multitude of crates you'll face more Reploids wielding simple laser guns, keep your distance and take them out from afar. Also watch out for the floating turrets scattered about. As per Alia's advice, you'll need to use the crates to avoid damage from dual laser batteries so keep an eye out for them. This shaft descends faster than the first, so try your best to keep up with the race. You'll have reached the bottom upon landing on a solid row of platforms, where you'll descend to the bottom to face off against Burn Rooster.  What's this? It's not over? Upon defeating Burn Rooster, you'll find yourself in a pickle; you can't teleport out from this depth so you'll need to evacuate up the shaft, all the while lava fills the area. Now the screen will pan upwards while lava slowly rises below. Scramble up the platforms (grabbing Metals along the way), once at the top you'll have cleared the mission. What's this? It's not over? Upon defeating Burn Rooster, you'll find yourself in a pickle; you can't teleport out from this depth so you'll need to evacuate up the shaft, all the while lava fills the area. Now the screen will pan upwards while lava slowly rises below. Scramble up the platforms (grabbing Metals along the way), once at the top you'll have cleared the mission. Intermission Descending an auto-scrolling shaft is what this Intermission's all about. You'll find a range of platforms down the never-ending tunnel, each with a yellow (and eventually red) Metal resting atop it. A number up on the right will keep track of your distance travelled along with your current best record. Eventually the screen will pan faster while platforms begin to either drop as you step on them or slide across the screen. Axl's hover will work wonders as the screen picks up the pace, and always keep in mind that you can exit at any time (watching the screen pan down long enough can really mess with your eyes, heh). |
| Mission select | ||
|---|---|---|
| 1. Noah's Park 2. Booster Forest 3. Troia Base 4. Pitch Black |
5. Primrose 6. Metal Valley 7. Dynasty 8. Central White |
9. Inferno 10. Jakob 11. Gateway 12. Sigma Palace |