
X's Bosses
There are two listings of the bosses here, one for X and one for Zero. Each list has the bosses organized in an order which allows you to be able to use the correct special weapon or technique to defeat them with.
X's Bosses will include the boss' attack patterns as well as how to defeat them, but Zero's will just have the method of defeating them. The boss levels will start out at 1 for the first few bosses, then their health and levels will begin rise once you reach the final few. Their levels will be different depending on the order you fight them.
| X's Bosses | Zero's Bosses |
|---|---|
 |
 |
| Click on an image to view the guide |
 |
|---|---|
 |
|
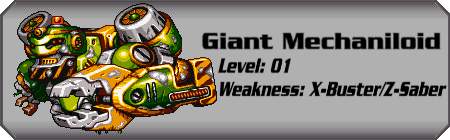
| Giant Mechaniloid | |||
|---|---|---|---|
| Level: 01 | Stage: Eurasia Remains |
Weakness: X-Buster/Z-Saber |
Special Weapon: N/A |
 |
|||
| At the end of the first stage you'll face the Giant Mechaniloid. It'll drop down from the sky and a smaller round object will appear in the corner of the screen. It'll beam down blue energy balls at the mechaniloid which will awaken it. The round object is the core of the mechaniloid, without it the mechaniloid can't operate, so you should concentrate on hitting it. The round object will fire down energy balls at X often, be ready to dodge them. The mechaniloid will move around a bit, if you move under it it'll drop down to try and crush X, be quick to dodge it. It'll also sometimes drop down and charge at the wall to try and crush X. The head might also sometimes fire down a large blue energy ball. Once it hits the ground a large vertical beam of energy will shoot up the screen, stay well clear of it. To defeat it, fire fully charged shots at the head of the mechaniloid or to damage it further, attack the round object. Once you hit it, it'll disappear and the mechaniloid will drop down to the ground while taking significant damage. Keep this up to destroy it. Once it blows, the Zero Nightmare will teleport down and finish it off. You'll fight High Max after, but the battle will end after a few seconds or if you take too much damage. |
|||
| Commander Yammark | |||
|---|---|---|---|
| Level: 01 | Stage: Amazon Area | Weakness: Ray Arrow | Special Weapon: Yammar Option |
 |
|||
| Commander Yammark will float down into the room and summon three smaller dragonfly-type projectiles which will float around him. Once he begins he'll move to the right corner and send his dragonflies moving up and down the screen. They'll begin firing out small energy balls from different positions, get ready to jump over and duck them as they fly past. He'll also often charge forward while firing the dragonflies, jump up the wall then over him as he passes, but be careful as the dragonflies will also fire out behind him. Keep in mind that you can destroy the energy balls by shooting at them with the X-Buster. Use the Ray Arrow to defeat him, or if you don't have it yet just stick with the X-Buster. After you hit him a few times he'll summon more dragonflies (up to a maximum of six), so you'll have to dodge even heavier fire now. Once his health's half gone, he might begin to fly straight at you. Jump up the wall and mid-air dash over him, but be careful as the dragonflies will be following him from behind and will drop small bombs down to the ground. He might also set his dragonflies into positions above and below him, he'll then move forward and try to hit you with his dragonflies. Try to dash under them as they move up. Keep hitting him with the Ray Arrow or blast away with the X-Buster to finish him off. Once you defeat Yammark you'll receive the Yammar Option. |
|||
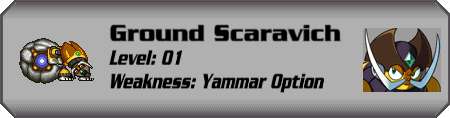
| Ground Scaravich | |||
|---|---|---|---|
| Level: 01 | Stage: Central Museum |
Weakness: Yammar Option |
Special Weapon: Ground Dash |
 |
|||
| Ground Scaravich will be pushing a large boulder around most of the time during this battle. He'll begin by rolling the boulder straight towards X. Quickly jump over him or use the poles above to dodge him. Once he comes back from off the screen, he'll fire out three small energy balls at X, one at at time. Just jump over them to dodge them. He'll continuously move around the screen while pushing his boulder, eventually when he returns the boulder will grow in size. Use the poles above to avoid the boulder. Eventually the boulder will grow again to a huge size. Keep using the poles to dodge it, but remember that you can destroy the boulders with the X-Buster. The boulder will only grow to one more size, where it nearly fills the screen. Use the Yammar Option to heavily damage Ground Scaravich. When he pushes the boulder forward, jump over him and activate the dragonflies. Move in close so the dragonflies hit him. After taking damage, he'll roll away to the other side of the boulder and push it towards X. After a while the boulder may shrink down again. Keep hitting him with the Yammar Option and try to avoid the boulder as best you can. Once you defeat him you'll receive the Ground Dash and Sentsuizan. |
|||
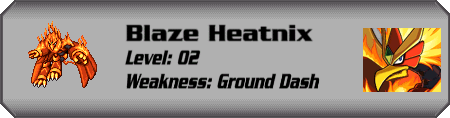
| Blaze Heatnix | |||
|---|---|---|---|
| Level: 02 | Stage: Magma Area | Weakness: Ground Dash |
Special Weapon: Magma Blade |
 |
|||
| Blaze Heatnix will be using some strong attacks during this battle. Once he enters the room he'll call up lava which will fill the lower half of the screen. Quickly jump up to the platforms and stay out of the lava. He'll dive down into the lava and fly around below you. After a few seconds he'll rise up below you, get ready to move out of his way. He'll then fire out a large fireball which will break up into three smaller fireballs when they hit the lava. Try to dodge them as best you can or destroy them with the X-Buster. After firing a few off he'll lower the lava and call lava down from the ceiling. Drop down to the floor to avoid it. Blaze'll then fire out small waves of energy that fly out at you, jump over or dash under them just as they pass to avoid them. He'll also often charge across the screen to try and ram X, dash under him or jump over him as he passes. After a while he'll repeat the lava attacks. Use the Ground Dash to heavily damage him. Once you take his health down to half, he might fly out of the screen. If he does, he'll fly back across the screen three times using a huge fire wave, try to dodge him as he passes. Keep hitting him with the Ground Dash, if you run out of weapon energy just use the X-Buster. Once you defeat Blaze you'll receive the Magma Blade and Shoenzan. |
|||
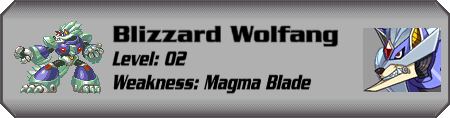
| Blizzard Wolfang | |||
|---|---|---|---|
| Level: 02 | Stage: Northpole Area | Weakness: Magma Blade |
Special Weapon: Ice Burst |
 |
|||
| Blizzard Wolfang will be lunging at you often during this battle. He'll appear out of the darkness and attack. He'll begin be firing out large ice blocks which will fly up and land down on top of X. Dash to the side quickly before they land to dodge them. He might also charge at you, quickly jump over him to dodge him. If he pauses and looks as if he's about to pounce, he'll jump up and try to ram into X. Dash under him as he jumps up to dodge this attack. He might also jump up to a wall and fly down straight at you. Be ready to jump over him whenever he charges. You can destroy the ice blocks he fires with the X-Buster. Use the Magma Blade to heavily damage him, and once you take his health down to half he'll begin to use stronger attacks. He'll often dash around the ground and ceiling while creating large ice spikes along the floor and ceiling. The ones on the ceiling will drop down, make sure they don't hit you. He also might create spikes up the walls, make sure you stay clear of them. Quickly blast away at the ground spikes to destroy them. He might also jump up into a corner and fire down a series of ice blocks, get ready to move quickly to dodge them. Try to dodge his attacks as best you can and keep hitting him with the Magma Blade. Once you defeat Wolfang you'll receive the Ice Burst and Hyoroga. |
|||
| Rainy Turtloid | |||
|---|---|---|---|
| Level: 03 | Stage: Inami Temple | Weakness: Ice Burst | Special Weapon: Meteor Rain |
 |
|||
| Rainy Turtloid is huge and will take up a fair portion of the room. He'll always have his back facing you, as it'll be his primary form of attack. He'll begin by firing out hordes of missiles at X from the two green crystals on his back. Jump up to the corner of the ceiling to dodge all the missiles, but you can also destroy them with the X-Buster or Z-Saber. After he stops firing them, he'll roll into his shell and extend spikes off his back. He'll begin rolling around and will roll across the ground to the other side of the screen. He'll then roll towards X depending on where you're standing. After passing across the screen a few times, he'll retract the spikes and stand back up. He'll then proceed to fire off a horde of missiles again. To defeat him, you'll first have to destroy the two green crystals on his back before you can damage him. Use the Z-Saber to hit both at the same time, and keep persisting until they blow. Once both are gone, rip into him with the Z-Saber, or use the Ice Burst to inflict heavier damage on him. You won't have much energy for the Ice Burst so you'll need to use the Z-Saber as well. Once he recalls the crystals you'll have to destroy them again, so go through his attack patterns again before attacking him again. Once you take his health down to half, he'll begin firing out water bubbles when he rolls across the screen. Try to dodge them as best you can. Keep firing away when his defenses are down, then once you defeat Rainy you'll receive the Meteor Rain and Ensuizan. |
|||
| Metal Shark Player | |||
|---|---|---|---|
| Level: 03 | Stage: Recycle Lab | Weakness: Meteor Rain | Special Weapon: Metal Anchor |
 |
|||
| Metal Shark Player will be using a few charge attacks often during this battle. Once he begins, he'll dive to the floor and slide along towards you. Jump over him before he hits X. He'll be doing this quite often, he might also jump up above X and drop down on him, dash to the side to dodge him. If he dives under the junk, he'll move around the ground with his fin sticking out. Try to stay up the walls to avoid being hit. Eventually he'll jump out again. He'll also often throw an anchor out at you, quickly dodge it, but be careful as once it hits the ground it'll bounce around the room. After a few seconds it'll blow. Use the Meteor Rain to inflict heavy damage on him. Once you drain half his health, he might jump up to a corner and charge up yellow energy balls in his hands. Once he does this, an object will form together in the other corner of the screen in the shape of Mavericks that X has already fought long ago. While using X it'll take the form of Magna Centipede from X2, it'll then fire down three ninja-stars, try to dodge them before they hit you. Keep hitting him with the Meteor Rain and try your best to avoid his attacks. Once you defeat Metal Shark you'll receive the Metal Anchor and Rakukojin. |
|||
| Shield Sheldon | |||
|---|---|---|---|
| Level: 03 | Stage: Laser Institute | Weakness: Metal Anchor | Special Weapon: Guard Shell |
 |
|||
| Shield Sheldon will be invincible when he has both his shells attached to his body. He'll begin by moving to one corner of the room and will throw each of his shells at you, one by one. Jump up the wall and over them, you'll notice that Sheldon will be now open to attack. Once the shells return to him, he'll disappear and reappear at the top of the screen. He'll now use different forms of attacks. He might curl up into his shells and bounce around the room, you should find it easy to dodge him. He might also sometimes create a clone copy of himself. Make sure you hit the real Sheldon, the real one is the one that isn't flashing. After finishing these attacks he'll reappear in a corner and throw out his shells again. Use the Metal Anchor to damage him significantly. Once you drain half his health, he might begin to use a new attack after his shell-throwing one. He'll create four energy shields around himself, and will then try to fly into X. If you shoot the shields they'll weaken but will fire out an energy ball so be careful. Drain one of the shields to open up a clear shot to him, or use the Metal Anchor to break through. A second attack will be when he begins to emits circular waves out of his body. He'll then create four shells in each corner of the screen and will teleport to one of them. They'll fire at you if you shoot them. Sheldon will fly around between them a few times before recalling the shells. Keep hitting him with the Metal Anchor while trying to dodge his attacks. Once you defeat Sheldon you'll receive the Guard Shell. |
|||
| Infinity Mijinion | |||
|---|---|---|---|
| Level: 04 | Stage: Weapons Facility |
Weakness: Guard Shell | Special Weapon: Ray Arrow |
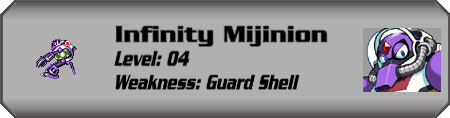 |
|||
| Don't underestimate Infinity Mijinion by his size, he's got some pretty damn strong attacks. He'll morph into the room via small bubbles before attacking. He'll begin by firing out small energy bolts at you which will change direction and fly down or up at X when they reach him. Try to dodge them by jumping clear over them. He might also often disappear and reappear in the center of the screen. He'll then drop down into the floor and will fire out two energy balls along the ground. Small energy bolts will also rain down from the ceiling, try to stay in the gaps between each bolt. He might also sometimes fire out several energy balls which will fire out in all directions. Eventually, he'll begin to use his strongest attacks. He'll often create clones of himself which will float around the screen. He'll also create several large bubbles which will float toward X. Try to destroy them with the Z-Saber before they cause too much damage. Infinity Mijinion has no direct weakness, but the charged shot of the Guard Shell will help. You can also use the Guard Shell to reflect the yellow beams he fires out. If the beams fire back and hit him he'll take damage. When the four shells of the charged shot are active, try to draw him into their line of fire, every time you hit him he'll fly across to one side of the room and take damage. You can also stick with the X-Buster and Z-Saber if the Guard Shell doesn't work out too well. As you keep damaging him, he'll keep summoning more and more clones and bubbles, so you'll have a very hard time trying to dodge everything. Having full energy tanks in reserve will help, try to follow the real Mijinion and keep hitting him. Once you defeat him you'll receive the Ray Arrow and Rekkoha. |
|||
| The following three bosses can be fought in the secret boss rooms found in each stage. When you enter one of these rooms for the first time before having Gate's Secret Laboratory stages active, you'll fight the Zero Nightmare, and once defeated, you'll be able to play as Zero. If you then enter another one of the boss rooms, you'll face High Max. If you manage to defeat him, you'll be able to go straight to Gate's Secret Laboratory stages without having to fight any more bosses. If you enter a boss room again after that, you'll face Dynamo in any of the eight stages. After this you'll keep facing Dynamo in each room. |
| Zero Nightmare | |||
|---|---|---|---|
| Level: 01 | Stage: Secret Boss Room |
Weakness: Z-Saber | Special Weapon: N/A |
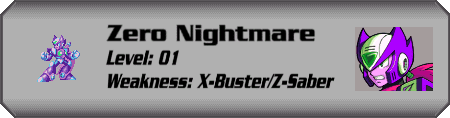 |
|||
| The Zero Nightmare will be using attacks similar to the attacks Zero used when you fought against him in X5. He'll begin by firing out two shots, followed by a slash with his Z-Saber. A small arc of energy will fly towards you when he slashes out, jump up or crouch down below it to dodge it. He'll be dashing around the room often, try to stay up the walls to dodge him. Make sure you stay well clear as he'll also often slash out his Z-Saber. If he disappears, quickly jump up a wall as he'll try to reappear on top of X. You can use charged shots from the X-Buster to damage him, but if you hit him with the Z-Saber he'll take further damage. Once you take his health down to half he'll begin to use stronger attacks. He might often fire out a horde of energy blasts at you, jump up the wall to dodge them. He'll dash around a lot, if he punches the ground large energy blasts will fly up the screen from the ground, try to stay in between each shot as they cause heavy damage. If he charges up his Z-Saber, he'll fire out a huge arc of energy similar to Maverick Zero's unavoidable attack in X5, but there'll be only one arc and it won't instantly drain all your health if it hits X. Keep whacking him with the Z-Saber and pick off a few charged shots whenever you can, once you defeat him, the real Zero will return and you'll be able to play as him in any stage. |
|||
| High Max | |||
|---|---|---|---|
| Level: 01-04 | Stage: Secret Boss Room |
Weakness: Magma Blade / Yammar Option |
Special Weapon: N/A |
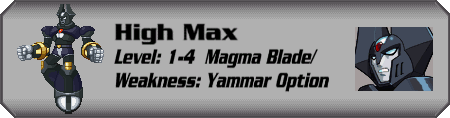 |
|||
| High Max will enter the room and taunt you before the battle begins. He'll be using some very strong attacks, and you'll need to have the right weapons to defeat him. Make sure you have at least one energy tank, the Yammar Option or Magma Blade weapon, and use the Falcon Armor. He'll be floating up in the top corners of the room for most of the battle. High Max will begin by firing out four energy balls straight at X. Keep moving around to dodge them, once he finishes firing four, he'll repeat the sequence two more times. After firing off all the energy balls, he might charge up energy in his hands. If he generates two circular rings around himself, he'll fly down and fly straight across the screen, duck down or dash under him to avoid him. Once reappearing down from the top of the screen, he'll perform one of the attacks again. If he holds back his arm and charges up energy in it, stay low or dash under him as he flies out with a huge energy ball extended. Each time he drops back down into the screen he'll use one of the three attacks again. He'll also often use a fourth attack, one where he charges up a huge energy ball which will move along the ground and up the wall. Jump up the wall and jump over the energy ball to dodge it. To defeat him, you'll need to hit him with a fully charged shot of the X-Buster first. When you hit him, he'll freeze and will begin to flash. Quickly hit him with the Yammar Option or the Magma Blade before he stops flashing. If you successfully hit him, he'll drop to the ground and take damage. Once you successfully manage to take his health down to half, he'll begin to use a much stronger attack. High Max will float over to the center of the screen and will charge up a huge energy ball over himself. He'll then create four smaller energy balls, each one will fly straight at X so you'll have some trouble dodging them. He'll keep firing out the smaller energy balls, so quickly try to hit him as he floats in the air. You'll find defeating High Max will be very difficult, but if you have enough energy and energy tanks in reserve, you should be able to beat him after some practice. Once you manage to defeat High Max you'll be able to go straight on to Gate's Secret Laboratory stages. |
|||
| Dynamo | |||
|---|---|---|---|
| Level: 01-04 | Stage: Secret Boss Room |
Weakness: Meteor Rain | Special Weapon: N/A |
 |
|||
| Dynamo will be using similar attacks to the ones he used in X5, but with stronger versions. He'll often fire out four swinging blades which will fly straight at X. Try to dodge them as they fly past. Once he's thrown out four, each one will fly back to him, make sure you stay out of their way. If he jumps to one side of the screen, quickly jump up the wall behind him as he'll punch the ground and cause huge energy beams to fill the screen. Blast away at him with the X-Buster of use the Z-Saber. If you have the Meteor Rain, use that to damage him further, when you hit him once he'll be temporarily stunned. If you hit him again before he recovers he'll fly across the screen and drop a Nightmare Soul. Make sure you pick it up, as you'll receive a whopping 200 Souls if you get it in time. Once his health is half gone, he'll jump into the center of the screen and will continuously fire out spinning blades at you. Keep moving to dodge them. Once he finishes, he'll jump at X and slash out with a large blade, stay above or below him to dodge the blade. Keep hitting him with either the X-Buster, Z-Saber or Meteor Rain and you should defeat him fairly easily. |
|||
| The following bosses will be fought in Gate's Secret Laboratory stages. |
| Nightmare King | |||
|---|---|---|---|
| Level: 04 | Stage: Gate's Lab Stage 1 |
Weakness: Giga Attack | Special Weapon: N/A |
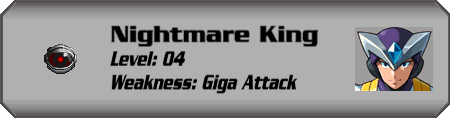 |
|||
| At the end of the first Gate's Secret Laboratory stage, you'll face two huge DNA blocks with metallic eyes in the center of each. They'll take up a lot of space in the room, so you'll need to move around quickly. As this stage is incredibly difficult to get through without the Shadow Armor, this guide will assume you have the Shadow Armor equipped. The two blocks will take up positions in two corners of the large room. Once the battle begins, they'll either begin moving around in a clockwise or anti-clockwise pattern around the room. As soon as they begin to move, quickly jump up the wall and follow them around, you'll need to be very quick to avoid being hit by one. After moving around the room six or seven times, one of the blocks will move to line up with the other. Once they're both in line, each eye will move out of the center of the blocks and emerge out into the open. It'll now be open to attack. If the eyes are moving out near the ground, attack one from the ground, otherwise try to jump up a wall to attack one. Slash away with the Z-Saber, but if you're on the ground, wait until the eye is close enough, then use the Giga Attack. The two crescent-shaped beams will trash the eye, draining a lot of energy. When the eyes are fully out, they'll perform different attacks. Sometimes they'll fire out small water blasts, when they hit the walls and floor they'll crawl along the ground/walls before dissipating. Try your best to dodge it. The eyes will also often fire out a barrage of fireballs, the fireballs will shoot up into the sky then drop down, try to stay between them as they fall. The eyes will also sometimes create electric fields which will appear over the screen, try your best to avoid them. If a huge fire wave appears on the floor, stay up the walls to avoid it. Once you destroy one of the eyes, the block will remain. After taking down half of the overall boss' health, the blocks may begin to move around the screen faster. Try your best to keep up with them to avoid the blocks. Wait for the second eye to be in firing range, then continue to hack away with the Z-Saber or use the Giga Attack (if you have enough energy for it). You shouldn't find beating this boss to be too difficult after some practice. |
|||
| High Max | |||
|---|---|---|---|
| Level: 04 | Stage: Gate's Lab Stage 2 |
Weakness: Magma Blade / Yammar Option |
Special Weapon: N/A |
|
|||
| Halfway through the second Gate's Laboratory stage you'll have to face High Max for the last time. He'll be using stronger attacks than in the previous battle, so you'll have to be quick to dodge him. He'll begin by creating a heavy deflector shield on both sides of his body. You won't be able to shoot through the shields, you'll just have to wait until they come down. He'll move up into the corner of the screen and then lower down to the ground. Quickly jump up the wall and get ready to mid-air dash over him as he flies over across the screen. He'll come back down again and often repeat the screen-dash. If he flies back down and stops at the top corner of the screen, he'll begin to charge up energy in his hands. If you hear him say something, he'll release a huge purple energy ball which will move across the ground and up the opposite wall. Jump over it as it passes along the floor. Once the ball disappears up the wall, he'll either lower down and continue his screen-dashing move, or he'll charge up more energy in his hands. If he charges up energy without saying anything, stay on the ground as he'll release the shields and they'll fly across the screen. Now is the time to attack. With his shields gone, charge up the X-Buster and fire off a shot at him. He'll freeze and begin to flash. Keep the Yammar Option or the Magma Blade out, and quickly hit him with either weapon before he stops flashing. Stay clear, as once you hit him he'll drop to the floor and take damage. After recovering himself, High Max will call back the shields and continue his screen-dash move. Wait until he releases the shields again before attacking. You can also destroy the shields with sustain fire from the X-Buster, but if you do be quick to attack him as he'll restore it quickly. Once you drain half of his health, he might sometimes combine the two shields together, they'll then begin to fly around the room while firing small energy balls at X. Try your best to dodge them. This battle will take a long time to finish, but if you're fast and know his attack patterns, you should be able to survive without taking too much damage. Once you finally defeat High Max you'll reappear in the second half of the stage, continue on to the end of it for the final showdown against Gate. |
|||
| Gate | |||
|---|---|---|---|
| Level: 04 | Stage: Gate's Lab Stage 2 |
Weakness: Energy Balls | Special Weapon: N/A |
 |
|||
| Gate will confront you at the end of the second Gate's Laboratory stage, and will be using a highly dangerous new battle body. The room will be full of small platforms for you to stand on, just make sure you don't fall into the hole below. Gate will be flying around during the entire battle, so he won't have to worry about needed something to stand on. He'll use one main attack with a few variations. Once the battle begins he might fly straight at you. He'll be charging at you quite often, so be ready to move when he does. When he flies at you, jump up and mid-air dash over to the platform up against the opposite wall. To make it easier, keep flying back and forth across the two platforms near the walls to dodge his charge attacks. His main form of attack will be that of firing out large energy balls at you. Move quickly as the balls will land just where you're standing, then they'll perform an attack depending on the ball's color. If the color is blue, it'll begin to suck you into it with a black-hole like effect. Try to stay well away from it so Gate doesn't trap you while causing damage. If the ball is red, your character will go into slow motion while Gate remains at normal speed, try your best to avoid being hit. If the ball is purple, it'll begin to flash and then will send out several Nightmares, try to destroy them quickly before they begin to annoy you. If the ball is green, it'll follow you around the room and try to ram X, so keep moving to avoid it. Finally, if the ball is orange it'll fire out a small energy ball at you, it should be fairly easy to avoid. Gate will continue to use his charge and energy ball attacks. You'll find that absolutely no weapon in your arsenal will even slightly damage Gate, so you'll need to use his own weapons against him. When he fires out an energy ball, move away and start firing at it with the X-Buster, or slash away with the Z-Saber. Once you destroy the ball, six smaller energy balls will fly out, three each to the left and right, try to avoid being hit by them, but if you take damage don't worry as it'll only take a tiny bit of health off. If one of the flying energy balls hits Gate it'll damage him. This is the only way you can inflict damage on Gate. Keep using this technique, then once you take down half his health, he'll begin to use stronger attacks. He'll often charge at you and then release a large purple vertical beam of energy directly in front of him, stay well clear to avoid it. He might also fire out more than one energy ball at a time. Energy tanks and the Life Recover part will greatly help you out here, but keep avoiding his attacks while destroying the energy balls to damage him, and you'll eventually defeat Gate. Once he's beaten he'll reveal a dark secret... |
|||
| When advancing through the final stage, you will have to fight all of the eight Investigators again. This time though, they'll all be on level 4 and will have more health than before. They will be tough to beat, but you can use the same tactics as before to beat them. Remember, the Ultimate Armor's Nova Strike will greatly assist you. |
| Sigma Part 1 | |||
|---|---|---|---|
| Level: 04 | Stage: Gate's Lab Stage 3 |
Weakness: Metal Anchor | Special Weapon: N/A |
 |
|||
| Sigma will enter the room in his badly beat-up body before crashing to the floor. He'll slowly rise, and will taunt X before the battle begins. He'll be very slowly moving towards X, make sure he doesn't corner you up against the walls. He'll use several different types of energy-based attacks. If he looks as if he's about to fire something from his head, he'll fire out a fast moving energy ball straight at X. Try to dodge it as best you can, but it's speed will make it tough to dodge. He might also often fire up a huge green energy beam. It'll hold still for a while before slowly moving towards X. You'll find it difficult to dodge so just try to dash over the top of it by jumping up a wall. He might fire off the small energy balls while the green beam is active so you might take some damage before it leaves. Use the Metal Anchor to cause serious damage to Sigma. Once hit by an anchor, he'll fly over to one corner of the screen and fall over. He'll fire out three small purple balls onto the ground as he hits the wall, try to stay back from them. He'll also release several large energy sparks, they'll all fly straight at X, quickly jump up the wall and dash over them as they pass. Once you take his health down to half, he'll use stronger attacks. He'll begin to charge up small green energy balls, they'll then form into a large purple energy wave that will fly across the screen. Sigma will continue to create the energy waves, try your best to dodge them. You can also use the Metal Anchor to destroy the sparks he fires out after falling over, and if you hit the large vertical energy wave he fires with the Metal Anchor, it'll move back towards him, enabling you to dodge the beam. Try not to waste more than one energy tank during this battle, and also have the Life Recover part equipped, it'll help out greatly. Once you manage to destroy Sigma he'll transfer to his final battle body. |
|||
| Sigma's Final Form | |||
|---|---|---|---|
| Level: 04 | Stage: Gate's Lab Stage 3 |
Weakness: Ground Dash |
Special Weapon: N/A |
 |
|||
| Sigma's final form will be a massive skeletal shaped mechaniloid, and will be taking up almost the entire space of the room. The head part of the body will be the primary unit that will attack you, and will also be the source of the body's weak point. You won't have much room to move around in so you'll have to be quick. The head will begin by firing out large green objects from it's forehead. When the objects land on the ground or the side of the screen they'll form into smaller green heads. They'll move around a lot and will try to ram X, you'll need to blast them with the X-Buster or Z-Saber before they crowd in too much. The higher-up ones will also fire down small energy bolts. One of the objects will become a moving platform with a spike attached to the bottom of it, try to avoid touching it. If Sigma's head opens up, stay below it as it'll fire out a massive green energy beam to the left that will shred all of the green objects in the way. If the head opens and a green energy pad appears on the floor, quickly dash away from it as a huge energy beam will shoot up out of it. He'll fire off two or more of the huge beams, try to stay out of their firing range. After firing off the beam he'll fire out the green objects again. Keep in mind that some of the green heads will drop energy or weapon capsules, make sure you pick them up if you need energy. None of your weapons can damage any part of the body, except for the inside of the head's mouth. You'll need to wait for the head to open up, then hit the inside of it with the Ground Dash to cause heavy damage. You can also use the X-Buster or Z-Saber to cause damage. If you've got the Shadow Armor equipped, use a charged saber shot to cause massive damage when the mouth opens up, if you hit the inside successfully you'll cause multiple damage hits. Once you take his health down to half, he'll begin to use a much more powerful attack. If his head opens he'll fire out a small energy ball either towards the top of the screen of down towards the floor. Once it hits the roof or floor it'll fire out two gigantic energy balls to the left and right, they'll be very difficult to dodge. If he fires them up towards the ceiling, stay low, but if he fires them down to the floor jump up on top of the moving platform (if it's there). If you have the Ultimate Armor, use the Nova Strike when the huge energy balls fly past to avoid them. Each time he fires out the small energy ball, try to hit him quickly before his mouth closes. Whenever he opens his mouth, stand back a bit so that when you jump up and hit him, you won't accidentally ram into the head. Keep firing away at the green heads, as the energy/weapon capsules they drop are very handy. Make sure you have both energy tanks full and have the Life Recover part equipped before taking Sigma on, and don't hesitate to use them. Try to avoid the annoying platform as it moves around the screen, keep firing at it to eventually destroy it. Keep avoiding Sigma's attacks, and keep attacking the head when it opens. Persist and you'll eventually win against Sigma. It'll be a very challenging battle, but with skill and practice, you'll make it through. Once you destroy Sigma's final battle body, sit back and enjoy the finale. |
|||