
Weapons Guide
Zero will have up to four weapons to use during the game, each one encompasses their own unique abilities and combat styles. Each weapon has a range of levels, as each one rises, more techniques will be learnt. Read on for detailed descriptions of each weapon. You can check the current level of a weapon by selecting it in the sub-screen menu and checking the number of red stars at the bottom of the screen.
Weapon levels
Each weapon has a certain maximum amount of levels that can be raised. To raise the weapons and improve Zero's skill, use each weapon often against enemies, one good place to raise weapon levels is the Underground Lab area where the white spider nests are, as spiders will continue to pour out of the nest you can constantly destroy them as they appear, you'll also gain a high number of crystals as well.
After you've beating the Retrieve Data mission you won't be able to go back there, so another good place to raise weapon levels is near the first crane on the way to the Disposal Center. You won't be able to see how much experience you'll need for the next level, so you'll just have to battle a lot of enemies and be patient, as raising each weapon to it's maximum level is well worth your while.
Using weapons against bosses will gain more experience than against normal enemies. You'll receive the Triple Rod and Shield Boomerang from Cerveau in the Engine Room of the Resistance Base after beating certain missions.
| Z-Buster | Gained from: N/A |
|---|---|
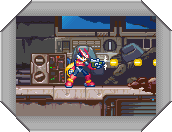
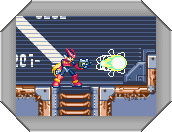
| You'll begin the game with the Z-Buster, a handheld blaster capable of delivering damage to almost any enemy. The standard shot fires off small energy bolts, while charging the weapon will release a stronger blast. A great weapon for long-range attacks, the Z-Buster is a handy backup weapon once you gain stronger weapons. Level 1: Up to three shots can be fired on-screen. Level 2: Up to four shots can be fired on-screen. Level 3: A second level charged shot can be fired. Level 4: Charging the weapon will take less time. |
 |
| Z-Saber | Gained from: X (Intro Stage) |
|---|---|
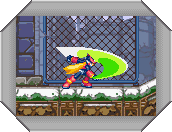
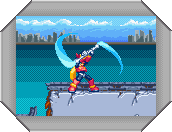
| You'll receive the Z-Saber from Unknown X at the end of the Intro Stage. This weapon is great for slashing enemies apart, but you'll need to be quite close to an enemy to hit them successfully. Once at its maximum level, the Z-Saber will be deadly against any foe, especially when used skillfully. Keep in mind that if you use air attacks with the Z-Saber more often, you'll gain the air attack and dash attack techniques before the charged shot ones. Level 1: You can perform a single slash attack. Level 2: You can perform a double slash attack. Level 3: You can perform a triple slash attack. Level 4: You can charge up the Saber for a powerful attack. Level 5: Charging the weapon will take less time. Level 6: You can perform a rolling attack in the air. Level 7: You can perform a dash rolling attack (L+Down+B). |
 |
| Triple Rod | Gained from: Cerveau |
|---|---|
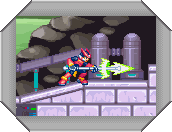
| You'll receive the Triple Rod from Cerveau after beating the Retrieve Data mission. This staff-like weapon can be extended up to three times the original length when fired off. You can use the directional pad to aim the rod in all eight directions, but you can only stab down with it when in the air. The energy arc released at the tip of the rod will cause severe damage to any enemies in range, making this weapon ideal for damaging enemies further back. Level 1: You can extend the rod to the standard attack range. Level 2: You can perform a double attack. Level 3: You can perform a triple attack. Level 4: You can charge the rod to deliver a twirling attack. Level 5: Charging the weapon will take less time. |
 |
| Shield Boomerang | Gained from: Cerveau |
|---|---|
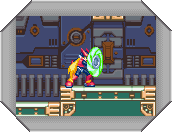
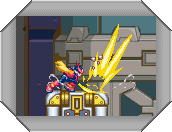
| You'll receive the Shield Boomerang from Cerveau after beating another mission after the Retrieve Data mission. This weapon is less flexible than the others, you'll only be able to use it to attack through the charged shot. Once activated, the shield will reflect energy blasts aimed at Zero, the shots will bounce off the shield and return to the source. Once charged, Zero will throw the shield out, it'll fly out and then return to Zero. Any enemies caught in range will be slashed in half. Keep in mind that you won't be able to dash while the shield's activated. Level 1: You can throw the shield to the standard attack range. Level 2: You can throw the shield to the medium attack range. Level 3: You can throw the shield to the maximum attack range. |
 |
Special element chips
Throughout the game, three different bosses will give you a special elemental energy chip once defeated. Each chip affects the charged shot of each weapon, allowing them to attack with either the power of lightning, fire or ice. Many bosses will take more damage than an ordinary charged shot when you use a certain chip.
 |
Thunder Chip |
|---|---|
| You'll receive the Thunder Chip once you defeat Aztec Falcon in the Disposal Center mission. This chip will give the charged shot attacks the power of electricity, electrocuting and frying the circuits of enemy targets. |
 |
Flame Chip |
|---|---|
| You'll receive the Flame Chip once you defeat the Hydra Mechaniloid in the Occupy Factory mission. This chip will give the charged shot attacks the power of fire, severely burning any enemy the attack strikes. |
 |
Ice Chip |
|---|---|
| You'll receive the Ice Chip once you defeat Blizzack Staggroff in the Find Hidden Base mission. This chip gives charged shot attacks the power of ice, freezing and cracking enemy targets apart. |