Stage Guides
This section holds guides for each of the thirteen stages in the game. As most of the stages are quite complex, each guide will give you hints on how to get through them successfully. Keep in mind though that these guides are spoilers, so don't read them unless you've already beaten the stages or if you really need help.
| Click on an image to view the guide |
 |
 |
|---|---|---|
|
|
||
| Intro Stage |
|---|
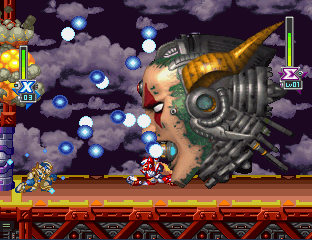 A fairly straightforward stage, you'll just need to make your way across the highways and through a ruined building before reaching the statue. The highway part is easy, just blast any enemies that get in your way. A fairly straightforward stage, you'll just need to make your way across the highways and through a ruined building before reaching the statue. The highway part is easy, just blast any enemies that get in your way.Once you reach the ruined building, watch out for the falling blocks, there's two single ones and a long beam. When you can see small rocks falling down from part of the roof, it means that part of the roof will fall, so get ready to dash out from under it as it falls. Once you reach the statue, climb the ladder and jump up the closing walls. Just jump up as fast as you can and you should easily avoid getting crushed. Go through the door at the top to face Sigma. |
| Grizzly Slash Stage |
|---|
 You'll start out on a moving truck. Make your way across the first one, and make sure you don't fall in the gaps between each carriage. Once you reach the front of the truck, wait for a gap in the firing of the blue energy beam on the nose, then jump down and crouch. Blast or hack into the core of the truck to destroy it. Once it blows, you'll notice a small timer appears in the corner of the screen. You'll start out on a moving truck. Make your way across the first one, and make sure you don't fall in the gaps between each carriage. Once you reach the front of the truck, wait for a gap in the firing of the blue energy beam on the nose, then jump down and crouch. Blast or hack into the core of the truck to destroy it. Once it blows, you'll notice a small timer appears in the corner of the screen.Jump to the next truck before the timer reaches zero. You'll have to traverse across a few more trucks, eventually you'll jump onto a truck that's already exploding. The timer will appear and you'll need to get to the other truck quickly. There aren't too many enemies on the exploding trucks, so you shouldn't have too much trouble getting across them. At the end of the second exploding truck is an energy tank, if you've got time, jump down and grab it before jumping to the next truck. The next truck won't be exploding, so just jump up to the front of it and another truck will come and ram it head-on, you'll then enter the second area of the stage. The second cave area is very easy to get through. Right at the start you'll notice a hole in the ceiling, jump up it to find Dr Light's capsule. Keep going deeper into the cave, there'll be a Maverick taxi blocking your way, just blast it and move on. Jump up the tunnel and finish off the two remaining enemies. Go through the door on the right, then drop down the hole to enter Grizzly Slash's room. An easy stage, you shouldn't have trouble getting through it. |
| Duff McWhalen Stage |
|---|
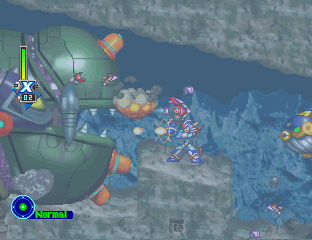 For most of Duff McWhalen's stage, you'll be fighting against the huge submarine "U-555." As soon as you enter the stage the sub will come up from the left with its front facing you. The screen and the sub will be moving to the right, so you'll have to be fast to keep up. The sub will use the four laser ports on its upper and lower front to fire at you, so try to destroy them quickly. For most of Duff McWhalen's stage, you'll be fighting against the huge submarine "U-555." As soon as you enter the stage the sub will come up from the left with its front facing you. The screen and the sub will be moving to the right, so you'll have to be fast to keep up. The sub will use the four laser ports on its upper and lower front to fire at you, so try to destroy them quickly.The lasers will reappear after a few seconds, so keep firing at the bare hull, you'll notice that it'll flash. Keep firing to eventually destroy it completely so that the lasers won't reappear. Do the same for the lower two. The mouth of the sub will also often fire out three homing missiles, you should easily be able to destroy them. It might also fire out a captured Maverick Hunter, quickly touch them before the sub covers them. Try to dodge the moving spike mines, and quickly blast the fish before they eat you. If they do, just keep firing to break out. Eventually, the sub will release a large canon in its mouth and will fire out a huge energy beam. Jump up high or stay low until the beam disappears, but you'll need to be quick as the sub will keep firing the beam. Once you reach an open area the sub will stop and an energy bar will appear. It'll begin to fire out the three missiles as well as the beam, so try to stay low and don't jump when the beam appears. Fire away at the mouth to damage it, once the energy bar runs out, the sub will leave. Go to the right and the sub will reappear, this time with it's rear engine facing you. The screen will begin to move down, and you'll have to move down through the tunnel. Four missile ports on the sub will continuously fire out missiles that fly down or up toward you when they're level with your character, so try to blast the missile ports to get some relief from the barrage. Eventually you'll reach the bottom of the tunnel and the sub's energy bar will appear. You'll need to hit the red part of the engine to damage it, charged shots or the three-strike attack will do fine. Keep blasting away and you'll eventually destroy it. The sub will leave, and you'll enter a sunken ship area. Make your way through the old ship, but be careful of the spikes. once you reach the end you'll notice the capsule on the left, but you'll need X and Duff McWhalen's weapon to reach it. Continue on and the sub will make it's final appearance. This time you'll be fighting the top part of the sub and the screen will move up. Make sure that you don't get caught under any of the rock platforms. Four laser ports will be firing at you, with X, crouch down and fire off a charged shot to hit them, with Zero just hack away or use the C-Sword to hit them. Once you reach the top the energy bar will appear again. The fish robots will appear and harass you, just ignore them unless they get too close. You'll need to hit the protected part of the ship attached to the fin. Destroy the small object below the fin to remove the shield, then blast away at the core. Once you destroy it you can move on to Duff McWhalen's room. |
| Squid Adler Stage |
|---|
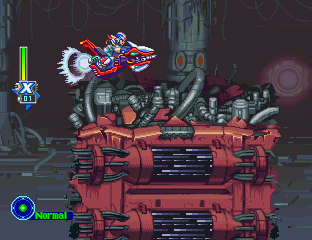 Squid Adler's stage will be tough to get through, you'll need practice to beat it successfully. You'll instantly start off on the Ride Chaser, and the terrain and speed of the screen will be intense, so be ready to have to try this area over again. Try to follow these instructions on how to get through successfully and also be able to grab all eight energy items along the way. First jump to the first platform, then the next, then jump up and again, fire away to destroy the walls blocking your way. Squid Adler's stage will be tough to get through, you'll need practice to beat it successfully. You'll instantly start off on the Ride Chaser, and the terrain and speed of the screen will be intense, so be ready to have to try this area over again. Try to follow these instructions on how to get through successfully and also be able to grab all eight energy items along the way. First jump to the first platform, then the next, then jump up and again, fire away to destroy the walls blocking your way.Jump down, then up a bit to grab the first item, go down low on the platforms to reach the second one. Once you jump back up to the red terrain, jump up onto the first higher platform, jump up to grab the item then dash to fly across the screen. You'll grab the next item and land in the tunnel. Jump up over the depression and blast away at the barrage of walls, but jump up to grab the item hiding above. When you reach the next hole, the item will be in mid-air in the center of the hole. Do a small jump and you should grab it and land on the other side. Jump up into the tunnel and blast away at the walls. When you reach the cliff, just drop off and you'll grab the item in mid-air. Quickly dash through the final three walls to reach the end. If you got all eight energy items, the wall ahead will blow open and you can get to the capsule. Drop down the hole to continue on. The next area's main challenge will be all the locked shutters. Hit the locks and they'll begin to close in on themselves. Once the lock closes, the door will open, but rush through the door before it closes. When there's two locks, hit one, then hit the other, alternating between the two so you can get them both open at the same time. You'll be faced with many of these locks, but just take it in turns to hit each one and you should be able to get them open. Right before the last two locks is a single lock leading to the heart, but you'll need X with the Gaea Armor to reach it. After passing through the last two doors, you'll reach Squid Adler's room. |
| Izzy Glow Stage |
|---|
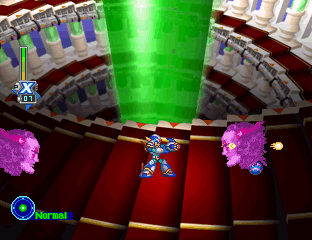 Izzy Glow's stage won't be too hard to get through. First, knock down the bridge over the hole and jump over. Down the hole is a Maverick Hunter and a heart, but you'll need the Gaea Armor to reach it. Keep going and you'll eventually reach the moving spiked platforms. Wait for them to retract back into the roof, then quickly dash under them. Izzy Glow's stage won't be too hard to get through. First, knock down the bridge over the hole and jump over. Down the hole is a Maverick Hunter and a heart, but you'll need the Gaea Armor to reach it. Keep going and you'll eventually reach the moving spiked platforms. Wait for them to retract back into the roof, then quickly dash under them.You'll notice the EX tank up in the roof, but you'll need the Ground Fire to destroy the wood blocks. Continue on and you'll eventually reach an area with spikes on the floor. Wait for the platforms to lower, then jump across the tops of them to reach the other side. Keep winding your way around the platforms and you'll eventually reach a door. Blow it open to enter the second area of the stage. You'll now be in a tower similar to the tower areas of Split Mushroom's stage in MMX4. As you walk forward, the tower will spin, so you'll be effectively climbing the tower. Blast all the enemies that come down, and try to destroy the energy barriers. Dodge the Sigma Virus drones, and you'll eventually reach the top. You'll now have to fight a mini boss. Three heads will come spinning down the poles, eventually coming to a halt. They'll face you and then fire out a large blue beam. Try to get in a gap to dodge the beams, you can also dodge them by staying between them. You'll need to blast away at the face of the black head to destroy it. The boss will take damage, and another set of heads will come down. Keep destroying the black head to eventually defeat the boss. You'll then enter the final area. The last area will have a lot of the auto-defense systems that fire out large yellow energy balls. You can destroy the cannons with the C-Shot or the C-Sword. Keep climbing up the tower, remember that above one of the energy barriers is a hole in the roof leading to a capsule. Once you reach a long tower leading up, jump up and dodge the energy balls, or you can also destroy the cannons to make it easier. Reach the top and you'll find Dr. Izzy Glow's room. |
| Dark Dizzy Stage |
|---|
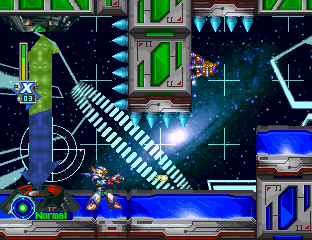 Dark Dizzy's stage runs straight ahead, there aren't many ups and downs to it. In the first area you'll notice that when the large swirling void appears in the background, the speed of the game will slow down, this is part of the stage, similar to the effect of Dark Dizzy's special weapon. Be careful when you walk around the constellations in the background, as the annoying bats will often appear. Dark Dizzy's stage runs straight ahead, there aren't many ups and downs to it. In the first area you'll notice that when the large swirling void appears in the background, the speed of the game will slow down, this is part of the stage, similar to the effect of Dark Dizzy's special weapon. Be careful when you walk around the constellations in the background, as the annoying bats will often appear.The Falcon Armor will greatly help you in this stage. Once you reach the open hole with the moving platforms, jump on it and get ready for a long ride. Be very careful when the bats appear, as they'll also drop down a set of killer spikes, don't touch them. Flying around with the Falcon Armor will help here. The platform will sometimes backtrack around the still platforms, jump on top of them and wait for the moving platform to continue on. Eventually you'll reach the end and you'll notice the energy tank up on a high platform. Use the Falcon Armor or double-jump with Zero to reach it. Jump down on the platform to reach the second area. The second area will have a lot of spikes and the gravity-reversing beams. Jump through the first beam and make your way through to the next one, but only jump back into the fourth one so that you can get to the heart which will be uncovered from the purple blocks. Try to dodge the Sigma Virus drones, there'll be a few of them, so the Virus Buster will help here. Eventually you'll reach the end of the corridor, you can jump down the hole near the door to find the capsule, through the door will be Dark Dizzy's room. |
| The Skiver Stage |
|---|
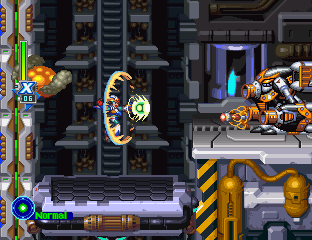 The Skiver's stage will have a lot of the exploding bombs, you'll need to quickly destroy them otherwise you'll take heavy damage. The Falcon Armor will greatly help you in this stage. When the stage begins, go right and quickly destroy the first bomb before it blows. Go through the opening, and get ready to destroy the next bomb hiding behind one of the Repliforce robots. The Skiver's stage will have a lot of the exploding bombs, you'll need to quickly destroy them otherwise you'll take heavy damage. The Falcon Armor will greatly help you in this stage. When the stage begins, go right and quickly destroy the first bomb before it blows. Go through the opening, and get ready to destroy the next bomb hiding behind one of the Repliforce robots.Go through to the next room and destroy the next bomb. when you reach the next room, quickly jump up to the upper platform and destroy the bomb hiding behind the Repliforce robot enemy before it blows. Jump up the tunnel and quickly destroy the next bomb. Once it's gone, an opening in the roof will appear. Jump up to continue on. Once you reach the top, head right to reach a large platform. Your character will automatically walk onto it, the platform will then begin to move down. When you've got enough room, jump off it so you can get to the items below. Once the platform reaches the crumbling ground, it'll smash through it and continue downward. After it plows through the second ground, jump down to grab the Weapon tank before the platform gets too close. After the third platform is broken through, jump down to the right and head through the door. You'll now be in an open area with a platform to the right which slowly takes you up to the next area. With the Falcon Armor, jump and fly directly up to find the capsule. When you step on the platform, it'll move up on a diagonal path, stand on the right edge of it and crouch down so the spikes miss you. Ignore the Sigma Virus drone that appears, it won't catch you. Once at the top, head into the large building and onto another moving platform. This one will move up, and there'll be more bombs to destroy. Jump into the first corridor on the right and grab the two Maverick Hunters, destroy the bomb in the corner. Go back on the platform and head up to the next corridor. Jump in and head down to the corner to find a heart. Get back to the platform quickly before it takes off. Once you reach the top, you'll find the door that leads to the airship where you battle The Skiver. |
| Mattrex Stage |
|---|
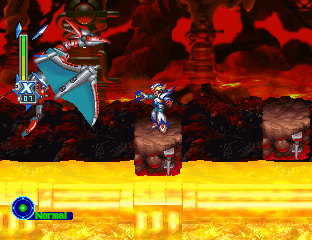 Mattrex's stage will have a lot of fire and lava traps, many of them will beat you instantly, so you'll have to be careful here. At the start, you'll need to head down a large tunnel. There'll be several large dragon-shaped heads that breath our fire. Make sure you don't get caught by the fire. The flames will appear in two ways, one will breathe out a continuous flame, wait until it stop before moving. The other will fire out short breaths, but will eventually stop. Mattrex's stage will have a lot of fire and lava traps, many of them will beat you instantly, so you'll have to be careful here. At the start, you'll need to head down a large tunnel. There'll be several large dragon-shaped heads that breath our fire. Make sure you don't get caught by the fire. The flames will appear in two ways, one will breathe out a continuous flame, wait until it stop before moving. The other will fire out short breaths, but will eventually stop.Once you get to the bottom of the tunnel, head right to reach the lava area. Alia will warn you about the lava, and you'll be able to see it fly across the screen below. Stand next to the hole and wait for the lava to stop. Jump down and head left to find the heart, then go right and hide behind the first rock you find to escape the lava. Once the lava stops, head right and keep hiding behind rocks to dodge the lava. Once you reach the end of the tunnel, quickly blast the door to get to the second area. The second area will have a huge sea of lava, and you can choose two paths to get to Mattrex's room. The first one is straight ahead, use the Raiden Armor sitting just ahead of you to jump over the hole. You'll need to leave the armor and continue across the rocky platforms. The Falcon Armor will greatly help you here. Once you start heading across the rocks, a large red dragon will appear on the left and will follow you. Ignore it and blast the fire balls it fires out. Keep going right, blast any bats that appear and blast the walls that block your way. Eventually you'll reach two moving platforms and a door. The dragon's energy bar will appear, and you'll have to fight it. Dodge it as it flies into the wall, and keep hitting it, use the Gel Shaver to easily beat it, you shouldn't have any trouble beating it. Continue on and you'll reach the large room just outside Mattrex's room. The capsule is down to the right, the Falcon Armor will help you reach it. Jump up the poles to reach Mattrex's room. If you choose to take the Raiden Armor down into the lava-filled area, you'll have to make sure that you don't get hit by many enemies, otherwise the armor will blow and you'll lose instantly. Make your way through the lava tunnels, and eventually you'll reach the room outside Mattrex's. |
| Axle The Red Stage |
|---|
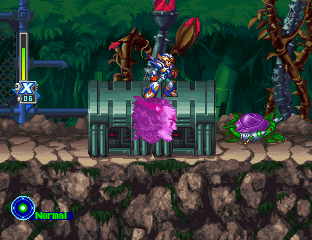 Axle The Red's stage is fairly straightforward, you'll have to mainly deal with a lot of enemies here. Once the stage begins, head right until you reach a cliff. In the right corner are a few v-blocks, use the Gaea Armor to get through them and on to find the heart. Jump up the poles to the top and continue on to the right. When you see the rose-shaped enemies, stay away from them as they will often lash out and grab you. Two charged shots or sustained damage from the Beam Saber will destroy them. Axle The Red's stage is fairly straightforward, you'll have to mainly deal with a lot of enemies here. Once the stage begins, head right until you reach a cliff. In the right corner are a few v-blocks, use the Gaea Armor to get through them and on to find the heart. Jump up the poles to the top and continue on to the right. When you see the rose-shaped enemies, stay away from them as they will often lash out and grab you. Two charged shots or sustained damage from the Beam Saber will destroy them.Keep going until you reach a tunnel leading down. Along the way you'll pass through a tunnel where large vine-type objects will fly out of the floor or roof, you can just see the green tip of them sticking out of the roof or floor, so slow down when you get close and destroy the eye at the base of them when they appear. Once you reach the hole leading down, Alia will warn you of a large hole below, as you jump down, fall to the left to land on a platform next to the hole. A long pole will extend over the hole, grab it and head right. Try to avoid the small spike enemies moving along the poles. When you reach the end of the pole area, if you have the Falcon Armor, fly up to find the capsule. Once you reach the end of the hole, jump back onto solid ground and head right. You'll now need to jump over spiked areas, look up above the spikes and you'll see the green tips of the vines, so jump forward then back, so that you can destroy the vines when they appear. Keep heading right and you'll eventually reach Axle The Red's room. |
| Zero Virus Stage 1 |
|---|
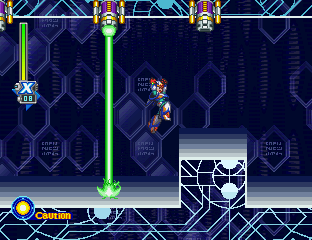 The first Zero Virus stage is the most difficult. For most of the stage you'll have to dodge past laser beams that extend a green beam right across the screen when you pass them. If you touch a beam, you'll be instantly vaporized. It'll be very tricky and will take you a lot of practice to get through, the Speedster part will help you out a lot here, but the best way to get through is by using the Dark Hold weapon. Both X and Zero have this, and also having the W-Energy saver part really helps as well. The first Zero Virus stage is the most difficult. For most of the stage you'll have to dodge past laser beams that extend a green beam right across the screen when you pass them. If you touch a beam, you'll be instantly vaporized. It'll be very tricky and will take you a lot of practice to get through, the Speedster part will help you out a lot here, but the best way to get through is by using the Dark Hold weapon. Both X and Zero have this, and also having the W-Energy saver part really helps as well.When you reach the top of the area that you have to drop down to dodge the lasers, activate the weapon and when you drop, they won't fire! Rush through as fast as you can before the weapon runs out and you'll easily get through safely, only you'll now have to face the Shadow Devil at the end of this stage. |
| Zero Virus Stage 2 |
|---|
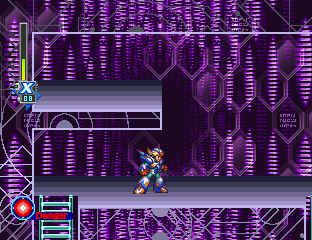 The second Zero Virus stage will have more enemies to bother you with. Fairly straightforward, whenever you encounter one of the large green robots, blast them with the Tri-Thunder of the E-Blade to destroy them quickly. Try to not get hit by too many of the Zero Virus drones, there'll be a few of them so watch out. If you have the Falcon Armor, once you reach the huge hole with all the moving platforms, you can just fly up the cliff easily, otherwise climb the platforms carefully. The second Zero Virus stage will have more enemies to bother you with. Fairly straightforward, whenever you encounter one of the large green robots, blast them with the Tri-Thunder of the E-Blade to destroy them quickly. Try to not get hit by too many of the Zero Virus drones, there'll be a few of them so watch out. If you have the Falcon Armor, once you reach the huge hole with all the moving platforms, you can just fly up the cliff easily, otherwise climb the platforms carefully.The Falcon Armor's charged shot can break through the green robot's shields, so keep firing at them even if they raise it. Once you reach the top of the large tower, the boss room will be to the right, jump up onto the ledge pictured here and walk left through the wall to find a hidden energy capsule which can greatly help you out. Enter the room on the right to fight the boss. |
| Zero Virus Stage 3 |
|---|
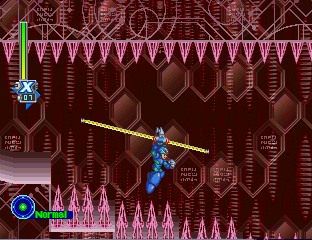 The third stage will have a lot of spike traps. Remember, this is the stage where you find the Ultimate Armor/Black Armor capsule, if you want the Ultimate Armor, you'll have to use normal X without any special armor. Once you reach the large hole with the pole, you'll need to use some fancy dodging to avoid the moving spike enemies on the pole. The third stage will have a lot of spike traps. Remember, this is the stage where you find the Ultimate Armor/Black Armor capsule, if you want the Ultimate Armor, you'll have to use normal X without any special armor. Once you reach the large hole with the pole, you'll need to use some fancy dodging to avoid the moving spike enemies on the pole.Go through the spiked area with the moving platforms, then you'll reach the hole with the capsule below. Keep going and you'll reach another large hole. Proceed across the platforms to reach the end of the stage where you fight Zero or X depending on who you're using. |
| Zero Virus Stage 4 |
|---|
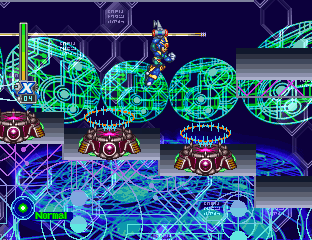 Very straightforward and easy to get through, at the end of the stage you'll reach the room with the eight teleport pods leading to the eight bosses. At the start, drop down the large hole and you'll land on the ground below. Head right and make your way through the spiked tunnels, just make sure you don't touch any of them. Once you reach the large open area with the floor covered in spikes, jump over the platforms and whack the green robots. Very straightforward and easy to get through, at the end of the stage you'll reach the room with the eight teleport pods leading to the eight bosses. At the start, drop down the large hole and you'll land on the ground below. Head right and make your way through the spiked tunnels, just make sure you don't touch any of them. Once you reach the large open area with the floor covered in spikes, jump over the platforms and whack the green robots.Once you destroy the second robot, jump down and you'll land on safe ground. Go right and you'll find the hole leading to the teleport pods. Jump over it to find an extra life and an energy capsule. Once you beat all eight bosses, enter the gold teleport pod. You'll now be in a new area. Head right and eventually you'll reach a large hole. Black blocks will slowly appear in mid-air, jump on each one and head right as they appear and you'll eventually reach the end of the stage where you will have the final showdown with Sigma. |
