
Items Guide
The item list shows where all the special items are to be found and how they can help out X. The list includes the locations of the energy hearts in each levels, the four sub-tanks, the four body upgrades, the robot ride armor carriers, the special upgrade chips, the secret Gold Armor and Zero's Beam Sabre.
Energy hearts will allow X to hold more energy, making him stronger and able to survive longer in battle. There are eight in total to find. Sub-Tanks will allow X to store energy to be used during battle if his energy is low. They are important and very useful. There are four in total.
The body upgrades will allow X to become much stronger and able to perform special abilities. The upgrade chips will further enhance his body upgrade abilities. The Robot Ride Armor can be used to aid X make his way safely through a stage.
| Energy hearts | |
|---|---|
 |
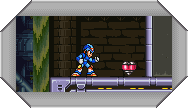
The first heart can be found in Blizzard Buffalo's stage. Near the start of the level you will find a robot ride armor platform. A little further down will be a large number of ice blocks leading down into the ground. Using either the chimera armored carrier or the Tornado Fang, punch or fire a drill into each block to destroy it. Continue down to find the heart. |
 |
The second heart can be found in Toxic Seahorse's stage. This heart is easy to find. Just after the area where you are climbing up the shaft with all the water flowing around, once at the top on the right will be the opening to continue on in the stage, but you will also notice an opening in the ceiling. Go up there to find the heart. |
 |
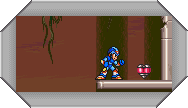
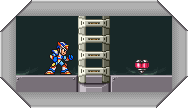
The third heart is found in Tunnel Rhino's stage. Near the start of the stage you will find the heart in a room with spikes on the floor and a large boulder blocking the heart. You will need the Triad Thunder and X-Buster upgrade to get this. Charge up the Triad Thunder and punch the ground to destroy the large boulder. Jump up to the ledge to get the heart. |
 |
The fourth heart is in Volt Catfish's stage. When going up one of the elevators, you will notice that the elevator will keep going up once it passes the opening on the left. Keep going up and then go to the right. You will see the heart lying just above a bed of spikes. To reach it, slide down the wall on the left and jump across to the other wall. Slide down to grab the heart and try to jump back across to the left wall before X falls into the spikes. |
 |
The fifth heart is found in Crush Crawfish's stage. Near the start of the stage there will be an area where one of the chain-ball enemies will crush several platforms. Use an armored carrier from the platform at the start of the stage and go down this area. On the last outcropping on the right side of the wall where the platforms are destroyed, you will notice that the wall has cracks in it. Punch open the wall or use missiles from the Hawk carrier to find the heart inside. |
 |
The sixth heart is in Neon Tiger's stage. At the very end of the level, just before the last door there will be one of the flying enemies which you can ride on. Jump on top of it and dash jump to the right. Grab onto the wall above the door and climb up to find the heart. |
 |
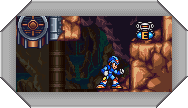
The seventh heart is found in Gravity Beetle's stage. You will probably notice the heart behind a wall high up in the top left corner of the large room at the start of the stage. Once you have beaten Blast Hornet, the wall here should disappear, giving you access to the heart. |
 |
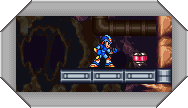
The eighth heart is in Blast Hornet's stage. When you find the Chimera carrier, ride it out of the underground room and continue going right. When you reach the tunnel which is too small for the Chimera to enter, go to the edge of the opening, jump up with the carrier and then jump out of it to reach the wall. You can also use the Leg upgrade and dash upwards to reach this. Climb up the wall and continue right to find this heart. |
| Sub-Tanks | |
|---|---|
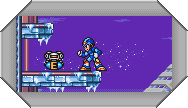 |
The first sub-tank is in Blizzard Buffalo's stage. You will need the Leg upgrade to reach this. Once you exit the indoor area and enter the outside area which has snow falling, use the mid-air dash to reach the sub-tank which is high up on the left wall. |
 |
The second sub-tank is in Tunnel Rhino's stage. This one is in clear view. As you proceed in the stage, in the area with the devices in the roof that drop down rocks, go to the far right of the tunnel where it continues down. Just above the shaft leading down you will see the sub-tank. |
 |
The third sub-tank is found in Neon Tiger's stage. Near the start is a large open area with industrial-type walls either side. Use the mid-air dash to jump up to the wall on the left and climb up. You will see a lot of platforms in the air to the right with the chain-ball enemies on top. Climb across these platforms and on the far right of the room, use the flying enemies to reach the sub-tank which is in the top-right corner. |
 |
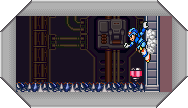
The fourth sub-tank is in Volt Catfish's stage. When you come to the area with the electric balls going up and down the walls, climb up the opening in the roof and go to the left. You will find a robot ride platform. Use either the Chimera, Kangaroo or Hawk and go back to the right. Fall down the hole, and you will land on the ground and fall through it into a secret area. Go to the left to find the sub-tank. |
Armored carriers
 |
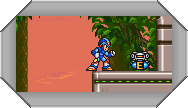
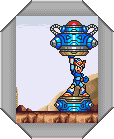
Chimera Carrier | Stage: Blast Hornet |
|---|---|---|
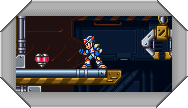
| The Chimera armor can be found in Blast Hornet's stage. You will need to first find this armor before you can use any of the others from the platforms. When you come to the area outside, destroy the large crates up on top of the buildings and fall down below. Destroy the wall on the left with the Tornado fang and go down the hole you find to find the armor. Destroy the machine holding it to reach it. This armor has the standard punching attack and can also charge ahead. |
 |
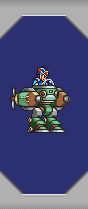 |
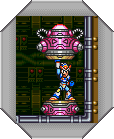
Frog Carrier | Stage: Gravity Beetle |
|---|---|---|
| The Frog carrier is found in Gravity Beetle's stage. In the area where you come outside, you will notice the item on a small platform attached to the wall on the left. Use the mid-air dash and dash up to reach the item. This carrier can be accessed from the robot ride platform and can be used underwater. It cannot execute a charge attack, but it can fire small homing mines on enemy targets. |
 |
 |
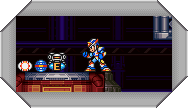
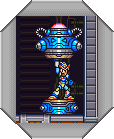
Hawk Carrier | Stage: Crush Crawfish |
|---|---|---|
| The Hawk carrier is found in Crush Crawfish's stage. This one is found near the start of the stage. At the bottom of the large area you will see a small platform above what looks like a shaft leading down. Destroy the platform by standing on it and using the charge-up Triad Thunder. Below is the Hawk armor. This carrier can fire off missiles to destroy targets and can also execute a charge attack, as well as being able to hover in the air for a short time. |
 |
 |
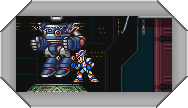
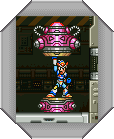
Kangaroo Carrier | Stage: Toxic Seahorse |
|---|---|---|
| The Kangaroo carrier is found in Toxic Seahorse's stage. In the large room filled with water, destroy the large spinning blades with the Frog carrier and jump up the wall. To find the item, jump onto the water to the left and as X just falls in the water jump again and he should jump out of the water. Continue doing this to the left and use the mid-air dash if necessary and you will eventually find the Kangaroo armor on a platform to the left. This carrier will be able to move and jump faster and further, and it will have the drills on its hands similar to the armored carrier in MMX2. These can be used to destroy certain walls and targets. |
 |
Body upgrades
 |
Boots Upgrade | Stage: Blizzard Buffalo |
|---|---|---|
| The Leg upgrade is found in Blizzard Buffalo's stage. Near the end of the level in the area where snow is falling, go under the large platform and destroy the snow machine so that the snow stops falling. Go to the far right upper platform, and use a dash-jump and jump off to the right from the very edge of the platform. If done correctly, you should grab onto the edge of another platform on the right. Go into the hidden room to find the capsule. This upgrade will allow X to execute mid-air dashes left and right, and he will also be able to dash straight up as well. |
 |
 |
X-Buster Upgrade | Stage: Neon Tiger |
|---|---|---|
| The X-Buster upgrade is found in Neon Tiger's stage. Go up to the area where the sub-tank was found, and you will notice a ladder leading up in the top left-hand corner. Climb up the ladder and go to the right. You will find a ladder leading down, but instead go up to the wall on the right and fire the Tornado Fang against it to destroy the wall and find a hidden room. Use the mid-air dash to jump up to the platform with the capsule on it. The X-Buster upgrade will allow X to fire a wave-type beam and then fire a second shot after releasing the first. He can also charge up to a red glow and release the wave beam, and if you release the second beam quick enough it will cross-lap with the other one and create a huge blast that covers a larger range. The special weapons will also be able to be charged up with this upgrade. |
 |
 |
Helmet Upgrade | Stage: Tunnel Rhino |
|---|---|---|
| The Helmet upgrade is found in Tunnel Rhino's stage. In the area with rocks falling from the roof you will notice another boulder hanging from the ceiling blocking a path to the left. Destroy the rock with the charged-up Triad Thunder and continue on to the left to find the capsule. The helmet upgrade will allow X to view a large map of each stage whenever you enter one in which the Maverick boss has been defeated. It will also tell you what items can be found in each level on the map screen and will show you their locations on the map of the stage. |
 |
 |
Body Upgrade | Stage: Volt Catfish |
|---|---|---|
| The Armor upgrade is found in Volt Catfish's stage. One of the elevators in this stage will lead up to an area where there is the normal way to continue on in the level as well as leading you up to a higher area where a motionless platform lies. You cannot climb up the walls as there are spikes all over them, so you will need to use the charged-up Gravity Well to activate the platform and take you up to the room where the capsule is. The Armor upgrade will cut damage to X's systems by 50% and create an energy field around him to reduce the damage inflicted. |
 |
Chip upgrades
The chip upgrades shown below will only be able to be used if you have the corresponding armor upgrade that matches the chip. X will only be able to use one of the four chips unless you find the secret Gold Armor shown below.
 |
The Energy chip can be found in Blast Hornet's stage. In the large room with the conveyer belts, go to the top right wall of the roof and you will notice an opening with spikes up the wall. To successfully reach the opening, you will need to jump out in front of the spikes from the wall and then use the upward dash to reach the top and find the capsule. This might take a while to get. The Energy chip will allow X to slowly regain his health if he stands still for a while. |
 |
The Arm chip can be found in Gravity Beetle's stage. Near the end of the stage just before the shaft leading up to the last door is a wall which will ping when you shoot it. Go to the robot ride armor platform and use either the Kangaroo, Chimera or Hawk and destroy the wall. Continue on to find the capsule. This chip will give X a new weapon in which he can fire off continuous charged shots without having to charge up his weapon, but it will cost weapon energy. |
 |
The Leg chip can be found in Toxic Seahorse's stage. In the watery area with the floating green enemies, use the Frog carrier to destroy the large spinning fans on the far right of the room. Once they are destroyed, jump up the wall and out of the water. Continue right to find the capsule. This chip will allow X to dash twice in the air instead of only once. |
 |
The Body chip is found in Crush Crawfish's stage. You will need one of the Robot Ride Armor vehicles to find this. Just after the area with the falling platforms, one of the large holes is hiding a secret area. Jump down the hole in an armored carrier and destroy the wall on the left to find the capsule. This chip will further enhance X's defensive capabilities, reducing damage he receives greater than before by creating a stronger energy field around him. |
Secret items
 |
Gold Armor | Stage: Doppler Stage 1 |
|---|---|---|
| The Gold Armor can be found in the first level of Dr Doppler's lab. Just after the robot ride armor platform and before the room with the falling spiked balls will be a large hole. Drop down the left of the hole and slide down the wall until you find the secret room. To actually see the capsule you will need to have full health and you must not have gotten any of the four energy chips. This capsule will give X all of the energy chips and it will turn his armor to a gold color. X will now have all of the chip's upgrades in one, which will make the game much easier. Just remember to not get any of the upgrade chips in the other levels if you want to find this. |
 |
 |
Zero's Beam Saber | Stage: Doppler Stage 1 |
|---|---|---|
| Zero's Beam Saber can be used by X, and here's how! First, you must have defeated Vile in the secret factory level using the Ray Splasher against him so that he explodes and doesn't just run away. In Dr. Doppler's first stage, you will find in the large, normally empty room a bug-type boss will be waiting. Use Zero to defeat it and the boss will fly into him and cause all of his energy to disappear. X will teleport down and Zero will say that he's failed. Zero will then go back to Dr. Cain and will give X his Beam Saber! You can now use it the same way Zero did, by charging up until X glows green. This time when X fires it he will shoot a large green energy beam forward as well. The only disadvantage is that Zero won't appear in the finale at the end of the game. |
 |