Stage Guides
This section holds guides for each of the twelve stages in the game. As most of the stages are quite complex, each guide will give you hints on how to get through them successfully. Keep in mind though that these guides are spoilers, so don't read them unless you've already beaten the stages or if you really need help.
Each stage description also indicates what changes will occur in each stage due to the Nightmare System and which stages affect others.
The Nightmare System
A new feature of Mega Man X6 is the Nightmare System, one which causes changes to occur in stages including randomizing certain areas, as well as introducing new features in each stage. You'll be able to tell if something new will happen in a stage if it shows up as red on the Boss Selection Screen.
Each stage has two different Nightmare System additions, and each stage will affect others, keep in mind that you'll need some of the new features to occur if you want to reach certain items.
Each stage guide below will detail the two changes for each stage, which stages affect others and the specific change that occurs. Each stage also has it's own secret boss room where you'll fight the Zero Nightmare/High Max/Dynamo. The guides below detail the main stages, their Nightmare System additions and the locations of the secret boss rooms.
| Click on an image to view the guide |
 |
|---|---|
 |
|
| Intro Stage |
|---|
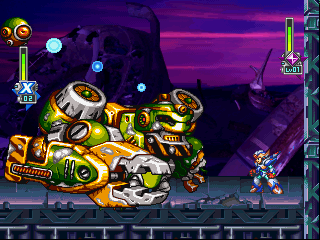 Not much difficulty here, you'll just need to make your way across the ruined surface to the underground complex ahead. Make your way over the terrain and use the X-Buster or Z-Saber to easily destroy any resistance along the way. Once you reach the entrance of the complex, head in and move on. You'll eventually reach a ladder that is blocked by a large block. Not much difficulty here, you'll just need to make your way across the ruined surface to the underground complex ahead. Make your way over the terrain and use the X-Buster or Z-Saber to easily destroy any resistance along the way. Once you reach the entrance of the complex, head in and move on. You'll eventually reach a ladder that is blocked by a large block.Use the Z-Saber to destroy the block and any others that you come across. Keep going and you'll find large circular machines rolling towards you. Use the Z-Saber to destroy them. Head on and you'll eventually reach an area with large drill-type machines in the ceiling. Pass under them quickly as they'll crash down and try to crush you. Once you make it through this area you'll reach the end of the stage where you face the Giant Mechaniloid and High Max. |
| Commander Yammark Stage |
|---|
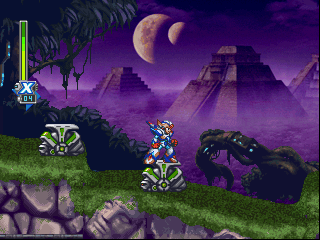 You'll begin in the middle of an Amazon forest, surrounded by lush foliage. Head right and you'll eventually come across strange looking slug-like creatures. You can ride on their backs, just make sure that you don't shoot them otherwise they'll curl up into a ball and roll around. Later on you'll need to ride on them to pass through a spike filled area. You'll begin in the middle of an Amazon forest, surrounded by lush foliage. Head right and you'll eventually come across strange looking slug-like creatures. You can ride on their backs, just make sure that you don't shoot them otherwise they'll curl up into a ball and roll around. Later on you'll need to ride on them to pass through a spike filled area.Keep going right until you reach an opening in the ground past the praying mantis-type enemy (they can be completely destroyed by hitting them with the Yammar Option weapon). Drop down the shaft and head left. You'll encounter the first Nightmare enemy down here, destroy it and move on. Destroy the snake-like creatures dangling out from the roof and floors, and keep going until you reach another opening leading down further underground. Head on down to the right and you'll eventually find a new underground ice-cave area. You'll have to be careful here as there'll be a lot of spike-filled areas about. Head on through the cave system and you'll find an area where the floor is completely lined with spikes. Here you'll have to ride across the slug creatures to avoid the spikes, as you go along be sure to destroy the flying robots, they'll shoot down annoying projectiles from above to distract you. Once you reach the final slug (the spike floor level will drop a bit) jump over what looks like a large hole and you'll land on safe ground below. Head right to leave the underground cave. You'll be back out in the open, in an area where large platforms hover above a huge hole. Make your way over the platforms, you'll have to destroy many of the praying mantis enemies before reaching the end. Keep in mind that there's a few trapped Reploids out here. Once you reach the end you'll find the entrance leading to Commander Yammark's room. Secret Boss Room: Just after you enter the underground ice-cave area, head forward and you'll eventually find a pole leading down into a large hole in the ground. You'll now need X's Blade Armor, or Zero to reach the teleport portal. Jump up into the hole in the ceiling above and you'll find a new area. Many trapped Reploids will be here, make sure you rescue them all. Head right and you'll find loads of the snake creatures coming out of the floor and ceiling. Make your way through here, you should eventually reach another large hole leading down. Jump up to the opening on the right to find another trapped Reploid by a Nightmare, then drop down the hole and stay against the right wall. You'll fall down straight into the teleport portal below. For the next area, you must have X with the Blade Armor equipped. Head right and you'll find another open area with platforms over a huge hole. Head over the platforms, you'll find several praying mantis enemies along the way, you'll also find areas where you need the Mach Dash to get through, otherwise you won't be able to make it. Keep going and you'll eventually reach the end to find the secret boss room. Nightmare System Effects:
|
| Ground Scaravich Stage |
|---|
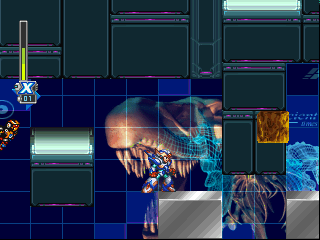 Ground Scaravich's stage will be a large museum with four inner sub-areas which will be random each time you enter the stage. Head down the staircase on the right and move forward. You'll eventually find a large transparent blue totem pole. Touch the pole to transport to an inner sub-area. Each area is fairly small, you'll have to make your way to the end of it to reach small orange statues. Ground Scaravich's stage will be a large museum with four inner sub-areas which will be random each time you enter the stage. Head down the staircase on the right and move forward. You'll eventually find a large transparent blue totem pole. Touch the pole to transport to an inner sub-area. Each area is fairly small, you'll have to make your way to the end of it to reach small orange statues.Destroy the statue to teleport back to the main museum. You'll also find that each area is swarming with Nightmares, use these areas to build up your Nightmare Soul count. Once you destroy the orange statue, you'll be able to move on in the main museum. You'll reappear near the totem pole that teleported you, but it'll now be active and will attack you. Four heads are on the pole separated by a larger head in the center. Each pair of heads will spin around and fire energy balls or arrows at you, dodge their fire and blast away at them. Once you destroy two heads, the center head will take off and come after you. Quickly destroy it and finish off the remaining two heads to destroy the pole. Move on and drop down the hole ahead. Go left and you'll find the second totem pole. You'll teleport to another inner-area. Make your way to the end of it and destroy the orange statue. Once you teleport back to the main museum, head forward and take out the totem pole. Move forward and drop down the next hole. Head further down to the third totem pole. Enter the inner-area and destroy the orange statue. Blow apart the third totem pole and head on to the final one past a bed of spikes. Clear the final inner area and destroy the fourth totem pole to finally reach Ground Scaravich's room. Secret Boss Room: Eventually you should find the teleport portal in clear view in one of the inner-areas. As the inner-areas are random, it might take a while to find it, but once you do, head in to reach the path leading to the boss room. You'll now be in a large room full of Nightmares, head through and destroy as many Nightmares as possible. You should eventually find the door leading to the secret boss room. Nightmare System Effects:
|
| Blaze Heatnix Stage |
|---|
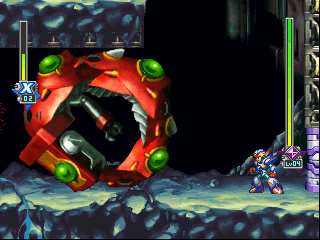 Blaze Heatnix's stage will be filled with large red circular mechaniloids like the one pictured on the right. You'll have to face many of them before reaching Blaze Heatnix's room, each one has a lot of health, so it'll take some fancy footwork to dodge their attacks. Once you begin, head forward and drop down into the area where you have to fight the first giant mechaniloid. You'll notice that it'll have four green bulbs around it, it'll often fire out green energy balls at you, so get ready to dodge them. Blaze Heatnix's stage will be filled with large red circular mechaniloids like the one pictured on the right. You'll have to face many of them before reaching Blaze Heatnix's room, each one has a lot of health, so it'll take some fancy footwork to dodge their attacks. Once you begin, head forward and drop down into the area where you have to fight the first giant mechaniloid. You'll notice that it'll have four green bulbs around it, it'll often fire out green energy balls at you, so get ready to dodge them.The entire thing will be moving back and forth across the room, jump up the wall and over it when it passes or crouch down in the low trenches to dodge it. If you use the Meteor Rain/Ensuizan you'll heavily damage it, otherwise just use the Z-Saber or the Giga Attack and hack away at the bulbs when it stops moving. Keep dodging it and you'll eventually destroy it. Once it blows head through the door on the right. You'll now be in a large shaft leading down filled with fire exhaust ports. Head down and make sure you dodge the flames, they cause serious damage if they hit you. Keep winding your way down through the platforms, once you reach the bottom of the shaft you'll spot a hole leading down on the right. Drop down and you'll land in another cavern with the second giant mechaniloid waiting. A large platform is in the center of the room, the mechaniloid will move around this in an anti-clockwise motion, jump up the wall and blast away at the bulbs when it comes into range. Once you destroy it head through the door on the bottom right corner of the room. You're now in a large shaft with two doors on the right wall - one on at the base of the shaft and the another a little higher up. At the top of the shaft is the area leading on to the secret boss room. You can go through either of the two doors, they both lead to similar areas where you'll be facing another giant mechaniloid. In both rooms, you'll have vertical poles you can grab onto to help you dodge the mechaniloid as it moves around. A good tactic is to follow it to the edges of the room, then when it stops use the Giga Attack (Falcon Armor is the best) and you should cause severe damage to it. Finish it off then move on through the door on the right of the room. You'll now enter into either the base of a large shaft or about halfway up (if you went through the upper door in the previous shaft-room). Lava will begin to flow up into the room and another mechaniloid will appear from below. The screen will begin to move up as well as the lava so you'll need to be quick to avoid it. Each time the mechaniloid comes up try to cause as much damage as possible with the Z-Saber (or the Giga Attack), as it'll be difficult to hit the two lower bulbs. Keep moving up the shaft while damaging it, then once you destroy it head up to the top of the shaft. Head through the door on the right to enter the room with the final mechaniloid. This one will be much easier to fight, as you'll have three platforms to stand on while the lower part of the room fills with lava. Wait for the mechaniloid to hover below you, jump up over it and it'll rise up out of the lava. Hack away at the bulbs before it lowers. Keep this up to destroy it, then head into Blaze Heatnix's room on the right. Secret Boss Room: Once you reach the first tall shaft after destroying the second mechaniloid, the path leading to the teleport pad is up at the top. You'll need Zero or X with the Blade Armor equipped. X will also need either the Speedster or Hyper Dash, and the silver blocks will help as well. Go up to the top of the shaft and double-jump up or Mach Dash up through the opening in the ceiling. You'll be able to pick up a lot of trapped Reploids, a heart and upgrade capsule on the way, but once you reach the top of the shaft, head right to eventually find the teleport portal. Once you reappear, you'll be at the base of a tall shaft filled with the fire-exhaust ports. Head up the shaft and make sure you pick up the energy tank along the way. Once at the top, head right to eventually find the door leading to the secret boss room. Nightmare System Effects:
|
| Blizzard Wolfang Stage |
|---|
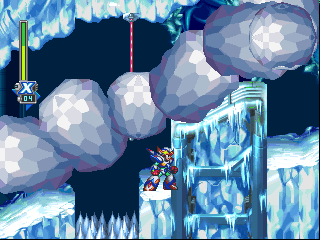 Blizzard Wolfang's stage will be full of areas where huge ice blocks will be tumbling down the screen either straight down or rolling down a slope. They cause serious damage if they strike you so you'll have to be quick to dodge them. Once you begin, head right over to the pole leading up to the slope. Blizzard Wolfang's stage will be full of areas where huge ice blocks will be tumbling down the screen either straight down or rolling down a slope. They cause serious damage if they strike you so you'll have to be quick to dodge them. Once you begin, head right over to the pole leading up to the slope.As you head up the slope, you'll find it difficult to climb as everything is very slippery, try to hide below outcroppings before the avalanche begins. If you're quick enough, you should be able to make it all the way to the top before the blocks fall. Hide in the small alcoves and below outcroppings on your way up, and make sure you destroy the enemies you'll encounter along the way. You'll have to survive several avalanches before reaching the top, but once you get there, head right and you'll find an open area where more ice blocks will fall from the ceiling. Once the blocks stop, jump over to the small platforms sticking up from the hole. Make your way over the hole, once you reach solid ground you'll find another slope leading down. Head down the slope once the avalanche stops and go down the ladder at the base. Drop down and climb up the slope on the left, but be careful as large blocks will bounce down from above. Drop down once you reach the top and head down the next slope. Eventually you'll reach a flat area, go forward and drop down into the large pit ahead. It'll look as if you're trapped, but ice blocks will begin to drop down one by one from the ceiling. Make sure you don't get crushed by any, and once enough have landed near the right wall, jump on them to reach the top of the hole. Once you get out of the hole head right and jump into the next pit. You'll find a few spiked areas in this next hole, so make sure you avoid them. Once enough blocks drop down from above, jump up and head out of the hole. Go right and you'll reach a large shaft leading up. Climb up the ladder and you'll spot a row of blocks beginning to fall down. A gap will be in each of the rows, just before the row lands jump up as the gap will seal and if you're in it when it seals you'll lose a life. Keep heading up the shaft as the blocks fall, and try to rescue as many trapped Reploids on the sides of the shaft as possible. Once you reach the top head through the door on the right to reach Blizzard Wolfang's room. Secret Boss Room: You'll need to enter this stage when it shows up as red on the Boss Selection screen so that the meteorites will be falling down in certain areas. You'll also need to be using Zero, or X with the Blade Armor or Shadow Armor. Once you reach the first area where the ice blocks tumble down the slanting slope, head down to the base of the slope and head through the opening ahead. You'll now be in the area where the energy heart and EX tank are hidden. You should be able to see the teleport portal high up on the other side of a wall, jump down below it and use the Mach Dash or Zero's double-jump to reach it. If you're using the Shadow Armor, drop down the spike lined hole, grab the EX tank (if you haven't yet) and go up the ladder to reach the portal. Once inside, head down the long ramp ahead and blast any enemies along the way. Dodge the spikes and holes along the way, once you reach the base you'll spot a pole leading down. Grab hold of it and slowly move down to the bottom. Directly below is a bed of spikes, to the left is an area with a trapped Reploid (you'll need the Shadow Armor to reach him), and on the right is the door to the secret boss room. Jump over the spikes to reach the door. Nightmare System Effects:
|
| Rainy Turtloid Stage |
|---|
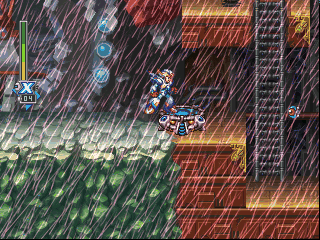 Rainy Turtloid's stage will be a long open area trek down a long river, so you'll have to make sure that you don't fall in the water. Once you begin, head right and jump over the water pits ahead. After clearing the first few, you'll reach a building with a health pod at the entrance. Rainy Turtloid's stage will be a long open area trek down a long river, so you'll have to make sure that you don't fall in the water. Once you begin, head right and jump over the water pits ahead. After clearing the first few, you'll reach a building with a health pod at the entrance.Head in and you'll notice that heavy rain will begin to pour down from above. X or Zero will speak to Alia about the acid rain, you'll have to be quick in these areas as the rain will slowly drain your character's health. Inside the building you'll have to find four small cores and destroy them, look around for them, then once you clear them all, drop down to the floor and destroy the large object blocking the exit on the right. Once you blow the machine, the rain will stop and you'll be able to move on. Go over to the cave ahead and the rain will begin coming down again. Head up the sloping ramp and you'll encounter a large mechaniloid at the top. Wait for it to move it's arm then blast away to destroy it. Destroy the core at the base of the ladder ahead, then head up and continue on. Head to the left above and destroy the next large mechaniloid you come across. Blow the core below the next ladder and head up out into the open. Go up the sloping ramp and destroy the mechaniloid at the top. Destroy the core, then drop down into the large hole on the right. The final core is just above the generator, destroy it to remove the generator's shield. Blow the generator and continue on. Just ahead is a very long river, so you'll have to be careful now. Jump across the ledges in the water, and make sure you destroy any cores along the way. When you reach the moving platforms, be patient and wait for them to come close enough, then use them to get across the river. After you destroy two cores along the way you'll reach an area full of energy capsules, this is also a useful area for filling up energy tanks. Keep going and you'll eventually reach the generator. If you managed to destroy all the cores along the way it's shield will be down. Destroy it and head into the next inner-area. In this next area, you'll find a large hole ahead with poles leading down. Straight ahead is the Armor capsule for the Shadow Armor beyond spiked areas, you'll need the Blade Armor to reach it. Down the hole are three tunnels leading off both the left and right walls, some will contain the cores and others trapped Reploids. At the end of each tunnel is a small opening lined with spikes, wait until you get the Shadow Armor before trying to get through them. The cores will be hiding on the middle and lower left tunnels, while the cores on the right will be in the lower and upper tunnels. Once you destroy the four cores head down to the middle right tunnel to find the generator. Destroy the generator and head through the door to reach Rainy Turtloid's room. Secret Boss Room: In the final acid rain area with the tunnels leading off on each side of the large hole, head down the lower left tunnel to reach the teleport portal. You'll need to make it past the spiked hole, the Shadow Armor makes it very easy but if you use Zero or any other suit for X you'll have a difficult time aiming a mid-air dash correctly. Once inside you'll have to destroy more cores to stop the acid rain. You'll be in a large room with many tunnels leading off down the left and right walls. Many of the tunnels will contain trapped Reploids and energy capsules, the cores will be hidden down the following tunnels: (the top level where you start is classified as the first tunnel) on the right wall down the second tunnel from the top, left wall third tunnel from the top, fourth level down in the right tunnel and finally, bottom level in the left tunnel. Once you destroy all four cores destroy the generator in the lower right tunnel and head through the door to reach the secret boss room. Nightmare System Effects:
|
| Metal Shark Player Stage |
|---|
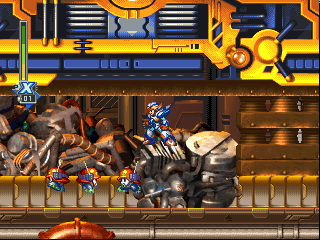 Metal Shark Player's stage will be dominated by a large trash compactor, you'll have to avoid being crushed by it quite often. Once you begin, head forward and jump into the Raiden Armored Carrier. While in the carrier you can't be crushed by the compactor, so use it as long as you can. Head right and traverse over the piles of junk in the way. Trash any enemies you come across, then once you reach a tall pile of junk too high to jump over, leave the carrier and head on. Metal Shark Player's stage will be dominated by a large trash compactor, you'll have to avoid being crushed by it quite often. Once you begin, head forward and jump into the Raiden Armored Carrier. While in the carrier you can't be crushed by the compactor, so use it as long as you can. Head right and traverse over the piles of junk in the way. Trash any enemies you come across, then once you reach a tall pile of junk too high to jump over, leave the carrier and head on.When you reach a higher area where the compactor crashes down to the ground level, dive into the small trenches to avoid it. Keep going and you'll eventually move clear of the compactor. Head down the ladder on the right to land in another compactor area. You'll be going left this time, and the compactor will have many more obstacles to avoid. Head in and be ready to move quickly. Destroy the gray blocks of junk that get in your way, and make sure you clear out all the Nightmares here, as a few trapped Reploids will be hiding among the junk piles. Small pylon extensions will be jutting out from the compactor, make sure you don't get crushed by any of them. Once you eventually reach a ladder leading down, head down and touch the teleport portal to warp to the next area of this stage. You'll now be in an area with another compactor, but the conveyer belt will be moving to the left, so you'll have to be quick to avoid being crushed. Walk against the conveyer belt to the right, you can also jump to move against it's motion. The compactor will have the large pylons attached to it again, make sure you don't get crushed by them. Move along through the piles of junk, and be careful of the spikes sticking out from the compcator and the ground. If you see any gray blocks sliding towards you, quickly destroy them before they crush you between piles of junk. Once you reach a point where spikes are lining a block of junk, jump up the side of the pylon coming out of the compactor on the left, then once the compactor rises up, mid-air dash to the right over the spikes to dodge them. Keep moving through the junk, and keep an eye on the height of the compactor, as you'll have to crouch down in some areas to avoid being crushed. Eventually you'll reach the end of the compactor and emerge to an open area. Head forward and a massive trash compactor mechaniloid will drop down from above and literally fill the screen. It'll rise up a bit and an energy bar will appear. Once it begins to attack it'll lower down two arms with spikes so make sure you don't touch them. It'll drop down several bombs, try to stay out of their way as they bounce along the ground. Eventually it'll lower down a large object with six circular cores on it. The blue ones will fire off shots at you, the purple ones are the weakness of the mechaniloid. Blast away at the three purple cores to damage it, once you destroy the three cores the entire thing will blow. Make sure you dodge the spike attacks it launches. Once it blows head through the door ahead to reach Metal Shark Player's room. Secret Boss Room: At the end of the second trash compactor area, instead of heading down the ladder to teleport to the next part of the stage, keep going left and you'll find that the room will keep going. You'll need to be very fast to get through the narrow passage below the compactor without being crushed, and below you'll need the Blade Armor with the Speedster part equipped or the Ultimate Armor. Once you clear the compactor you'll find a ladder leading down. Drop down below and head right. You'll find a huge hole with three Nightmares floating above it. Destroy them and use the Mach Dash or the Nova Strike attack to reach the other side. Beyond the point where the Helmet capsule for the Shadow Armor was, the teleport portal will be waiting. Head in to teleport to the secret boss room area. You'll now be in another conveyer belt area, but this time the screen will automatically move to the right. You'll have a Raiden Armored Carrier available, but you'll probably find it easier to make it through on foot if the brown blocks are active in this stage (destroy them with the Ground Dash). Head through the compactor area, and make sure you don't get caught on the left side of the screen. If you see any gray blocks sliding towards you, quickly destroy them before they squash your character. This area is fairly straight forward, eventually you'll reach a tall pile of junk with a trapped Reploid behind it. Just behind the Reploid is the door leading to the secret boss room. Nightmare System Effects:
|
| Shield Sheldon Stage |
|---|
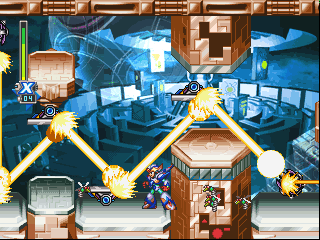 Shield Sheldon's stage will be full of areas with strange laser devices. Once you begin, head right until you reach a large hole. You'll notice a Metool will be walking in mid-air, it's actually standing on an invisible block - more work of the Nightmare. Three blocks span the gap, try to estimate where they are or just dash-jump to the other side. Keep going and you'll reach another hole with the invisible blocks, head across and move inside the Laser Institute facility. Shield Sheldon's stage will be full of areas with strange laser devices. Once you begin, head right until you reach a large hole. You'll notice a Metool will be walking in mid-air, it's actually standing on an invisible block - more work of the Nightmare. Three blocks span the gap, try to estimate where they are or just dash-jump to the other side. Keep going and you'll reach another hole with the invisible blocks, head across and move inside the Laser Institute facility.Just ahead will be a single laser and a mirror reflector in front of a sealed door. Stand by the door and wait for the laser to fire at the mirror. Once it hits the mirror the beam will redirect and hit the door to open it. Head in and continue on to the next door. Wait for the laser to hit the mirror, then the door will open. In the next room you'll have to shoot the mirror by the door to reposition it. Once it's in the correct position, the reflected beam will hit the door and open it. Enter the next room and jump up the tall platform. Shoot the mirror straight ahead to allow the laser beam to reflect down to the lower right of the screen. Follow the beam down and you'll find two more mirrors by two doors, one in the right wall and one in the floor. Redirect the mirrors to open each door, the door on the wall leads to Shield Sheldon's room while the one in the floor leads to the secret boss room. Secret Boss Room: At the end of the stage just before Shield Sheldon's room you should spot a door in the floor. Use the mirrors to reflect the laser beam to hit the door, then head down into a complex laser-mirror area. You'll need to redirect the lasers to hit the purple beam emitters, once they're hit they'll begin to fire. Keep moving along the room and redirect the beams to the end of the room, you'll find another door in the floor. Use the mirrors to direct the laser to hit it, then drop down below. Through the left wall below is another upgrade capsule, head right to reach the teleport portal. Avoid the spikes along the floor, when you reach an open area jump over to find invisible blocks appear when you land on them. Go a little further forward to find the teleport portal. In the new area you'll just have to head over spiked areas and a large hole before reaching the end. On the way you'll spot the weapon tank lying on a bed of spikes, you'll need the Shadow Armor to reach it. Head over the large hole by traversing across the suspended poles in the air to reach the boss room. Nightmare System Effects:
|
| Infinity Mijinion Stage |
|---|
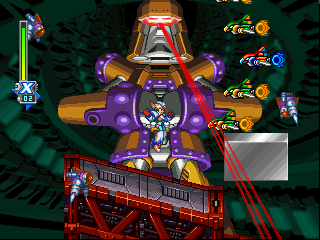 Infinity Mijinion's stage will have you battling against a gigantic mechaniloid in the background. You'll have to battle against it for most of the stage, so get ready to move quickly. Once you begin and the mechaniloid appears, it'll repeatedly fire down huge energy balls from it's face. Keep moving to dodge it. Head down further into the stage and avoid the large holes along the way. Small bird-like robots will appear often and fire at you, try to destroy them before they ram you. Infinity Mijinion's stage will have you battling against a gigantic mechaniloid in the background. You'll have to battle against it for most of the stage, so get ready to move quickly. Once you begin and the mechaniloid appears, it'll repeatedly fire down huge energy balls from it's face. Keep moving to dodge it. Head down further into the stage and avoid the large holes along the way. Small bird-like robots will appear often and fire at you, try to destroy them before they ram you.Eventually you'll reach a huge cable and an energy bar will appear. You'll need to strike the large red core on it to cause damage, if you use the Meteor Rain/Ensuizan, it'll cause severe damage. Once the cable blows you'll be able to move on. The giant mechaniloid will use a new attack, the head will rise up and close in on you, three small drones will then appear around the screen. A large red beam will scan along the screen from the head, if the beam hits you while you're on the ground, it'll lock onto you and after a second the three drones will fire out energy beams at you. Jump up quickly to dodge them, and try to stay off the ground to dodge the scanner beam. Keep going and you'll eventually reach the next cable. The mechaniloid will call down two large walls which will fire energy blasts at you, use the same tactics as before on the red core to destroy it. Once the cable blows the entire mechaniloid will explode. A teleport portal leading to the secret boss room will appear, head right to continue on to Infinity Mijinion's room, which is just a little further down. Secret Boss Room: After you destroy the second cable which will cause the giant mechaniloid to explode, the teleport portal will appear in the air. Jump into it to teleport to the secret boss room area. Once you reappear, head right to find a huge hole and a long pole extending across. Head over and destroy any Nightmares along the way, you'll also find many trapped Reploids here, be sure to save them all. Keep jumping across the poles and you'll eventually reach the other side where the door leading to the secret boss room will be waiting. Nightmare System Effects:
|
| Gate's Laboratory Stage 1 |
|---|
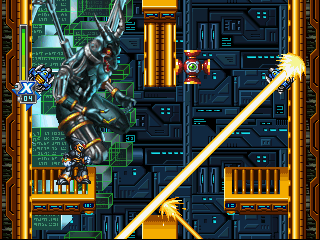 You'll need X equipped with the Shadow Armor or Zero to make it through the first area of this stage. Once you begin, you'll land among the ruins of Eurasia's crash site. The entrance to Gate's lab will be further ahead through the ruins. Once you reach the huge opening in the ground, Alia will speak to your character and say that she won't be able to contact you while you're inside. You'll need X equipped with the Shadow Armor or Zero to make it through the first area of this stage. Once you begin, you'll land among the ruins of Eurasia's crash site. The entrance to Gate's lab will be further ahead through the ruins. Once you reach the huge opening in the ground, Alia will speak to your character and say that she won't be able to contact you while you're inside.Drop down the huge hole and make your way inside. You'll enter into a colorful interior complex, but the first part will have walls lined with spikes. If you're using X with the Shadow Armor, don't even worry about the spikes, just climb up the walls to reach the top of the shaft. If you're using Zero, use the Hyoroga so that he jumps up and hangs from the ceiling. Once there, dash to the left or right so that you avoid the spikes and land on safe ground. Once at the top head right to find a long sloping ramp heading down. The ramp will be covered in ice so you'll have to be careful. Head down and try to dodge the lasers and holes along the way. Once you reach the bottom head up the ladder on the right into a new shaft. Head up the shaft and try to avoid the intense laser beams along the way, as well as the enemies climbing around the walls (do they look familiar?). Once you reach the top head right and move down along the corridor. Destroy all the enemies along the way, make your way through all the lasers and enemies and you'll eventually reach a door. Head through and as soon as you can move again jump up the wall as lava will begin to fill the room. Once it just about reaches you it'll lower down below you. Jump down and quickly head through the door on the right. Go over to the hole in the roof and the lava will rise again. Quickly head up through the hole and go right. Destroy the enemies along the way and you'll eventually reach a ladder leading down. Wait for the lava to lower, then climb down and head right. Head through over to the icy ramp and the lava will begin to rise again. The screen will slowly move up, follow it up the large shaft and make sure you destroy any Nightmares you encounter. Try to avoid the spiked areas along the way, eventually you'll reach a door at the top of the shaft. Head through it to confront the boss of this stage. |
| Gate's Laboratory Stage 2 |
|---|
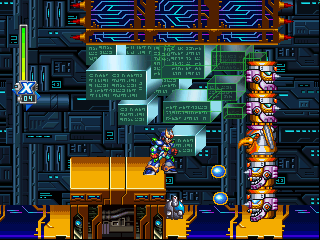 Halfway through the second Gate's Lab stage you'll have to fight High Max. Once you begin, jump up to the poles leading up and make your way up the shaft lined with spikes. Try to destroy the brown blocks that appear, and you'll have to jump from pole to pole before reaching the top. Halfway through the second Gate's Lab stage you'll have to fight High Max. Once you begin, jump up to the poles leading up and make your way up the shaft lined with spikes. Try to destroy the brown blocks that appear, and you'll have to jump from pole to pole before reaching the top.Once you reach the top, head right. Keep going until you spot a large mechaniloid which will fire missiles at you. Destroy it, then head up to the platforms above it. Make your way across the platforms and destroy any Nightmares that appear. Keep going and you'll eventually reach a small room full of Nightmares. Destroy them all and grab the large energy capsule in the corner before leaving. Drop down the hole and head right. In the next area you'll be in a large room with four of the totem poles from Ground Scaravich's stage scattered around. Head over to the first pole and destroy it by blowing out the four heads and the center head. Continue on and destroy the second pole. When the small energy balls moving around the floor stop moving and open up, blast them quickly before they fire. Climb up the ladder after the second pole and jump over to the moving platform. On the left is another totem pole, stay on the moving platform and blast away at the heads. Hit the lower two heads by sliding down the side of the platform. Once it blows head over to the platform on the left. Go left and you'll see another moving platform. Jump over to it and begin firing away at the totem pole on the left. When the platform rises up to the roof, slide down the side of it to avoid being crushed. Once you destroy the pole head up the ladder behind it. Head right and over the spikes in the floor to find another totem pole. Destroy it and head right to find yet another one beyond a bed of spikes. Trash it and head up the ladder behind it. Go left and you'll find an area filled with spikes, so you'll have to be very careful here. Wait for the moving platform to come close, then jump on and ride it to the left. Crouch down to avoid the spikes in the roof, then once you reach the second vertical moving platform, jump on it but make absolute sure that you don't ride it as it goes up as it'll move straight into the spikes in the ceiling. Wait for the third platform ahead to move clear, then jump over the spikes on the left and mid-air dash to fly past them to land on safe ground. Once you're through, climb up the ladder and head through the door on the right to confront High Max. Once you defeat High Max you'll reappear in a new area. Head down the corridor and destroy the robot birds that fly at you. Dodge the small bed of spikes here and there, and destroy the rolling machines with the Z-Saber. Keep going down the corridor and you'll eventually reach a teleport portal. Head in to warp to the next area. In the next area you'll have to destroy many of the mechnailoids that appeared in Rainy Turtloid's stage. Head right and make your way past each of the mechaniloids. Once you reach an area with a hole next to a mechaniloid, slide down the wall but don't drop down as spikes are below. Jump to the safe platform and trash the next mechaniloid. Keep going and you'll eventually reach and area where acid rain will begin falling. You'll need to destroy the small cores again before you can destroy the generator. Head over the large hole across the platforms, but make sure that you're not using the Shadow Armor at all during this stage as you'll need the mid-air dash move here. Keep destroying the cores and then blow the generator when you reach it. Head through to the next acid rain area. Move through and destroy all the cores, once you destroy the second generator you'll teleport to the final area. Head down the long corridor and destroy any of the bird robots that fly at you. Once you reach the end of the corridor head through the door for the final showdown against Gate. |
| Gate's Laboratory Stage 3 |
|---|
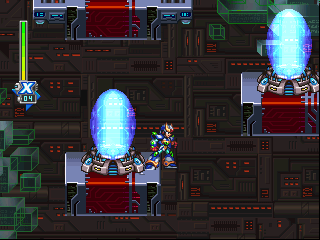 The final stage will contain the eight teleport pads which lead to rooms where you have to fight the eight bosses again. Once you begin the stage, head right until you find an opening leading down. Slowly drop down the gray platforms while avoiding the spikes, once you reach the bottom head right to find a long shaft leading down containing teleport pads. Once you beat the eight bosses again, a final pad will appear, use it to teleport to the final area. Head through the next area and you'll eventually reach the room where you'll have the final showdown with Sigma. The final stage will contain the eight teleport pads which lead to rooms where you have to fight the eight bosses again. Once you begin the stage, head right until you find an opening leading down. Slowly drop down the gray platforms while avoiding the spikes, once you reach the bottom head right to find a long shaft leading down containing teleport pads. Once you beat the eight bosses again, a final pad will appear, use it to teleport to the final area. Head through the next area and you'll eventually reach the room where you'll have the final showdown with Sigma. |
