
Bosses Guide
Listed below are all the bosses you'll encounter in the game. Each entry has a detailed description and guide on how to defeat each boss, including which special weapons to use. Remember to have sub-tanks filled up before taking on a boss, they can really help you out in a battle. Also note that the bosses are listed in an order which allows you to defeat the three X-Hunters successfully to gain all of Zero's parts so that you won't have to fight him at the end of the game.
If you ignore the X-Hunters and beat another boss, one of them will disappear and you won't be able to get all of Zero's parts back, and you'll then have to fight him at the end of the game.
| Click on a boss to view the guide |
|
|---|
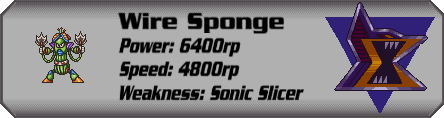
| Wire Sponge | |||
|---|---|---|---|
| Power: 6400rp | Speed: 4800rp | Weakness: Sonic Slicer | Special Weapon: Strike Chain |
 |
|||
| Wire Sponge should be the first boss you take on. He will often spin his whip around which will block your attacks if you shoot at him. He will then release it and it will fly straight at you. Jump up the wall to dodge it. If the whip hits the wall he will be drawn towards it. He will also often shoot his whip up to the ceiling and hang from the roof. He will then fire out small seeds which will become sharp spikes when the hit the ground. Shoot the spikes to destroy them. When he drops down, he will often begin vibrating and will slowly turn a red color. He will then cause huge lightning bolts to fire down from the ceiling. Stay on the other side of the room to dodge them. To destroy him, use the Sonic Slicer or X-Buster if you don't have it. When you defeat him with the Sonic Slicer his upper body will detach itself from the bottom part when he is exploding for a bit of a humorous end. Once you defeat him you'll receive the Strike Chain. |
|||
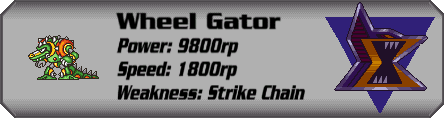
| Wheel Gator | |||
|---|---|---|---|
| Power: 9800rp | Speed: 1800rp | Weakness: Strike Chain | Special Weapon: Spin Wheel |
 |
|||
| You will fight Wheel Gator in a room full of engine oil. He will stay below the oil for most of the time. He will begin by diving under and will fire out a metal wheel which will fly up the wall and down the other side. If you stay on the oil, he will jump up out of it and try to bite X and will cause a lot of damage if he hits you. He will also often charge up his shoulders and fire two metal wheels at the wall. Jump up the wall to dodge them. He will also sometimes jump up and charge against the wall. The mark he makes on the wall after this will damage you if you touch it, so try to make sure he doesn't charge at the walls. To defeat him, use the Strike Chain. When he jumps out of the oil, shoot him with the Strike Chain and he will dive back under. Stay high up on the wall to dodge him as he jumps out and continue shooting him when he appears. Once he is defeated you'll receive the Spin Wheel. |
|||
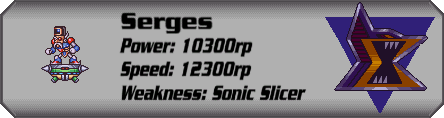
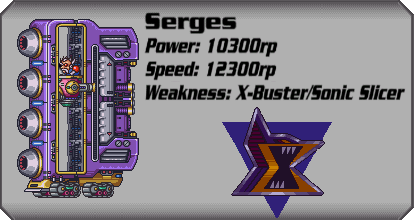
| Serges | |||
|---|---|---|---|
| Power: 10300rp | Speed: 12300rp | Weakness: Sonic Slicer | Special Weapon: N/A |
 |
|||
| You should take on Serges first in Flame Stag's stage. He can be found above the room with the platforms falling into the lava. He will be on a floating platform during this battle. He will occasionally stop and lay land mines on the floor which will explode when you touch them. You will find that when you shoot at him he will activate a protective shield which will block your shot. To successfully hit him, use a charged-up shot. When he gets hit, he will jump up and spin around, firing energy beams all around the room. Dodge the beams and shoot him again when he lands back on the platform. As he moves forward while jumping, jump over the platform before it hits you. When you defeat him you'll receive Zero part No. 1. |
|||
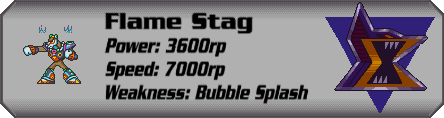
| Flame Stag | |||
|---|---|---|---|
| Power: 3600rp | Speed: 7000rp | Weakness: Bubble Splash | Special Weapon: Speed Burner |
 |
|||
| Flame Stag will be jumping around a lot during this battle. He will begin by jumping up the walls and will slowly jump back down to try and hit X. He will also often charge at X on the ground and if he grabs you he will throw you against the wall and use an uppercut to throw X straight up and will then slam him into the ground. He will also often shoot out two blue or red fireballs. When he charges at you and jumps up the walls, try to dodge him by jumping away from the direction he is going to evade him. To defeat him, use the Bubble Splash. Each time you hit him he will most likely fire two fireballs, so dodge them by jumping up the wall and then over them and fire again. If you don't have the Bubble Splash use the X-Buster in the same fashion with charged-up shots. Shoot him when he lands and jump over him as he jumps on the wall. Once he is defeated you'll receive the Speed Burner. |
|||
| Violen | |||
|---|---|---|---|
| Power: 18400rp | Speed: 6200rp | Weakness: Bubble Splash | Special Weapon: N/A |
 |
|||
| You should next fight Violen in Morph Moth's stage. When you come to the long ladder leading down, near the top of it to the right will be an opening which will lead to his room. He will begin the battle by firing out energy balls straight at you. Jump up the wall to dodge them. He will jump around the room often, so dash under him each time he comes close to one of the walls. He will also fire out his energy beams from the top of the room. He will occasionally stand still and release a huge spikes-ball attached to a chain. It will bounce around the room at a high speed. Try to stay out of its way, as it causes huge damage if it hits you. To defeat him, keep shooting him with charged shots and normal shots when he's on the ground. Just try to stay out of his way when he jumps around and stay out of contact with the spike ball. Once you defeat him you'll get Zero Part No. 2. |
|||
| Morph Moth | |||
|---|---|---|---|
| Power: 3200rp | Speed: 8800rp | Weakness: Speed Burner | Special Weapon: Silk Shot |
 |
|||
| Morph Moth will begin the battle as a small object hanging from the ceiling. It will swing around the room and release pieces of junk which will damage X if they hit you. He will also often drop to the floor and spin across the room throwing junk everywhere. He will then jump back up to the roof and will spin junk around the room. To dodge the junk, jump up the wall and then over him to dodge it. You will notice the object will begin to grow as the junk is flying around. He will continue this loop a few times before becoming the next form. To destroy him, use the Speed Burner. When you have taken his health down to about half, The shell will break open and the roof will open. The larger form of Morph Moth will now enter. It will fly around the room and release a pollen weapon which will cause damage when it touches you. He will also often fire out an energy beam at you so don't stop moving. Defeat him by shooting him with the Speed Burner. When you defeat him you'll receive the Silk Shot. |
|||
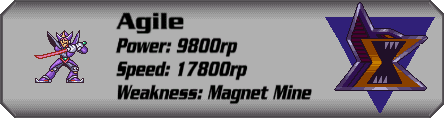
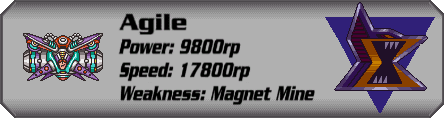
| Agile | |||
|---|---|---|---|
| Power: 9800rp | Speed: 17800rp | Weakness: Magnet Mine | Special Weapon: N/A |
 |
|||
| You should next fight Agile in Magna Centipede's stage. He can found found at the end of the large room that has the strange blocks falling from the roof. He will take out a large sword and use it as his primary weapon during this battle. He has two main attacks, one where he will charge across the room with his sword out to try and hit X, and he will also often jump up and shoot out a large energy beam. He will fire it at you depending on your position in the room, so try to jump up the wall and drop down to dodge it or dash under it to dodge it. To defeat him, use a charged up shot when he is standing still. When you shoot him, jump up the wall so that when he fires the beam you can drop and fire again. |
|||
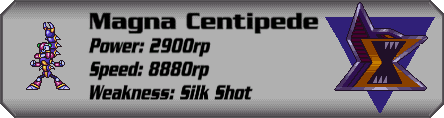
| Magna Centipede | |||
|---|---|---|---|
| Power: 2900rp | Speed: 8880rp | Weakness: Silk Shot | Special Weapon: Magnet Mine |
 |
|||
| Magna Centipede will teleport around the room often during this battle. He will often fire out three small razor blades which will fly towards you. Dodge them by jumping over them. He will also shoot his tail out and it will home in on you and eventually strike. Dash to the left or right to dodge it. He will sometimes jump up to the roof and attack from there. If he draws you towards himself, dash away quickly as he will grab you and disable your weapon so that you won't be able to fire any charged shots. To defeat him, use the Silk Shot. When you shoot him with it, his tail will fall off and he won't be able to use his tail attack. When you shoot him he will disappear and reappear in a different location. If he appears on the roof, face away from him and shoot the Silk Shot so that the projectile will fire up towards him. Once you defeat him you'll receive the Magnet Mine. |
|||
| Crystal Snail | |||
|---|---|---|---|
| Power: 6800rp | Speed: 500rp | Weakness: Magnet Mine | Special Weapon: Crystal Hunter |
 |
|||
| Crystal Snail will often hide in his shell to protect himself during this battle. He will begin by firing out three ice bubbles which will freeze X if they touch him. He will often fly up in the air and charge at you in his shell. He will also sometimes jump up and cause the screen to wobble, and X's movement will go into a slow-motion type state. To defeat him, shoot him with the Magnet Mine. When you successfully hit him, he will fly forward out of his shell and hit the wall which will cause further damage to him. Just try to jump out of his way as he will probably fly towards you when you shoot him. When he is defeated you'll receive the Crystal Hunter. |
|||
| Overdrive Ostrich | |||
|---|---|---|---|
| Power: 3800rp | Speed: 9900rp | Weakness: Crystal Hunter | Special Weapon: Sonic Slicer |
 |
|||
| Overdrive Ostrich will move around often during this battle. He will begin by dashing towards you and will cause X to fly across the large room if he hits you. Jump over him to dodge his charge attack. He will also often hop around and try to kick X. Dash under him as he jumps to dodge him. If you dash too far away from him, you will see him moving around in the background and he will jump up out of the screen and land on top of X. He will also often fire small purple disks straight ahead and several from the sky. To defeat him, use the Crystal Hunter. When you shoot him, he will freeze for a few seconds. When he breaks free, he will jump up and release several disks. When he jumps up, before he shoots the disks shoot him again to freeze him. Continue this to defeat him. When he is destroyed you'll receive the Sonic Slicer. |
|||
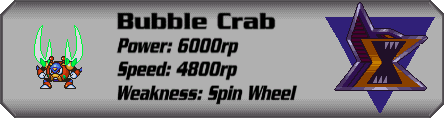
| Bubble Crab | |||
|---|---|---|---|
| Power: 6000rp | Speed: 4800rp | Weakness: Spin Wheel | Special Weapon: Bubble Splash |
 |
|||
| Bubble Crab will cause the water level of the room to rise and lower often. He will begin by creating a protective bubble around himself and you won't be able to penetrate it with the X-Buster. He will also jump up often and fire out electric bolts which will change the water level of the room. Try not to jump too high as the roof has spikes on it. He will often fire out three bubbles with small crabs in them which will fly towards you when their bubbles break. To defeat him use the Spin Wheel. When the wheel hits him when he has his bubble active, it will break it and cause damage to him. If you have the X-Buster upgrade, use a charged-up shot as well to hit him successfully. When he is defeated you'll receive the Bubble Splash. |
|||
| The following bosses will be fought in Sigma's fortress. |
| Violen | |||
|---|---|---|---|
| Power: 18400rp | Speed: 6200rp | Weakness: Bubble Splash | Special Weapon: N/A |
|
|||
| Violen will be the first of the X-Hunters you will have to battle. He will use the same attacks as before, using his large spiked ball that will fly around the room to try and hit you. He will also occasionally jump up and fire out the small energy balls in different directions. This time he will make small blocks appear in the room which you can stand on to hit him if he jumps up too high. To defeat him, use the Bubble Splash. When you hit him, try to keep away as it will take a few seconds for him to stop flashing. When he stops flashing continue hitting him. Try to avoid the spiked ball by staying near the edges of the room or near one of the small blocks. |
|||
| Serges | |||
|---|---|---|---|
| Power: 10300rp | Speed: 12300rp | Weakness: X-Buster / Sonic Slicer / G-Crush | Special Weapon: N/A |
 |
|||
| Serges will battle you in a large vehicle above a large bed of spikes. There will be four moving platforms for you to stand on. Serges will enter in a large vehicle which has four gun turrets on the front. Each turret will fire out a different energy weapon when Serges moves up and down and fires one. To defeat him, shoot each gun turret with the X-Buster until they explode, but you can also use the G-Crush weapon to destroy all four turrets at once! When you destroy one, the vehicle will move forward and destroy one of the moving platforms. When you destroy all of them, The front part of the vehicle will explode and Serges will be exposed. Jump onto the edge of the vehicle and use the Sonic Slicer to finish him off. To hit him, stand on the edge and charge up the Sonic Slicer, and release it so that the projectiles fly up and hit him. Try to dodge the small energy balls he fires and keep away from the spikes. |
|||
| Agile | |||
|---|---|---|---|
| Power: 9800rp | Speed: 17800rp | Weakness: Magnet Mine | Special Weapon: N/A |
 |
|||
| Agile will battle you in a strange looking vehicle. He will float around the top of the screen most of the time. He will occasionally glow red and shoot out two spike platforms either side of him, which will fall down to the floor. Stay underneath him to avoid the platforms. When they release four energy balls will fly around the walls and floor of the room so you will also have to jump out of their way. He will also often fire small missiles across the room which will be followed by a huge bomb. Jump up the walls to dodge them. To destroy him, use the Magnet Mine. The best way to do this is to charge up the weapon and jump up the wall until you are level with him. Release the energy ball and it will slowly fly through him, causing a lot of damage as he will continue to fly around it. Continue this to finish him off. |
|||
| Before fighting Sigma you will have to fight all of the eight bosses again in any order you want. Use the same tactics as before and you'll find that they are much easier to defeat the second time. |
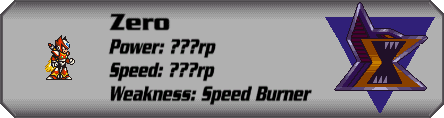
| Zero | |||
|---|---|---|---|
| Power: ???rp | Speed: ???rp | Weakness: Speed Burner | Special Weapon: N/A |
 |
|||
| This is one battle any fan of Zero's will not enjoy. If you fail to regain all of Zero's parts from the X-Hunters earlier in the game you will have to battle Zero before fighting Sigma. But if you did find all of his parts, a black Zero will appear instead but the real Zero will come in and destroy it, so you can go straight on to fight Sigma. During the battle with Zero, he will be often firing charged shots and then firing an energy beam at you with his Beam Sabre. He will also often charge at you with his Beam Sabre extended. When he stops, he will punch the ground and cause debris to fly into the air and will damage you if they hit X. To defeat him, use the Speed Burner. Wait for a break in his shots, as if you hit one of his beams, it will destroy it and not hit Zero. Try to avoid the rocks that fly up out of the ground and when you defeat him he will return to normal and lead you to Sigma. |
|||
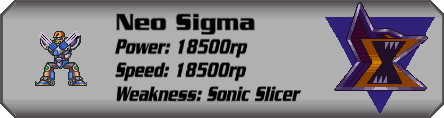
| Neo Sigma | |||
|---|---|---|---|
| Power: 18500rp | Speed: 18500rp | Weakness: Sonic Slicer | Special Weapon: N/A |
 |
|||
| Sigma will use large claws on his hands as his primary weapon during this battle. Once again, he will be difficult to beat and will cause a lot of damage to X if he hits you. He will begin by charging at X and will strike him and cause him to fly across the room. Try to jump over him to dodge this attack. He will also often shoot out several energy balls which will one at a time home in on X. They will fly in a straight line towards you so dodge them by moving away from them after they are fired. If Sigma jumps up on the wall he will disappear and then reappear above X and charge down on you. Dodge him by dashing to the side. He will sometimes glow yellow and fire an electric wall similar to the secondary fire of the Electric Spark weapon from MMX. Jump up the wall to dodge it. To defeat him, use the Sonic Slicer. When he disappears, charge up the weapon and release it on him when he reappears. Fire many shots around the room as they will bounce off the walls and eventually hit Sigma. After you defeat him his true form will be revealed. |
|||
| The Sigma Virus | |||
|---|---|---|---|
| Power: ???rp | Speed: ???rp | Weakness: Strike Chain | Special Weapon: N/A |
 |
|||
| The final form of Sigma will not have an energy bar, but you can tell how much damage he has taken during the battle. He will fly around the room and will often charge across the screen firing down an energy beam which will cause damage to X. He will also often fly to one side of the room and shoot out two blue balls which will become small enemies. The advantage of this is that some of them will give you weapon and energy refill capsules when you destroy them. To defeat Sigma, use the Strike Chain. Each time you shoot him the screen will blur in the background, indicating that he is taking damage. After a few shots he will begin to slowly change color. Keep shooting him until he turns a reddish color. He will disappear and then reappear over X and will begin to cause damage. You won't be able to escape from him, but you can still cause him damage. Keep firing the Strike Chain on him and after a few more shots he will finally explode and you will have beaten the game! |
|||